Showing posts with label stir fried dishes. Show all posts

Tuesday, 7 June 2016

Pad Woon Sen (Stir Fried Vermicelli Noodles)


Pad woon sen, a speedy stir-fry dish for when you don't know what else to cook!! Joking aside this is possibly one of the most versatile dishes you will find in the Thai repertoire. There is very little that can't be substituted or skipped. As long as you're frying a combo of meats and/or vegetables with fine mungbean glass (vermicelli) noodles, you can't go far wrong. There does seem to be a common theme of cabbage, beansprouts, tomatoes and Chinese celery but, whatever you have can go in. It's another cross over dish- very definitely exported from Chinese cuisine along the way.

                                                                           *

I also want to give you a heads up that I'm going to be away on holiday for a few weeks- sadly, no not Thailand (although it is exactly one year already since I was in Malaysia- I do miss it and would love to go back to Kuala Lumpur again one day). This time we're going to be in the USA. We've been quite a few times already and tend to do big road trips; two years ago it was the Deep South, this time it's New England.

For the next three weeks, I'll be travelling and eating my way around Boston, Cape Cod, the Hudson Valley, the Adirondacks, Vermont/ New Hampshire, Mt Desert Island, Portland and Salem. Hopefully  eating a LOT of fresh seafood, buffalo wings, popovers, pies etc. I am particularly looking forward to experiencing Boston's Chinatown; I hope to post from there.

If you've any recommendations- it doesn't need to be Thai/Asian food, I love all food- then I would be thrilled to hear from you. And now back to my version of Pad Woon Sen....

                                                                             *
Okay so this recipe will make plenty for 2 and still enough for 3

You'll need:

  • 2 sheets/nests of dried mungbean/glass vermicelli noodles (they're transparent)
  • A small bag (200-250g) of raw king prawns/shrimp
  • 2 small pork chops or steaks, fat trimmed off and cut into strips
  • 2 eggs, beaten
  • 1 carrot, peeled and cut into coins
  • About a 1/4 of a white cabbages, cut into large squares (cut a thin slice off one side, then chop)
  • 3 or 4 stalks of Chinese celery, chopped into large pieces. Regular celery leaves are great too
  • 3 or 4 spring onions, trimmed and cut into large pieces
  • 4 cloves of garlic, finely chopped
  • A big splash of oyster sauce
  • A big splash of light soy sauce
  • A small splash of dark soy sauce
  • A big pinch of sugar
  • A big punch of black pepper
  • Vegetable oil for frying

Soak your vermicelli noodles by submerging them in cold water for 10-15 minutes, breaking them up as they soften. Drain and keep handy.

Heat a wok up until very hot, almost smoking and add in the oil, swirling to coat the base. Throw in the pork and stir fry for 1 minute, until mostly cooked through. Add in the raw prawns and stir fry for a further minute until they've mostly turned pink. If by any chance you're using pre-cooked prawns, add them in later (at the point that the celery and spring onions go in).

Next in goes the garlic, just toss it very lightly for a few seconds before adding in the carrot and cabbage, stir frying for around 1 minute. Now shove all these ingredients to one side of the wok, leaving them for a moment and pour the beaten egg into the empty side. Let the egg start to cook before lightly scrambling it before letting it set again. Repeat the setting scrambling until it's 90% cooked before mixing all the ingredients back together again, making sure the egg's well distributed.

Now throw the celery and spring onions into the pan, stir fry them for minute before adding in the noodles, 3 sauces, pepper and sugar. Stir well,the sauces will soften and darken the noodles and mix all the ingredients today. Try and let the noodles stick to the base of the wok a bit; it'll give you some nice crunchy bits. Cook for a final minute or two and serve.



Monday, 25 April 2016

Pad Horapha Moo Grob Gwang Tung Kai Dao (Deep Fried Pork with Sweet Basil and Choi Sum with a Fried Egg)


What's not to love, crispy sticky deep fried pork, a crispy but runny fried egg, fragrant anise flavoured basil and some crunchy fresh greens over rice. It's a quick (mostly unhealthy, yes) but very satisfying one plate meal. Speaking one one plate dishes or ahaan jan diew (lit. one dish food) in Thai, they're some of my favourite things to cook and exactly what I want to eat when I don't want to cook anything elaborate or time consuming. They're the classic type of food you expect to find for lunch at a street food stall (usually served on the omnipresent plastic pastel- coloured plate. By the way if you know of anywhere in the UK that sells those thick melamine plates used in South East Asia, do let me know, I've been after them for years!!

This recipe is in essence a combination of three of my earlier recipes- 

Pad Grapao Gai (Chicken fried with holy basil), Pad Horapha Bhet Yang (Roasted duck fried with sweet basil) and Moo Grob Pad Pak Got Shangai (deep fried pork fried with pak choi). It combines the best of everything in one dish.

For two portions use:

  • 300g of pork shoulder, rind and excess fat trimmed off, cut into 1 inch cubes
  • 2 eggs
  • a large double handful of choi sum (or pak choi/gai lan etc,) cut into 2 inch pieces
  • a handful of Thai sweet basil leaves
  • 3/4 small red chillies, roughly chopped
  • 4 cloves garlic, peeled
  • a big splash of oyster sauce
  • a big splash of light soy sauce
  • a small pinch of sugar
  • vegetable oil for deep frying and for stir frying
  • Freshly cooked rice
Boil water and get the rice cooking before starting.

Heat the deep frying oil and when hot, carefully drop in the pork. Deep fry until dark golden brown and crispy (roughly 6-7 minutes) before draining onto kitchen paper.

In a pestle a mortar, lightly pound the chopped chillies and garlic into to rough paste, leave for a moment.

Heat a splash of oil in a wok and when hot, throw in the garlic chilli paste, stir for a few seconds before adding in the crispy pork, stir frying for 20//30 seconds. Tip in the vegetables and stir fry for about 1 minute, no more as you want some crunch to be retained.

Pour in the sauces and pinch of sugar, coating everything well before turning off the heat and lightly toss through the sweet basil leaves.

Heat a separate frying pan/wok (or decant your stir fry into a dish) and keep warm somewhere while you quickly do the fried eggs. Heat a large splash of oil in a clean wok/ frying pan and when very hot crack in an egg, let the bottom get crispy and spoon hot oil over the yolk until it's reached your desired crispy/runniness. Briefly blot on kitchen paper.

Drain the rice, plate up with the stir fry and place the fried egg over the top. 

Jobs a good'un!


Wednesday, 13 April 2016

Khao Pad Gaeng Kiew Wan (Green Curry Fried Rice)


After a rather busy last few days for me I'm ready to get back writing again, It's been my birthday weekend and we decided to take a trip down to see my parents near the south coast. We ended up having an impromptu night in Brighton, a full on day in London (involving a rapid trip to Brick Lane for Indian food supplies, amongst other things, a days walking in the Ashdown Forest and an equally full on day getting gooey-eyed at the amazing Bodleian Library and various colleges during a stop off in Oxford before the long drive back to Lancashire.

It's taken another couple of days getting back in the swing of things but I've finally found time to post this recipe for Khao Pad Gaeng Kiew Wan (Green curry fried rice). Now we're well into April it's now getting so much easier to take photos again as there is still daylight when I'm cooking, Long way it continue!

Like the last recipe I posted (Chicken stir fried with ginger) this is also a common restaurant dish found here in the UK. The red curry paste version is equally common. If you're not in the mood for sharing a bowl of curry or you need to take a portion for the next day, this fried rice version is definitely the easy option and dare I say it, preferable to the usual curry.

It still has all the same flavours that you would expect from a green curry, just in a neater package.

For two large portions use:

  • 2 cups of cooked, cold rice (ideally cooked yesterday)
  • a tablespoon of green curry paste (I use Mae Ploy brand)
  • 2/3 skinless chicken thighs, trimmed of fat and cut into cubes (i've also used up some pre-fried tofu pieces cut into small cubes)
  • your choice of crunchy vegetables, cut into inch long pieces- I've used baby corn, green beans and pea aubergines
  • a small handful of Thai sweet basil (or tarragon as a substitute- never Mediterranean basil!!)
  • 1/2 can of coconut milk
  • a big splash of fish sauce
  • a big pinch of sugar
  • 4/5 limes leaves, finely shredded
  • 4/5 small red chillies or 1 large, finely sliced
  • (optional) a few stalks of green peppercorns

In a large wok, heat the coconut milk until it bubbles, add in the green curry paste and stirring regularly, fry for a few minutes until you can see some oil separating.

Pop in the chicken and cook in the sauce until nearly cooked (2/3 minutes). 

Add in the seasonings- lime leaf, sugar, fish sauce, then the crunchy vegetables, cook for 3/4 minutes until they lose their rawness but not soft.

It should still resemble a very thick green curry at this stage- now tip in the rice and gently mix so everything gets well coated in the sauce. there will no longer be any obvious sauce.

Mix through the basil leaves, chillies and (if using) green peppercorns. Sprinkle over any remaining chillies, shreds of lime leaf or Thai basil for decoration.


Wednesday, 6 April 2016

Gai Pad King (Chicken Fried with Ginger)


This ubiquitous dish is found on every Thai restaurant menu up and down the country (UK), it's one of those dishes that gets overlooked in favour of something more exotic, spicier and perhaps ''more traditionally" Thai. However, it's one of the healthiest stir fries out there with lightly cooked crunchy vegetables, low fat- high protein chicken and mushrooms and immune boosting ginger and chillies.

The ginger is used as a vegetable meaning this stir fry is full of fragrant and peppery ginger flavours. Easy to make, very quick to cook, colour and packed with flavour, it made a great weekday dinner.

For two people use:

  • two small chicken breasts, cubed
  • 1 small onion, cut in slivers
  • 3/4 spring onions, cut in inch long pieces
  • a large piece of ginger, peeled (2-3 inches long) and cut into thin slivers
  • a handful of Chinese wood/jelly ear mushrooms, soaked in hot water until soft then drained and cut into strips
  • 3 cloves garlic, peeled and finely chopped
  • 3 small red chillies, chopped
  • a pinch of sugar
  • a big splash of light soy sauce
  • a big splash of oyster sauce
  • a small splash of fish sauce
  • a small splash of vegetable oil for frying
Get the oil heated up in a wok until it's nice and hot, throw in the onion and stir fry, letting it get some colour. Next in goes the chicken, stir frying for a couple of minutes until it's white and mostly cooked through. Add the garlic and spring onions next, giving them a quick turn in the wok. Now add in the mushrooms, ginger and chillies and mix well.

Finally add the sugar and three sauces, toss everything to get it well coated and serve- it shouldn't take more than five minutes to cook.


Monday, 21 March 2016

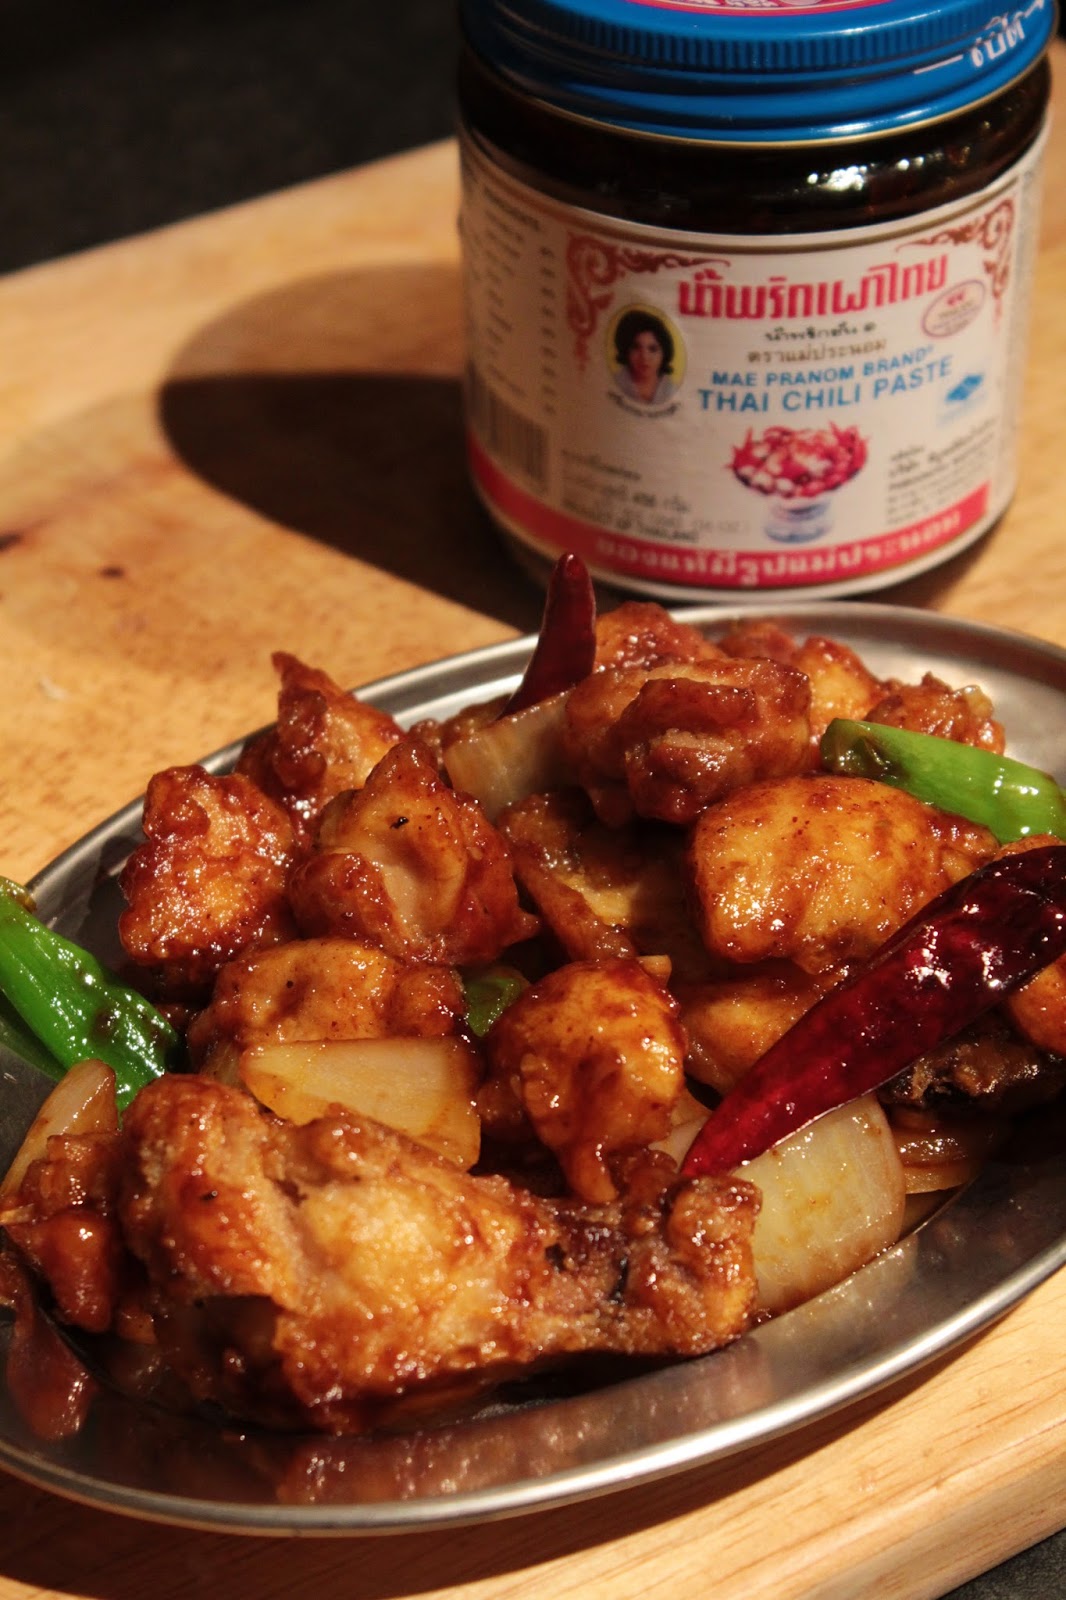
Gai Tod Pad Nam Prik Pao (Fried Chicken Stir Fried with Roasted Chilli Paste)


It's very rare these days that we would ever buy a takeaway, I've just had way too many identical oil drenched, msg ridden, jam-like, tummy ache laden meals to ever optionally order one then pay through the nose for the privileged. however that's not to say I eat healthy all the time. Like most, I occasionally like deep fried food, I just like my salt, sugar and fat in reasonable amounts and I think takeaway places (by and large) rely on pre made cheap fixes.

Ranting over, when I do want something takeaway like, I'd much rather make it myself, lets face it, as long as you have the ingredients in, you can be eating this quicker than it would take for a takeaway to be delivered. I guarantee this crunchy, spicy, sticky stir fry will satisfy all your takeaway urges!! It differs quite substantially from all the other English written versions of gai tod nam prik pao, this is taken directly from a Thai recipe and is the real thing!

As an added bonus, it's a 2 in 1 dish. If you just want the chicken as a starter/snack, use wings and forgo the vegetables. If it's a whole meal, keep the veggies in and serve with rice.

For the stir fry version for two people use all the ingredients:
For the chicken wing snack version use just the ingredients with a * next to them
  • 4 large chicken thigh fillets, skinned and cut into large cubes or 10 wings, jointed*
  • 1 large onion, peeled and cut into large chunks
  • 2 spring onions, kept in large chunks
  • 4 cloves garlic, peeled and finely chopped
  • a small handful of dried red chillies
  • a heaped dessert spoon of roasted chilli paste (nam prik pao)*
  • a big splash of light soy sauce*
  • a big splash of oyster sauce*
  • a big pinch of brown or palm sugar*
  • rice flour for dredging the chicken (plain flour is ok too, just not as light and crispy as rice)*
  • salt and pepper*
  • oil for deep frying and splash for stir frying*

Season the chicken with salt and pepper, then dredge it through the rice flour, shake off the excess.
Heat a deep fat fryer to 190 degree Celsius or use a heavy pan and watch it carefully.
Pop in the chicken pieces and cook until deep golden and crispy (3-5 mins). Drain on kitchen paper.

Heat a small splash of oil in a wok until hot then throw in the onions and stir fry on a high heat to get some colour. Throw in the dried chillies and garlic and stir fry for a few minutes. Throw in the spring onions and the drained fried chicken.

Add in the roasted chilli paste, coating the chicken well, then the remaining sauces and sugar. Everything should be nice and sticky.

* If you make the wings snack version make the sauce in a wok- heat a small splash of oil before adding the roasted chilli paste, sugar oyster sauce and soy sauce, blend well and put the fried chicken wings in, stirring well so everything is coated.


Friday, 18 March 2016

Pak Mara Pad Kai (Bitter Melon Stir Fried with Egg)


There comes a time when occasionally I have to admit defeat with one of my recipes, when I quite frankly hate it. This is one of those times. Bitter melon is most definitely not for me- although it's supposed to be very healthy for you and I purposely chose the palest ones the market stall had, it still tasted like something that shouldn't be eaten!! My palate just isn't accustomed to bitter as a predominant flavour. 

If you would like to try the health giving properties of pad pak mara kai, here's the recipe...

  • 2 small bitter melons (paler are less bitter supposedly) cut in half lengthways and seeds scooped out, cut into thin slices.
  • 2 eggs, beaten
  • a big pinch of ground black pepper
  • a small splash of light soy sauce
  • a small splash of fish sauce (or a bit extra soy if you're vegetarian)
  • a splash of vegetable oil for stir frying

Heat a wok with the oil until hot. Throw in the bitter melon and stir fry for a couple of minutes until beginning to soften. Push to one side and pour in the beaten egg. Let it set for a moment before scrambling and then mixing all together again. Add in the sauces and pepper and mix well, frying for a couple more minutes before serving.

Thursday, 25 February 2016

Pad Kee Mao Moo (Drunk's Noodles with Pork)


I'm spending quite a bit of time at the moment re-visiting some of my earlier recipes, making some amendments where needed and updating the photos- some of my earlier attempts were not very pretty!! Pad Mee Mao (Drunk's noodles; so named as they're just right after a night's drinking- think spicy, greasy and quick to make- sooo much better than a nasty takeaway kebab!) hold a special place in my heart; it's the meal I had in Manchester's China town whilst on my hen do back in 2009 and I made a point then of learning the recipe.

There are a couple of changes to the other version of this recipe I made back in 2014- simply I've changed a few of the veggies and I now use the (optional) additions of green peppercorns and krachai (fingerroot) for added punchiness. I also think it's essential that you try to get fresh wide rice noodles (sen yai) for this dish- they're soft and stretchy but not chewy and suck up all the sauce, giving you a relatively dry dish. I've used pork rather than chicken but that's totally up to you, this is a very good candidate for a purely veggie version.

For 4 small/ 3 large portions use:

  • 2 pork steaks, trimmed of fat, cut into thin slices
  • 400g or thereabouts of fresh rice noodles, separated into individual strands
  • a handful of green beans, cut into inch long pieces
  • a carrot, peeled and sliced- I have a fancy gadget- a komkom that does the star shaped edges
  • 6-8 baby corn cobs, sliced into inch long pieces
  • a large bunch of sweet basil or holy basil, leaves ripped off stems
  • (optional) a tablespoon of green peppercorns
  • (optional) a few fingers of krachai (fingeroot), cut into thin slivers
  • 4 large cloves of garlic, peeled
  • 4 small red chillies
  • a very big splash of oyster sauce
  • a big splash of light soy sauce
  • a small splash of fish sauce
  • a small splash of dark soy sauce
  • a pinch of sugar
  • vegetable oil for frying

  • Lightly bash the garlic and red chillies into a rough paste
  • Heat a splash of oil in a wok until hot and very briefly fry the garlic/chilli paste
  • Throw in the pork (if using) and stir fry for a minute
  • Throw in the veggies and stir fry, tossing everything together
  • If using, throw in the green peppercorns and krachai and mix, cooking for 2 minutes
  • Put all the sauces and sugar in together, stir the ingredients through.
  • Put in all the noodles, mixing very well so they absorb the sauces and colour. Careful not to overcook- rice noodles can become stodgy very quickly- only cook as long as needed, around 1 minute.
  • Toss through the sweet basil leaves, sprinkling some over the top of the finished dish.


Tuesday, 16 February 2016

Nasi Goreng Kampung (Malaysian Fried Rice- Village Style)


I mentioned a while back that I may from time to time, post a non Thai recipe so hope it's okay that today I'm making a short hop over the border into Malaysia. Some of you may remember I went on holiday for a few weeks last year to Kuala Lumpur and Langkawi where I spent as much time as possible eating my way through dishes from all the cultures that call Malaysia home. 

My husband and I particularly enjoyed the simple rice dishes that we ate for breakfast, such as nasi lemak and this one; nasi goreng kampung (village style fried rice). Although it looks quite a straightforward dish it's full of very strong flavours; notably salty, fishy and spicy ones. Treat yourself and top your portion off with a freshly cooked crisp fried egg.

For 4 large portions use:

  • A large bowl of cold, pre cooked rice
  • a large bunch of morning glory (water spinach) cut into 2 inch pieces
  • a handful of green beans, cut into small pieces
  • 2 large handfuls of dried crispy anchovies (1 handful finely chopped, 1 left whole)
  • 4 red chillies, finely chopped
  • 4 cloves garlic, finely chopped
  • 2 large eggs, beaten
  • 1 small onion, finely sliced
  • a big glug of light soy sauce
  • a big squeeze of kecap manis (sweet, dark, thick soy sauce)
  • vegetable oil for frying

In a deep wok, heat the oil until hot and fry the onion, garlic and chillies until they have some colour (about 2 minutes). 
Stir fry in the handful of chopped anchovies and green beans (open a window/put on the extractor!), frying for a minute before moving the ingredients to the side of the wok and pouring in the beaten egg. 
Let the egg begin to set before lightly scrambling. Let it set again, scramble, set, scramble until fully cooked and mix all the ingredients back together. 
Throw in the morning glory, briefly stir frying for a minute before carefully tipping all the rice in.
Pour over the sauces and gently toss and mix all the ingredients, making sure all the rice is well coated and heated through. 
Have a taste to see if it needs any more sauce and plate up, sprinkling the other handful of dried fish over the steaming rice.


Thursday, 11 February 2016

Gai Khua Kem (Salty Roast Chicken)


I've been making this for years now and had affectionately named it 'stinky chicken' due to the huge amount of garlic and chillies I use in it but only recently did I discover it is actually made in Thailand and even has a name; Gai Khua Kem (Salted Roast Chicken).

I eat this as a guilty pleasure usually over pork ribs or just with chicken wings but this version can best be described as a form of a 'hash', I guess. Anyway, it's a great way to use up a roast chicken.


For 4 small or 2 large portions, use:


  • A roast chicken (or part of)- I had used the breasts for another recipe so mine was mostly comprised of leg, crispy skin, wings and some spare bits from underneath! I chopped the roasted chicken into varying size bits, keeping some on the bone. This allows for a range of textures in the final dish.
  • A whole bulb of garlic, peeled and finely chopped
  • 3-5 hot Thai chillies, or more if you wish
  • 4 spring onions, finely sliced
  • A small splash of oyster sauce
  • A small splash of light soy sauce
  • A big pinch of salt
  • A teaspoonful of ground black pepper
  • A large splash of vegetable oil for frying

Heat the oil in the wok to a low/medium temperature. Add in all the chopped garlic and gently fry, stirring from time to time for 3-5 minutes over a fairly low temp until the garlic is a light brown and crispy. Scoop out and drain on kitchen paper, leave the garlic oil in the wok.

Turn up the heat on the garlicky oil and pop in the chopped chicken, Toss the chicken every now and then to allow crispy bits to develop. Fry for around 5 minutes so the chicken has time to get some colour and crisp.

Throw in the salt and pepper and mix well. Pour in the oyster and soy sauces and stir. Cook until the liquid has evaporated and the sauces have coated the meat well (about 2 minutes).

Next fling in the chillies, stir, then the crispy garlic, stir again and lastly, the spring onion.

Serve with some fluffy white rice.


Wednesday, 16 December 2015

Goong Pad Sot Makham (Prawns Fried with Tamarind Sauce)


With Christmas just around the corner, it's the time of year when special dishes like this one are in store. I picked up a huge bag of king prawns from our local Asian food store which was much more economical than buying the tiny bags from regular supermarkets. Just a note on the prawns- I recommend using the prawns with the shell on. The sauce seems to stick to it so much better- however if you can't get shell on, don't get too hung up about it. Depending on your persuasion you can either chew the prawns, shell and all or get hands on and peel and suck the prawns as you go. 

This is a quick one to make, there is a bit of time needed to make the toppings but it's not onerous. My husband was a bit worried when I was making this that it would be too sweet; neither of us are particularly keen on sweet savoury dishes and I have used less sugar in my recipe than you may find in other versions of this dish. As ever with Thai food, you should always adjust the food to suit your own tastes. The end result is a thick sauce perfectly balanced between sour salty and sweet.

For two people, use:

  • Two big handfuls of raw king prawns (shrimp) ideally with shell on
  • 2 spring onions, sliced
  • 3-4 small red chillies, sliced
  • 1 large red chilli, thinly sliced
  • 5/6 cloves garlic, chopped
  • 4 shallots, peeled and thinly sliced
  • 1/2 small onion, chopped
  • Around 75ml of thick tamarind concentrate
  • Around 100ml water
  • A big splash of light soy sauce
  • A small splash of Thai fish sauce
  • A tablespoon of palm sugar (or light brown sugar)
  • Vegetable oil for frying
  • Optional- lettuce leaves for serving on, coriander sprigs etc. 


Heat a large splash of oil over a medium heat and throw in the shallot slices. Gently fry for 4-5 minutes or until they become light golden. Add in the garlic and continue frying everything together until golden and crisp. Scoop out and drain on kitchen paper.

Heat up the same oil again and when hot, fry the chopped onion, until softened. Pop the small chillies, sugar, tamarind, water, soy and fish sauce into the pan, stirring until the sugar is all dissolved, and the sauce is reduced by around half. When the sauce is reasonably thick, pop in the prawns and cook in the sauce until pink (about 3-4 minutes).

Pour the prawns and sauce onto a serving plate (with a lettuce leaf bed if you wish) sprinkle over the large sliced chilli, crispy shallots/garlic and the sliced spring onion.

Saturday, 12 December 2015

Pad Pla Cha (Sizzling Fried Fish)


The last week has certainly been a chaotic one- in our corner of the world we've had horrendous amounts of rain which led to wide scale flooding in our city centre, followed by our substation getting flooded, blowing up and widespread blackouts. It really was strange to have 3 days without electric, internet or even phone signal; most people also use digital phones so even a basic phone call using a landline was out. Consequently, cooking in the dark at friends and family's houses (we don't have gas here, only electric so we had to borrow) using up whatever food we had that hadn't yet gone off did not make for a productive week to run a food blog- all the shops were shut due to flood damage and having no power and even the museum where I work (unfortunately next to the river) had suffered from the flood waters so the beginning of week there was much cleaning up to be done.

This recipe for pad pla cha was made last week before all of this even began and has been waiting to get uploaded for a bit. The 'cha' part of the name describes the sizzling noise made by stir frying at high temperature, there are many variations on pad cha recipes, this is just one! I find deep frying the fish holds it together and helps absorb the flavours of the sauce. It has a couple of specific ingredients- the green peppercorns and the krachai root which give it a unique flavour.

For two people use:

  • 2 small fillets of fish (I've use basa- a type of catfish)
  • a big handful of flour
  • 1 long Asian aubergine/ 3 Thai, sliced
  • a handful of green pea aubergine
  • a tablespoon of green peppercorns
  • a heaped teaspoon of red curry paste (I use Mae Ploy brand)
  • 2 small red chillies
  • 4 cloves garlic, peeled
  • 1 large red chillies, sliced
  • 2 fingers of krachai (fingerroot), peeled and finely chopped
  • a large handful of sweet Thai basil (bai horapha)
  • a large splash of oyster sauce
  • a large splash of light soy sauce
  • a small splash of fish sauce
  • vegetable oil for deep frying and a splash for the stir fry

Make a rough paste in a pestle and mortar with the small chillies and garlic, set aside. Cut the fish into thin slices and coat them in the flour, dusting off the excess. Heat a pan of oil to a depth of at least 3 inches and when hot, deep fry the fish until crisp and light golden in colour, scooping out and draining onto a paper towel. Set aside briefly.

In a wok, heat a splash of oil over a high heat and briefly fry off the chill/garlic paste and the red curry paste for around 30 seconds until fragrant. Next pop in the sliced aubergine and fry for a few minutes until slightly softened. Next in go the pea aubergines, green peppercorns, krachai and sliced red chilli and fry for just a minute. Now pop in the breaded fish and be much more gentle now, stir through and add in the remaining sauces (soy, fish and oyster), coat everything well. Finally, turn off the heat and throw in the basil leaves, briefly stirring through. 

Serve with freshly cooked rice. 

Friday, 16 October 2015

Khao Pad Tom Yum (Hot & Sour Soup Flavour Fried Rice)


Apparently this Thai dish was all the rage a few years back when it became rather fashionable to mix together classic Thai dishes into one combined meal. Take Tom Yum Goong (Hot & Sour Prawn Soup) and Khao Pad (Fried Rice) and mix the flavours together to create a quick, filling, fresh and vibrant tasting rice dish.


For two people use:

  • 3 cups of cooked and cooled white rice (left over from yesterday is ideal)
  • a large handful of small prawns/shrimp
  • a few stalks of green leafy veg (such as morning glory or pak choi) or substitute mushrooms or another veg of your choice
  • 1 stalk lemongrass, finely chopped
  • 4 large cloves garlic, finely chopped
  • a 1 inch piece of galangal, peeled and finely chopped
  • 5-6 kaffir lime leaves, stem removed and ripped into pieces
  • 3-4 small chillies, red, orange or green
  • juice of 1 lime
  • a big splash of fish sauce
  • a heaped teaspoon of nam prik pao (roasted chilli paste)
  • a handful of fresh coriander, some chopped, some left as stalks
  • vegetable oil for frying

Heat a splash of oil in a wok until hot and fling in the garlic, stir frying for a few short seconds. Next add in and briefly fry the flavouring herbs: galangal, lemongrass, kaffir lime and chillies. Next in goes the nam prik pao, move it around and cook out the paste for a moment. Next your vegetable choice, give it 20 seconds or so stir frying before the prawns go in for another 30 seconds or so of frying.

Now it's time to carefully tip in the cool, cooked rice and mix everything well, coating the rice in the nam prik pao. Finally pop in the fish sauce, squeeze over the lime and mix in the chopped coriander before giving everything a good final mix through before serving alongside plenty of fresh coriander.


Sunday, 11 October 2015

Gai Pad Pong Karee (Chicken Fried with Curry Powder)


Soft chicken and egg pieces, a few crunchy vegetables and a mild yellow curry powder stir fry served over rice; this is great comfort food, just what you want on an autumn evening. 

As far as stir frys go, this is a great one as you won’t need to look hard for the ingredients (apart from possibly the nam prik pao- roasted chilli paste) and you can be eating it in around 20 minutes. It’s another classic Thai street food dish (although it’s often made into a luxury version by being served with crab or other seafood). Evaporated milk (although not a common ingredient in savoury recipes in the UK anymore) still crops up in Thai food quite regularly (such as tom kha gai soup) and is interchangeable with coconut milk (though obviously will give a less sweet flavour whilst still retaining the right creaminess). Mild curry powder gives it it’s bright yellow colour and makes it popular for little ones too.
For 4 portions use:
  • 6 medium sized chicken thighs (skinned, boned and trimmed of fat), cut into small pieces
  • 2 eggs, lightly beaten
  • 100ml of evaporated milk
  • a heaped dessertspoon of nam prik pao (roasted chilli paste)
  • a heaped dessertspoon of mild curry powder
  • a large handful of crunchy veggies (I used some green beans and green/yellow bell peppers)
  • 1 onion, sliced
  • a few red chillies, chopped into a few bits (optional)
  • 3 cloves garlic, finely chopped
  • a big splash of light soy sauce
  • a big splash of oyster sauce
  • vegetable oil for frying
Prepare the sauce first as it’ll all get poured in together- mix in a bowl the eggs, evaporated milk, nam prik pao, curry powder, soy sauce and oyster sauce. This will make things much quicker and easier.
In a wok, heat the oil until reasonably hot and stir fry the garlic for a few seconds before you add in the onion. The onion needs a minute just to soften, we’re not looking for colour. Now add the chicken. Cook the chicken until it’s more or less completely white and cooked through. Toss in the rest of the veggies and stir fry for a further minute then pour in the sauce. It’ll take a few minutes but as the egg cooks you’ll get something that resembles a lightly scrambled texture; i.e some solid and fluffy bits and still a little liquid- that’s the consistency you want. Don’t worry about it looking slightly curdled- that’s how it’s meant to be!!
Serve over hot fluffy rice and enjoy- this dish is like having an warm blanket wrapped around you.

Sunday, 20 September 2015

Pla Pad Prik Thai Dam (Fish Fried with Black Pepper)


Deep fried fish, lots of garlicky spices and crunchy vegetables- you can’t really go wrong here. I suspect this is one of these dishes that may have started out as tourist food but has ended up being just as popular with the Thai people.
It’s a quick easy to make dish that doesn’t use any obscure or hard to track down ingredients. It’s a nice contrast to have two kinds of heat from the smoky black pepper and the fiery chillies. It didn’t last long on our plates anyway!! Serve with fluffy white rice.
For two portions use:
  • a large, skinned sea fish fillet (I used haddock- pollock, coley, catfish or ling are also good) cut into large chunks
  • 1 & ½ bell peppers (whatever colour you fancy)
  • 1 onion, sliced into strips
  • 2 spring onions, cut into large pieces
  • 4/5 cloves of garlic, chopped fine
  • 2-3 small red chillies, chopped fine
  • a dessertspoon of black pepper, ground
  • a cup of plain flour
  • a big splash of oyster sauce
  • a big splash of light soy sauce
  • vegetable oil for deep frying/ stir frying
Start off by coating the chunks of fish in the flour. Heat a deep pan or wok and when hot, gently drop in the fish and deep fry until lightly golden and crisp- roughly ¾ minutes. Cook in batches if needed so the pan isn’t overcrowded and drain on kitchen paper.
In a clean wok, heat a splash of oil until really hot and throw in the sliced onions and peppers, stir frying for 3 minutes and allowing the bottoms to get a little char. Throw in the spring onions, garlic, chillies and ground pepper (it’ll make you cough!) stir frying for another 30 seconds before adding in the fried fish and both sauces. Briefly stir fry (gently so the fish doesn’t break up) so everything is coated in sauce and serve with rice.

Wednesday, 27 May 2015

Pad Bai Horapha Bhet Yang (Roasted duck stir fried with sweet basil)


Before I begin, could I ask a big favour. On 1st June ‘I Wish I Was In Thailand’ blog will be a year old and I’m amazed to have *almost* reached 1000 followers. It would mean a lot for me if you like Thai food recipes and photography and enjoy my regular posts, you could follow my blog if you haven’t already.
Okay, so this is the last post for a little while until I get to Kuala Lumpur next week. We’ve already got out first reservation at the Fat China Seafood restaurant which apparently has amazing crab, can’t wait to try that and we’re keen to sample Jalan Alor’s street food as an introduction to Malaysian cuisine.
This is the other duck dish which I mentioned in my post on Sunday and let me use up the rest of my roasted duck. I have done a few variations on pad grapao/ horapha before. One with chicken and a fried egg, one with squid but this one, with roasted duck and sweet basil could well be the best; the firm but juicy chunks of roasted duck with it’s stronger taste hold up really well to the punchy garlic/chilli/basil flavours.
For two people use:
  • 1 large roasted duck breast + chunks of any other meat on the duck
  • 3 red chillies, sliced
  • 4 cloves garlic, peeled
  • a big splash of oyster sauce
  • a big splash of light soy sauce
  • a big handful of sweet basil leaves (try fresh tarragon as a substitute)
  • a splash of vegetable oil for frying


Pound up the garlic and chillies in a pestle and mortar and leave for just a moment. Heat the oil in a wok until hot and throw in the garlic/chilli paste, stir frying for a few seconds before adding in the duck. As it’s already cooked, it doesn’t need long, perhaps 30 seconds before you add in the two sauces. Stir fry for a further minute or so before turning off the heat and tossing in the sweet basil until it’s just wilted. Serve over white rice.

I started doing IWIWIT as a way to pass some time when I was working and living away from home in a very rural/quiet area and was going mad. This blog started up as a way of passing the evenings; I never imagined I would have over 80 recipes and 1000 followers 1 year later. If you want to see the full web page with all it’s recipes head to www.iwishIwasinthailand.tumblr.com 
Thanks, Naomi x

Tuesday, 19 May 2015

Guay Tiew Khua Gai (Chicken Noodles)


I sometimes have the tendency of overlooking noodles in favour of rice as generally it’s easier to cook and less likely to end up a sticky mess (as sometimes happens with rice noodles) but in reality, noodles- particularly the wide rice noodles are eaten just as commonly in Thailand, particularly at lunch time and especially as street food.
You’ll notice there’s not a whole lot of ingredients or time involved with making this dish and that is because it’s a classic Thai street food dish. For a street food seller you need to be able to get your cart/pitch set up with the minimum of fuss and be able to fire out dishes to hungry customers as fast as they arrive. As ever in Thailand, you are expected to adapt the basic dish to your personal tastes and it would be rare for a Thai customer to eat a simple noodle dish like this without adding an assortment of flavourings from the condiment caddy (seen here in the background). To my plate I added a pinch of sugar, a generous sprinkling of chilli flakes and a ladle of naam pla prik gratiem (chillies and garlic in a fish sauce/vinegar mix) which together add that perfect Thai blend of hot, sweet, salty and sour.

For two portions use:
  • Half a pack (or just over) of the widest rice noodles you can get- fresh or dried
  • two small chicken breasts/ four thighs, sliced thinly
  • 2 eggs
  • 2/3 spring onions, finely sliced
  • a big splash of light soy sauce
  • another splash of light soy sauce
  • a small splash of Thai fish sauce
  • a big pinch of ground black pepper
  • a big splash of vegetable oil for frying
  • optional (but recommended) chilli flakes, chilli slices in vinegar/fish sauce, sugar- see my last post about Thai seasonings here
Start by marinating the sliced chicken in a bowl with the big splash of soy sauce and black pepper, it doesn’t need long- deal with the noodles while it marinades.
If using dried noodles as I did here (my local Asian supermarket was out of fresh noodles) start off by soaking them in cold water for 15-20 minutes or until you can wrap a noodle around your finger without it breaking. If using fresh, spend a bit of time loosening the bundle and gently pull the noodles into individual strands.
Heat a big splash of oil in a wok (rice noodles have a tendency to stick so use a little more oil than you would normally use when stir frying) until it’s nice and hot. Add in the chicken and stir fry for 2/3 minutes until fully cooked. Shove the chicken off to one side and crack in the eggs- let them sit and start to set before scrambling, then set, then scramble etc. When the eggs have fully cooked stir everything back together.
Next add the (drained) noodles and quickly after, the soy and fish sauces. Toss everything well and cook for a few minutes before throwing in the spring onion.
Season to your liking.

Friday, 1 May 2015

Makua Yao Nam Prik Pao (Aubergine with roasted chilli paste)


Despite being in house selling mode and what I said in my last post about not wanting to cook strong smelling food, I couldn’t resist another Thai dish. This one is ‘more or less’ vegetarian and is easily adapted to be vegan too, just check the ingredients on any chilli paste you use. It took about ten minutes to prep and even less to cook, so it’s perfect for a quick meal. Aim to get the aubergines to be a little soft but not mushy; you still want some texture in the dish.

For 2 big portions use:
  • 2 regular purple aubergines/ 4 thin purple ones/ 16 Thai egg aubergines or a combination of. I used the thin purple ones, sliced
  • 3 cloves of garlic, peeled
  • 3 small red chillies, roughly sliced
  • a handful of sweet Thai basil (or try using tarragon for an anise-like flavour as a substitute)
  • a big splash of light soy sauce
  • a splash of fish sauce (nam pla) or extra soy if vegetarian/vegan
  • a heaped teaspoon of roasted chilli paste (nam prik pao- be aware some contain shrimp)
  • vegetable oil for frying
This recipe it so easy; Make a rough paste by pounding the garlic and chilli in a pestle and mortar. Heat a big splash of oil in a wok until hot. Throw in the garlic/chilli paste and stir fry for a few seconds before throwing all the aubergine in. Depending on which aubergine you have used (green Thai need longer, large purple need less) stir fry for 3-5 minutes, making sure the garlic/chilli doesn’t burn. Add in the roasted chilli paste, soy sauce and (if using) fish sauce, mixing everything well for a further minute. Turn off the heat and stir through the sweet basil leaves until just wilted before serving.

Sunday, 19 April 2015

Moo Khua Kling (Dry Roasted Curry)


 I Had a break from Thai food over the weekend and as a late birthday treat sampled some amazing Japanese/Danish hybrid food at Sticks n Sushi in Greenwich. We couldn’t decide what to pick from their vast menu so went for the lazy option; basically tell the server your budget and they pick for you! We sampled tataki, rice crispie shrimp tempura two ways (whole and with avocado in rolls), black sesame and truffle crispy cauliflower, salmon sahimi, tuna, pork and steak yakitori. The quality of the ingredients and the imaginative way they were served was amazing!
Anyway, since we’ve just arrived back, Moo Khua Kling is a perfect dish to cook as it’s really quick to make and doesn’t need many ingredients. It’s not really a curry at all, as it’s a dry dish though it is stir fried in red curry paste. It’s a Southern Thai dish and like most Southern dishes packs some serious heat. It’s traditional not to add vegetables to the dish but to serving cooling ones alongside.
For two people use:
  • 350g minced pork
  • a level tablespoon of red curry paste
  • a ‘finger’ of fresh turmeric, if available, or a heaped teaspoon of powder
  • 8-10 kaffir lime leaves, spine removed, rolled and shredded fine
  • a large red chilli, or 4/5 small red, sliced
  • a big splash of fish sauce (nam pla)
  • optional vegetables (cucumber, green cabbage, lettuce etc.)
Bash the fresh turmeric (if using) into a paste in a mortar then mix the turmeric (fresh or powdered) with the red curry paste. Use a non stick wok to dry fry the meat over a high heat until fully cooked and any water has evaporated. Add in the curry paste and mix thoroughly, cooking for a couple of minutes until fragrant and even coloured. Throw in the fish sauce, chilli slices and lime leaves, leaving some back for decoration if you want to. Cook until dry (1 minute or so) then serve with the cooling vegetables.

Friday, 20 March 2015

Khao Pad Moo Grob (Deep Fried Pork Fried Rice)


This is definitely an indulgence dish- any dish with ‘fried’ in it’s title twice has got to be. That said, there’s only a few pieces of crispy pork belly per portion and there’s lightly cooked fresh veggies, so don’t feel too guilty.
I loved fried rice dishes, they great for using up leftover cooked rice or assorted vegetables. Click the link for the chicken fried rice I made last summer- http://iwishiwasinthailand.tumblr.com/post/91472102264/pad-khao-gai-chicken-fried-rice 
For 3-4 portions use:
  • A 300-400g slab of pork belly
  • a cereal bowl of cold, pre cooked rice (yesterday’s is ideal)
  • a few stalks of choi sum or or pak choy (or other leafy/crunchy veg)
  • half a white onion, thinly sliced
  • 4 spring onions, sliced
  • a large red chilli, sliced
  • 4 cloves of garlic, minced
  • 1 egg
  • juice of 1 lime
  • a big splash of fish sauce (nam pla)
  • a big splash of light soy sauce
  • a big pinch of ground black pepper
  • half a bottle of vegetable oil for deep frying and a splash for the fried rice
Cook the pork belly (click link to open recipe) following the boiling, cutting, soaking and deep frying stages (please be careful- cover the pork during cooking and watch out for spitting oil- I ended up with a few nasty burns on my hands) then once cooked,cut into cubes.
With the meat cooked, we’re ready to start. heat a small splash of oil in a wok and when it’s nice and hot, add in the garlic and sliced onions; stir frying for a few seconds before shoving everything to one side of the wok. Crack the egg into the empty half and leave it to set for a bit, then scramble, then set, then scramble. When it’s fully cooked through, mix everything back together. Throw in the choi sum, chillies and spring onions, stir frying for a minute over a high heat. Now tip in the rice and mix gently, but thoroughly. Add in the sauces and black pepper next, then mix through most of the crispy pork belly. Cook for a final couple of minutes.
Serve with a few more pieces of pork on the top and squeeze over a wedge of lime per portion.

Sunday, 15 March 2015

Bu Pad Gratiem Prik Thai (Crab Fried with Garlic and Peppercorns)


A week or two ago now, we had a visit to Manchester which gave me chance to visit China town which has some fantastic food stores and restaurants. I’ve been cooking up a whole bunch of new recipes with the ingredients I picked up from Siam Supermarket this is the first of four to come. The supermarket also features a cafe called Siam Smiles which we ate at and it really did make me smile! It was a typically casually affair, like all good Thai cafes and I was thrilled to see a flavour caddy on the table (way better than regular salt and pepper) and a little pot of nam prik pao (chilli paste). I ordered the Laab Mu (chopped pork salad) which was meaty (pork and I think, liver), lots of herbs, sour and salty and a perfect amount of chilli. My husband chose the Khao Pad Moo Grob (deep fried pork fried rice) which I have re-created for a recipe later this week. The verdict- wonderful flavours, definitely not Westernised, great value for money- absolutely perfect and definitely one to return to the next time we’re back in Manchester.
Now back to the recipe; this is a dish that’s quick to prepare and cook, looks great for a special occasion or party but does require you to get hands on and messy when eating.
For two people use:
  • 500g or thereabouts of fresh crab claws
  • 6 cloves of garlic, finely chopped
  • a few stems of fresh green peppercorn, pulled off stems
  • 1 large red chilli, sliced
  • a big splash of oyster sauce
  • a big splash of fish sauce (nam pla)
  • a big splash of light soy sauce
  • vegetable oil for frying

Prepare the crab claws first by individually wrapping each in a tea towel and lightly crack them with a pestle or heavy rolling pin (discard any small shell fragments).
Heat a splash of vegetable oil in a large wok and when hot, throw in the garlic and chilli, stir frying for 20 seconds or so before adding the crab claws and peppercorns. Stir fry for 3 minutes before adding in the sauces. Fry for a further minute to make sure everything gets well coated and serve.
Don’t even attempt to use cutlery with this- it’s fingers all the way!