Showing posts with label chicken. Show all posts

Wednesday, 18 May 2016

Karipap Gai (Chicken Curry Puff)


Today's post is a substantial hike in the difficulty levels! Normally I try and make dishes that are easy to follow and make but Karipaps (Curry Puffs) are particularly difficult, or the pastry is at least. As you might be able to see it's a multi-layer puff pastry that is folded in such a way that ends up with an open spiral-like finish. This is the first time I've ever tackled anything like this so it really was a challenge but with a bit of practise, hopefully you can manage it too.

The filling is a fairly simple chicken and potato curry-at least that part is easy to do!

The pastry involves making two lots of dough, both slightly different mixes.

For 8 curry puffs, you'll need:

For the Inner Dough:

  • 120g plain flour
  • 1/3 cup vegetable oil
For the Outer Dough:

  • 300g plain flour
  • 1/3 cup vegetable oil
  • 1/3 cup water (you may not need all of it)
  • big pinch salt
  • big pinch sugar
For the Curry Filling:

  • 4 small/2 medium potatoes, peeled, cut into 2 cm squared cubes and pre-boiled for 3-4 minutes
  • 2-3 chicken thighs, cut into 2 cm squared pieces
  • 1 small onions, finely chopped
  • 1 tablespoon mild curry powder
  • 1 teaspoon of chilli powder
  • 1 teaspoon turmeric powder
  • a big pinch salt
  • vegetable oil for frying

Start by making the filling, as it'll need to be cool by the time you make the doughs.

Heat a small splash of vegetable oil in a pan until hot, then fry the onions until softened. 

Add in the chicken pieces, frying until cooked; about 2-3 minutes. Pop in the spices and salt and mix well. 

Gently add in the cooked potato, stir everything well and cook for a couple minutes more. Leave to cool while you make the pastry...


Make the inner dough

Pour the oil into the flour, it'll quickly and easily make breadcrumbs and then with a little further squeezing and kneading will become a smooth, oily dough. Divide into 8 equal balls (each will be about golf ball size).

Make the outer dough

Put the sugar and salt into the flour, add the oil as before, using your fingertips to make 'breadcrumbs'- this will be a dry mix at this stage. Slowly add in the water bit by bit, kneading gently to bring the dough together. You do not want a dry crumbly dough, it needs to hold together so add enough water to make sure you've got a smooth, pliable dough that will hold itself together.

Divide the outer dough into 8 equal sized balls and use a rolling pin to roll them into a flat circle.

No need to leave the dough to rest, lets move straight on to the rolling....


Making the pastry...

Work on an oiled work surface or board to make life a lot easier for yourself.

Place a ball of the inner dough into the middle of a flat circle of outer dough and fold and squeeze the outer dough around the inner dough ball so it's fully encased. Repeat for the rest of the dough. You now have 8 enclosed dough balls.

Take one of the enclosed dough balls and roll it flat rolling only forwards and backwards- you want a long, narrow 0 shape to the dough, as thin as you can get it.
Loosening the dough from the work surface, roll it up like a cigar, rolling away from yourself (open rolled ends are to your left and right)

Pick up the rolled dough and turn it 90 degrees (an open rolled end is facing you). Use the rolling pin to roll out the dough, like we did at the beginning, into a long narrow 0 shape. Again, use your hands to roll it up like a cigar (or sausage roll!) pushing it away from you before turning it 90 degrees.

Rinse and repeat... 

Altogether I did 3 cycles of rolling out, cigar rolling and turning. As long as you do the same actions each time and turn the dough in the same direction you'll be fine.

On the final cigar roll, smooth the roll off, smoothing the ends into the dough as much as possible and gently manipulate into a more even roll. Cut this roll into 8 equal slices, leaving you with something resembling the picture above.

Give yourself a well deserved pat on the back!!

Filling & Cooking

Heat a deep fat fryer or heavy pan of vegetable oil while you start to fill the dough. Yes more oil, these are not healthy snacks!!

Take one of the dough slices, placed flat on the work surface and roll flat with the rolling pin straight down on top of the layers, again, aiming for an elongated '0' shape. As you roll, you'll see the layers start to stretch and open up. Aim to get the dough quite thin, about 5mm is ideal.

Lift up the rolled dough and place a tablespoon of the cooled curry filling into the inside, fold both halves of the dough together and pinch and twist the edges to seal it tightly.

Repeat with the remaining pastry and filling.

Cooking in batches, deep fry for 6-8 minutes until crispy and light brown.

Serve with pickled cucumber/chilli/shallot (known as ajaad- click for the recipe) to help cut through the rich pastry.

Fall into a heap!!



Sunday, 1 May 2016

Po Pia Sot (Fresh Spring Rolls)


Since it's supposedly spring, it seemed like a good opportunity to do some fresh spring rolls using rice paper. Full of herbs and vegetables; they're very light, fresh and extremely healthy; we'll just ignore the fact that it's still only about 10 degrees and pouring down outside!

Since I was already doing one variety of spring roll, and I had a whole pack of dried rice paper sheets, I thought I'd do a second type of roll and also made Nam Nuang- a Vietnamese type of spring roll that uses pork 'sausages'. I will follow up this post very soon with the nam nuang.

* Just a note- the plate of herbs/veggies was used for both the po pia sot and the nam nuang and the darker sauce on the plate is the sauce for the nam nuang, not the po pia

If you're looking for the deep fried variety of spring roll, or Po Pia (to use the Chinese name) you can find the recipe here- Po Pia Tod. Spring rolls pop up with various fillings and wrappers in just about every east and south east Asian country (we even ate them in Malaysia last year) and there's lots of debates over who made them first, whose variation is the most authentic etc. I don't make any such claims with my version though this version has distinct Vietnamese influences.

Enjoy as a snack, a starter or as part of a larger meal.

For 8 rolls use:

  • 2 poached chicken thighs (simmer in plain water for 20 mins), cooled and shredded finely
  • 8 dried rice paper circles
  • a shallow dish of cold water
  • peanut sauce (I went for the easy option and pre bought- Lee Kum Kee brand) but you can use the sauce recipe from when I made satay- click here
  • 1 sliced large red chilli
  • fresh mint leaves
  • fresh coriander leaves
  • a small piece of cucumber, seeds removed and cut into very thin slivers
  • some shredded lettuce
  • a few extra peanuts for crunch (mixed into the sauce)

Have all your ingredients  prepped and ready in front of you. Take a dried disc of rice paper and dunk it into the dish of water for about ten seconds before lifting out, turning over and dunking for ten seconds more. It should now feel fairly flexible. If not, and you still feel it will snap if you tried to fold it, dunk for a further ten seconds then shake off the excess water.

Place the damp rice paper sheet on a board (it will continue to soften and become gelatinous) and fill with your choice of ingredients place horizontally across the middle of the sheet. It's worth placing some of the pretty ingredients like mint leaves and sliced chilli on the bottom, so when you roll them up they are visible through the wrapper.

Fold the sides into the middles then roll up from bottom to top, using your fingers to hold all the ingredients inside the wrapper.

Place them on a ceramic or metal plate as they will stick fast to wood or other porous materials as well as each other.

Drizzle over some of the peanut sauce and place a bowl alongside to dip into.


Wednesday, 13 April 2016

Khao Pad Gaeng Kiew Wan (Green Curry Fried Rice)


After a rather busy last few days for me I'm ready to get back writing again, It's been my birthday weekend and we decided to take a trip down to see my parents near the south coast. We ended up having an impromptu night in Brighton, a full on day in London (involving a rapid trip to Brick Lane for Indian food supplies, amongst other things, a days walking in the Ashdown Forest and an equally full on day getting gooey-eyed at the amazing Bodleian Library and various colleges during a stop off in Oxford before the long drive back to Lancashire.

It's taken another couple of days getting back in the swing of things but I've finally found time to post this recipe for Khao Pad Gaeng Kiew Wan (Green curry fried rice). Now we're well into April it's now getting so much easier to take photos again as there is still daylight when I'm cooking, Long way it continue!

Like the last recipe I posted (Chicken stir fried with ginger) this is also a common restaurant dish found here in the UK. The red curry paste version is equally common. If you're not in the mood for sharing a bowl of curry or you need to take a portion for the next day, this fried rice version is definitely the easy option and dare I say it, preferable to the usual curry.

It still has all the same flavours that you would expect from a green curry, just in a neater package.

For two large portions use:

  • 2 cups of cooked, cold rice (ideally cooked yesterday)
  • a tablespoon of green curry paste (I use Mae Ploy brand)
  • 2/3 skinless chicken thighs, trimmed of fat and cut into cubes (i've also used up some pre-fried tofu pieces cut into small cubes)
  • your choice of crunchy vegetables, cut into inch long pieces- I've used baby corn, green beans and pea aubergines
  • a small handful of Thai sweet basil (or tarragon as a substitute- never Mediterranean basil!!)
  • 1/2 can of coconut milk
  • a big splash of fish sauce
  • a big pinch of sugar
  • 4/5 limes leaves, finely shredded
  • 4/5 small red chillies or 1 large, finely sliced
  • (optional) a few stalks of green peppercorns

In a large wok, heat the coconut milk until it bubbles, add in the green curry paste and stirring regularly, fry for a few minutes until you can see some oil separating.

Pop in the chicken and cook in the sauce until nearly cooked (2/3 minutes). 

Add in the seasonings- lime leaf, sugar, fish sauce, then the crunchy vegetables, cook for 3/4 minutes until they lose their rawness but not soft.

It should still resemble a very thick green curry at this stage- now tip in the rice and gently mix so everything gets well coated in the sauce. there will no longer be any obvious sauce.

Mix through the basil leaves, chillies and (if using) green peppercorns. Sprinkle over any remaining chillies, shreds of lime leaf or Thai basil for decoration.


Wednesday, 6 April 2016

Gai Pad King (Chicken Fried with Ginger)


This ubiquitous dish is found on every Thai restaurant menu up and down the country (UK), it's one of those dishes that gets overlooked in favour of something more exotic, spicier and perhaps ''more traditionally" Thai. However, it's one of the healthiest stir fries out there with lightly cooked crunchy vegetables, low fat- high protein chicken and mushrooms and immune boosting ginger and chillies.

The ginger is used as a vegetable meaning this stir fry is full of fragrant and peppery ginger flavours. Easy to make, very quick to cook, colour and packed with flavour, it made a great weekday dinner.

For two people use:

  • two small chicken breasts, cubed
  • 1 small onion, cut in slivers
  • 3/4 spring onions, cut in inch long pieces
  • a large piece of ginger, peeled (2-3 inches long) and cut into thin slivers
  • a handful of Chinese wood/jelly ear mushrooms, soaked in hot water until soft then drained and cut into strips
  • 3 cloves garlic, peeled and finely chopped
  • 3 small red chillies, chopped
  • a pinch of sugar
  • a big splash of light soy sauce
  • a big splash of oyster sauce
  • a small splash of fish sauce
  • a small splash of vegetable oil for frying
Get the oil heated up in a wok until it's nice and hot, throw in the onion and stir fry, letting it get some colour. Next in goes the chicken, stir frying for a couple of minutes until it's white and mostly cooked through. Add the garlic and spring onions next, giving them a quick turn in the wok. Now add in the mushrooms, ginger and chillies and mix well.

Finally add the sugar and three sauces, toss everything to get it well coated and serve- it shouldn't take more than five minutes to cook.


Monday, 21 March 2016

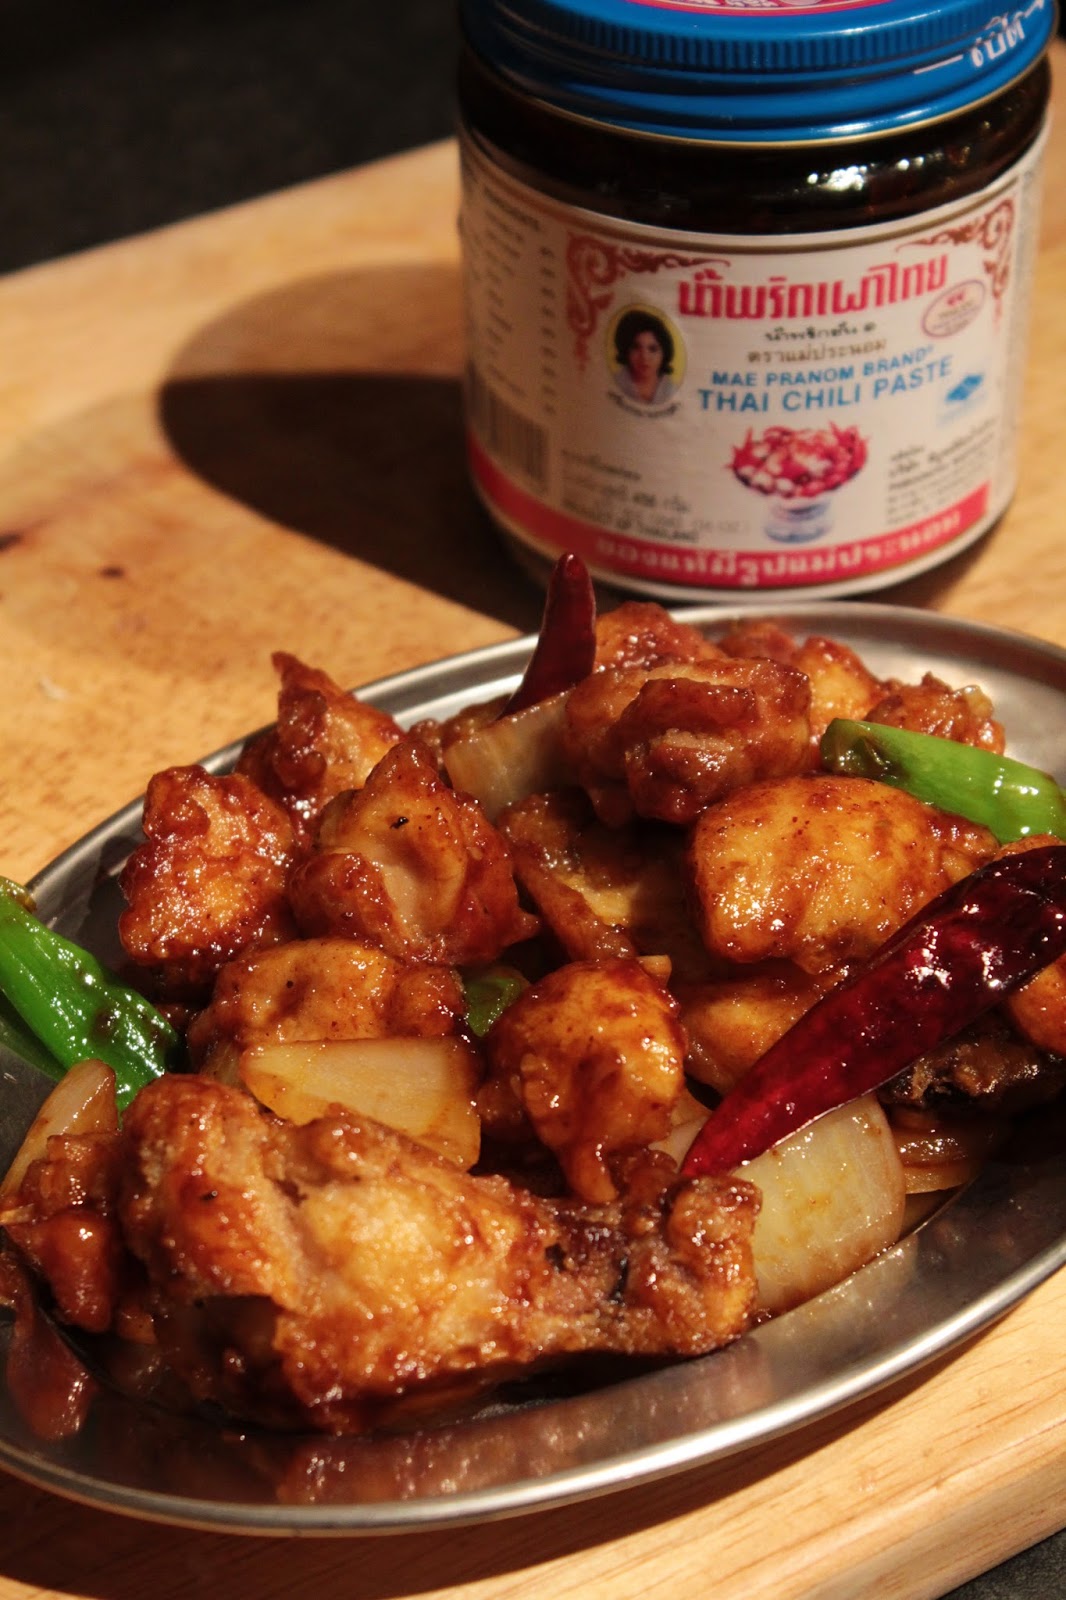
Gai Tod Pad Nam Prik Pao (Fried Chicken Stir Fried with Roasted Chilli Paste)


It's very rare these days that we would ever buy a takeaway, I've just had way too many identical oil drenched, msg ridden, jam-like, tummy ache laden meals to ever optionally order one then pay through the nose for the privileged. however that's not to say I eat healthy all the time. Like most, I occasionally like deep fried food, I just like my salt, sugar and fat in reasonable amounts and I think takeaway places (by and large) rely on pre made cheap fixes.

Ranting over, when I do want something takeaway like, I'd much rather make it myself, lets face it, as long as you have the ingredients in, you can be eating this quicker than it would take for a takeaway to be delivered. I guarantee this crunchy, spicy, sticky stir fry will satisfy all your takeaway urges!! It differs quite substantially from all the other English written versions of gai tod nam prik pao, this is taken directly from a Thai recipe and is the real thing!

As an added bonus, it's a 2 in 1 dish. If you just want the chicken as a starter/snack, use wings and forgo the vegetables. If it's a whole meal, keep the veggies in and serve with rice.

For the stir fry version for two people use all the ingredients:
For the chicken wing snack version use just the ingredients with a * next to them
  • 4 large chicken thigh fillets, skinned and cut into large cubes or 10 wings, jointed*
  • 1 large onion, peeled and cut into large chunks
  • 2 spring onions, kept in large chunks
  • 4 cloves garlic, peeled and finely chopped
  • a small handful of dried red chillies
  • a heaped dessert spoon of roasted chilli paste (nam prik pao)*
  • a big splash of light soy sauce*
  • a big splash of oyster sauce*
  • a big pinch of brown or palm sugar*
  • rice flour for dredging the chicken (plain flour is ok too, just not as light and crispy as rice)*
  • salt and pepper*
  • oil for deep frying and splash for stir frying*

Season the chicken with salt and pepper, then dredge it through the rice flour, shake off the excess.
Heat a deep fat fryer to 190 degree Celsius or use a heavy pan and watch it carefully.
Pop in the chicken pieces and cook until deep golden and crispy (3-5 mins). Drain on kitchen paper.

Heat a small splash of oil in a wok until hot then throw in the onions and stir fry on a high heat to get some colour. Throw in the dried chillies and garlic and stir fry for a few minutes. Throw in the spring onions and the drained fried chicken.

Add in the roasted chilli paste, coating the chicken well, then the remaining sauces and sugar. Everything should be nice and sticky.

* If you make the wings snack version make the sauce in a wok- heat a small splash of oil before adding the roasted chilli paste, sugar oyster sauce and soy sauce, blend well and put the fried chicken wings in, stirring well so everything is coated.


Thursday, 11 February 2016

Gai Khua Kem (Salty Roast Chicken)


I've been making this for years now and had affectionately named it 'stinky chicken' due to the huge amount of garlic and chillies I use in it but only recently did I discover it is actually made in Thailand and even has a name; Gai Khua Kem (Salted Roast Chicken).

I eat this as a guilty pleasure usually over pork ribs or just with chicken wings but this version can best be described as a form of a 'hash', I guess. Anyway, it's a great way to use up a roast chicken.


For 4 small or 2 large portions, use:


  • A roast chicken (or part of)- I had used the breasts for another recipe so mine was mostly comprised of leg, crispy skin, wings and some spare bits from underneath! I chopped the roasted chicken into varying size bits, keeping some on the bone. This allows for a range of textures in the final dish.
  • A whole bulb of garlic, peeled and finely chopped
  • 3-5 hot Thai chillies, or more if you wish
  • 4 spring onions, finely sliced
  • A small splash of oyster sauce
  • A small splash of light soy sauce
  • A big pinch of salt
  • A teaspoonful of ground black pepper
  • A large splash of vegetable oil for frying

Heat the oil in the wok to a low/medium temperature. Add in all the chopped garlic and gently fry, stirring from time to time for 3-5 minutes over a fairly low temp until the garlic is a light brown and crispy. Scoop out and drain on kitchen paper, leave the garlic oil in the wok.

Turn up the heat on the garlicky oil and pop in the chopped chicken, Toss the chicken every now and then to allow crispy bits to develop. Fry for around 5 minutes so the chicken has time to get some colour and crisp.

Throw in the salt and pepper and mix well. Pour in the oyster and soy sauces and stir. Cook until the liquid has evaporated and the sauces have coated the meat well (about 2 minutes).

Next fling in the chillies, stir, then the crispy garlic, stir again and lastly, the spring onion.

Serve with some fluffy white rice.


Wednesday, 11 November 2015

Gaeng Om Gai (Herbal Chicken Curry)


Gaeng Om is the ultimate meal if you are feeling under the weather, if you're eating light and fresh or it's dark, cold and raining outside. It's light but filling, fresh tasting but complex and is versatile and quick to make. It's also not exactly a curry (though it does start with a paste) and is more broth like so it can be eaten with rice or alone as a soup. Like other northern Thai dishes (jungle curry, hanglay/northern curry) it doesn't use any coconut milk.

For 3-4 portions, use:

  • 2 large lemongrass stalks, peeled and finely chopped
  • 4 shallots, peeled and chopped
  • 4 large garlic cloves, peeled and chopped
  • 3 red chillies, chopped
  • a chunk of galangal, finely chopped
  • a small handful of lime leaves, ripped up
  • a few dried red chillies
  • 2 small chicken breasts/ 4 thighs, trimmed of fat and sliced into thin pieces
  • a handful each of dill and Thai sweet basil
  • 3 spring onions, chopped in a few pieces
  • 3 or 4 shiitake mushrooms, stems removed and sliced
  • a large splash of fish sauce
  • 300ml of chicken stock
Start by making a paste of the first 5 ingredients by pounding them up in a mortar. It'll take some time (10-15) but stick with it and you should have a fairly smooth paste by the end of it.

Heat half the chicken stock in a large pan and add the paste, heat until fragrant and some of the rawness is cooked out. Next add the chicken and mushrooms and cook for around 10 minutes until the chicken is fully cooked. Next in goes the dried chillies, lime leaves and fish sauce and the remainder of the stock; the consistency you're looking for should be broth like, rather than curry sauce so add a little more water if needed, or reduce down if it's a bit too watery. When the gaeng om has reached the desired thickness, add in the spring onions and herbs... 

(The observant among you will notice I haven't used Thai basil but tarragon; unfortunately there was none to be found when I made my gaeng om and tarragon is the best substitute to my mind with its anise flavour- never mediterranean basil which so many UK restaurants resort to- ugh)...

Back to it- once the herbs and spring onions have gone in, you can turn off the heat and simply stir them through the broth, they'll wilt quickly. Serve either with rice or a big spoon and feel gaeng oms healthiness sink in!


Sunday, 11 October 2015

Gai Pad Pong Karee (Chicken Fried with Curry Powder)


Soft chicken and egg pieces, a few crunchy vegetables and a mild yellow curry powder stir fry served over rice; this is great comfort food, just what you want on an autumn evening. 

As far as stir frys go, this is a great one as you won’t need to look hard for the ingredients (apart from possibly the nam prik pao- roasted chilli paste) and you can be eating it in around 20 minutes. It’s another classic Thai street food dish (although it’s often made into a luxury version by being served with crab or other seafood). Evaporated milk (although not a common ingredient in savoury recipes in the UK anymore) still crops up in Thai food quite regularly (such as tom kha gai soup) and is interchangeable with coconut milk (though obviously will give a less sweet flavour whilst still retaining the right creaminess). Mild curry powder gives it it’s bright yellow colour and makes it popular for little ones too.
For 4 portions use:
  • 6 medium sized chicken thighs (skinned, boned and trimmed of fat), cut into small pieces
  • 2 eggs, lightly beaten
  • 100ml of evaporated milk
  • a heaped dessertspoon of nam prik pao (roasted chilli paste)
  • a heaped dessertspoon of mild curry powder
  • a large handful of crunchy veggies (I used some green beans and green/yellow bell peppers)
  • 1 onion, sliced
  • a few red chillies, chopped into a few bits (optional)
  • 3 cloves garlic, finely chopped
  • a big splash of light soy sauce
  • a big splash of oyster sauce
  • vegetable oil for frying
Prepare the sauce first as it’ll all get poured in together- mix in a bowl the eggs, evaporated milk, nam prik pao, curry powder, soy sauce and oyster sauce. This will make things much quicker and easier.
In a wok, heat the oil until reasonably hot and stir fry the garlic for a few seconds before you add in the onion. The onion needs a minute just to soften, we’re not looking for colour. Now add the chicken. Cook the chicken until it’s more or less completely white and cooked through. Toss in the rest of the veggies and stir fry for a further minute then pour in the sauce. It’ll take a few minutes but as the egg cooks you’ll get something that resembles a lightly scrambled texture; i.e some solid and fluffy bits and still a little liquid- that’s the consistency you want. Don’t worry about it looking slightly curdled- that’s how it’s meant to be!!
Serve over hot fluffy rice and enjoy- this dish is like having an warm blanket wrapped around you.

Monday, 5 October 2015

Gai Yang Khamin (Turmeric Grilled Chicken)


So lots of you liked my sushi post yesterday? thanks for that; I do sometimes wonder whether I should include more than Thai food in this blog as we eat Asian food probably 4-5 nights a week, I guess I just know way more about Thai than any other food culture. I may start throwing in the odd non- Thai Asian post from time to time.
So it’s moving towards Autumn/ Wintertime again and the which makes taking pictures in poorly lit kitchens quite tricky so sorry for the washed out pic. It did taste really good though and was really easy to do. I’ve done a gai yang post way back here but a slightly different recipe and without the addition of turmeric.Turmeric is supposed to have cancer preventative properties so is a great food to eat.
For two portions use:
  • 4-6 chicken thighs, skinned and boned, trimmed of excess fat
  • a small handful of coriander roots or stalks
  • a teaspoon of black peppercorns
  • half a bulb of garlic
  • 2 fingers of fresh turmeric
  • a big splash of light soy sauce
and the sauce is simply:
  • Juice of a big lime
  • a big splash of fish sauce
  • a few stalks of chopped coriander
  • a big pinch of chilli flakes/powder
  • a teaspoon of toasted rice powder (dry fry rice and grind up)

Pound all the solid ingredients in a pestle and mortar until you have a chunky paste. Put this paste along with the soy sauce and chicken into a bowl, mixing well and leave to marinade for as long as you have, ideally an hour or so.
Heat the grill on a medium heat (not too hot otherwise the spices burn and the chicken stays raw!) and grill until cooked through, with a slight char and some crispy bits. Serve with (ideally! sticky rice, a som tam salad and the spicy dipping sauce

Wednesday, 2 September 2015

Roti Mataba (Folded Pancake)


Roti Mataba is the name used in Thailand whilst in Malaysia they are known as Roti Murtabak. Roti are found mainly in the south of Thailand, near the Malay border where there is a larger Muslim population.


Unlike a UK pancake (which is made from a batter), roti are made from dough, rolled out incredibly thin and pan fried to create a flaky, chewy flat bread. Really skilled cooks will stretch and slap the dough out until it becomes paper thin but this is very difficult and not totally necessary!


Roti Mataba are made in two parts- the curried chicken filling (though you could vary this with pretty much any meat/vegetable/egg/sweet filling) and then the enriched dough.

They are absolutely delicious and well worth taking the time to make (and eat them).
For 5 rotis (a snack for 2 people or main meal if served with another dish) use:
Dough-
  • 450g plain (all purpose) flour
  • 1 beaten egg
  • 1 cup water
  • 25ml milk
  • a dessertspoon of sugar
  • pinch salt
  • vegetable oil for coating
Filling-
  • 3 skinless chicken thighs/1 breast, chopped into small cubes
  • 1 beaten egg
  • 4 shallots/ half red onion, very finely chopped
  • 3 cloves garlic, finely chopped
  • 2 red Thai chillies, finely chopped
  • 1 teaspoon cumin seed, ground
  • 2 teaspoons coriander seed, ground
  • 2 teaspoons curry powder
  • pinch chilli flakes
  • pinch salt
  • small splash of vegetable oil
The dough needs to be started at least 2 hours before you plan on making and eating the mataba. In a bowl sift flour, salt and sugar. Mix in the beaten egg and milk and slowly add in the water- you may not need the whole cup of water. The dough shouldn’t be wet but it certainly doesn’t want to be dry. Knead it well on a floured surface until it feels soft and springy. Pop it back in the bowl, covered and leave it for at least an hour while you make the filling.
For the filling, heat the oil in a pan, when it’s hot add in the shallots/onion and fry until they have some colour. Add in the garlic and chicken (or whatever meat/veggies you’re using), toss in the spices, salt and chillies, frying briefly before pouring in the egg and scrambling it into the mixture. Once cooked, it can be left to cool until the dough is ready.
Back to the dough again. Briefly knead before cutting and rolling into golf ball sized pieces. Coat each ball with vegetable oil, cover with cling film and leave them for a further hour.
After an hour, roll each ball as flat as you can manage- the oil will stop it from sticking. Heat a large flat frying pan and add a small dribble of oil. Working quickly, place a flattened piece of dough in the pan and it will start to cook straight away. Place a heaped tablespoon of the filling mix into the centre of the roti and fold in the sides, top and bottom to cover. Flip the roti parcel over to cook (and somewhat seal) the edges. Each roti takes about 2 minutes to cook. Add and small drizzle of oil between each one
Cut in half to serve and serve alongside a cucumber pickle or simply a few slices of cucumber.

Tuesday, 19 May 2015

Guay Tiew Khua Gai (Chicken Noodles)


I sometimes have the tendency of overlooking noodles in favour of rice as generally it’s easier to cook and less likely to end up a sticky mess (as sometimes happens with rice noodles) but in reality, noodles- particularly the wide rice noodles are eaten just as commonly in Thailand, particularly at lunch time and especially as street food.
You’ll notice there’s not a whole lot of ingredients or time involved with making this dish and that is because it’s a classic Thai street food dish. For a street food seller you need to be able to get your cart/pitch set up with the minimum of fuss and be able to fire out dishes to hungry customers as fast as they arrive. As ever in Thailand, you are expected to adapt the basic dish to your personal tastes and it would be rare for a Thai customer to eat a simple noodle dish like this without adding an assortment of flavourings from the condiment caddy (seen here in the background). To my plate I added a pinch of sugar, a generous sprinkling of chilli flakes and a ladle of naam pla prik gratiem (chillies and garlic in a fish sauce/vinegar mix) which together add that perfect Thai blend of hot, sweet, salty and sour.

For two portions use:
  • Half a pack (or just over) of the widest rice noodles you can get- fresh or dried
  • two small chicken breasts/ four thighs, sliced thinly
  • 2 eggs
  • 2/3 spring onions, finely sliced
  • a big splash of light soy sauce
  • another splash of light soy sauce
  • a small splash of Thai fish sauce
  • a big pinch of ground black pepper
  • a big splash of vegetable oil for frying
  • optional (but recommended) chilli flakes, chilli slices in vinegar/fish sauce, sugar- see my last post about Thai seasonings here
Start by marinating the sliced chicken in a bowl with the big splash of soy sauce and black pepper, it doesn’t need long- deal with the noodles while it marinades.
If using dried noodles as I did here (my local Asian supermarket was out of fresh noodles) start off by soaking them in cold water for 15-20 minutes or until you can wrap a noodle around your finger without it breaking. If using fresh, spend a bit of time loosening the bundle and gently pull the noodles into individual strands.
Heat a big splash of oil in a wok (rice noodles have a tendency to stick so use a little more oil than you would normally use when stir frying) until it’s nice and hot. Add in the chicken and stir fry for 2/3 minutes until fully cooked. Shove the chicken off to one side and crack in the eggs- let them sit and start to set before scrambling, then set, then scramble etc. When the eggs have fully cooked stir everything back together.
Next add the (drained) noodles and quickly after, the soy and fish sauces. Toss everything well and cook for a few minutes before throwing in the spring onion.
Season to your liking.

Monday, 12 January 2015

Gai Tod Gratiem (Garlic Fried Chicken)


Sometimes you just need deep fried food and Thai food has plenty of it to spare. These wings are WAY better than fast food fried chicken and they don’t need many ingredients or take too long to do. All the crispy garlic bits were particularly good. This is the kind of street food dish you can find up and down Thailand. Serve it alongside a healthy salad like Som Tam or a vegetable stir fry like Pad Pak Grachet. I served these wings with the same sweet chilli dipping sauce that I made to go with last week’s Po Pia Tod (click and scroll down for sauce recipe).


For two people use:

  • a pack of chicken wings (about 10)

  • half a bulb of garlic (or more if you like), peeled

  • a dessert spoon of black peppercorns

  • a big splash of Thai fish sauce (nam pla)

  • a small splash of light soy sauce

  • vegetable oil for deep frying


Prepare the chicken wings by using a heavy knife to trim off and discard the tip. Then find the joint between the upper and lower part of the wing and cut them into two. Place in a large bowl. In a pestle and mortar, bash up the peppercorns- it can be slightly coarser than a powder but don’t leave big bits- pour over the chicken. Lightly bash up the garlic, just to break it into pieces, not paste and add into the bowl. Pour the sauces over the chicken and give everything a good mix,leave to marinate for up to an hour.


Heat the oil in a heavy pan or wok. The oil needs to to be hot but not smoking otherwise the chicken and garlic may burn but the chicken inside could still be raw. Gently lower the chicken pieces in, including the garlicky bits (but discard any left over sauce). I had to do mine in two batches so the pan wasn’t crowded. Fry for around ten minutes, turning over half way. The chicken should be a dark golden brown and crispy. Drain onto kitchen paper,making sure you scoop out and sprinkle the crispy garlic bits over the top when serving. Serve with sweet chilli sauce.

Sunday, 16 November 2014

Tom Kha Gai (Galangal Chicken Soup)


As it’s getting to winter and getting pretty cold and foggy here in North Yorkshire it’s time to step up the comfort factor. Tom kha gai is a herbal chicken and mushroom soup that hits all the Thai flavour notes- sweet, sour, salty and spicy. It shouldn’t be too spicy and certainly shouldn’t be too sweet although as ever, with all Thai food, these can be customised to your particular preference. As it’s a soup the liquid should be quite thin, not thick like a curry sauce. This dish shouldn’t cause too many problems as most of the ingredients can be found in a regular supermarket.


For two- three bowls use:

  • 2 skinless, trimmed chicken thighs/ 1 breast- chopped small

  • 1 small red onion, cut into chunky wedges

  • a big handful of oyster mushrooms, ripped up

  • 2 tomatoes, cut into chunky wedges

  • 200ml of  coconut milk

  • 200ml of water

  • a splash of chicken stock/ 1 stock cube

  • some red small chillies (I used 3) cut into a few pieces

  • a handful of fresh coriander leaves

  • a small chunk of galangal, cut into thin slices

  • 6 kaffir lime leaves, ripped (use lime peel if you can’t get leaves)

  • 2 stalks of lemongrass, trimmed, outer layer removed and cut into a few pieces and lightly bashed.

  • juice of 1-2 limes

  • a splash of fish sauce (nam pla)

  • optional chilli flakes for serving

Start by heating the coconut milk up gently in a pan and throw in the tough herbs- galangal, lemongrass, lime leaves and chillies. Once it’s hot, cook for about five minutes and add the chicken, poaching in the soup. Give this about 5 minutes, making sure at all times the coconut milk doesn’t boil. Add in the water and stock, onions and mushrooms. Cook for another 5 minutes, watching it so it doesn’t boil and stirring gently from time to time. Next add the tomatoes and a splash of fish sauce. Give it just five minutes more and while it has it’s last few minutes on the stove, squeeze the lime juice equally amongst the serving bowls. Divide the soup out on top of the juice and top each bowl with a few coriander sprigs and (optionally) some chilli flakes. When eating it’s up to you if you want to eat the tougher herbs; I tend to eat it all apart from the lemongrass!

Tuesday, 4 November 2014

Khao Soi (Curried Noodles)


This is another new favourite- my husband has requested this as a regular in our house.


In other news (and I’ll come back to the noodles very soon) I’m soon to be relocating back to my home city in Lancashire :) which means I’ll no longer be stuck in a small town in North Yorkshire! Sadly this will mean an end to my Thai food stock up trips to Nong Fern in Leeds but does mean I have two Asian supermarkets on my doorstep! The very good news is, the recipes will all be continuing!


Back to the Khao Soi- for once I wasn’t lazy and did make the simple curry paste from scratch- you could use a yellow or red Thai curry paste but it’s worth giving this one a go as it’s a bit different due to the roasting process. Khao soi is a northern Thai dish and is said to take a lot of it’s influence from nearby Burma. It’s a creamy, rich satisfying noodles dish, not too hot at all.


For two people use:


  • 2 skinless small chicken breasts/ 4 thighs, chopped into small pieces

  • 400ml coconut milk

  • 100ml water

  • a big splash of fish sauce (nam pla)

  • a big pinch of sugar

  • 2 sachets of egg (yellow) noodles

  • vegetable oil for deep frying

  • a lime, halved

For the curry paste, use:


  • 4 cloves of garlic

  • 2 stalks of lemongrass (ends trimmed and outer layer peeled off)

  • 6 lime leaves

  • a finger sized piece of fresh tumeric

  • a finger sized piece of ginger

  • 3 red chillies

  • a small handful of coriander roots or stalks
  • 4 red shallots/ half a red onion cut into a few bits

  • 4 brown/ 10 white cardamom pods

  • a small handful of coriander seeds


Start out by placing all the curry paste ingredients into a packet made from tin foil. Place this foil packet over a low-medium heat hob- I did this on electric, gas works best. Don’t let the foil packet sit for too long, keep it moving to stop the contents from burning. After 5 to ten minutes, take a look inside; there should be some charring and everything should have softened up. This provides a really nice smoky flavour to the paste. Pop everything into a pestle and mortar and pound, pound, pound away until you have a course paste. I cheated a bit after a while and transferred the pounded paste to a mini herb chopper, just to get it really fine. 


Once the paste is done, heat a wok and pour in the coconut milk. Let it sit for quite a while, until reduced by half and the oils are visible on the surface. Add in all the paste and stir fry for a few minutes until cooked down. Add in the water, fish sauce, sugar and chicken and let it cook for at least ten minutes, more if you like a thicker sauce.


While the curry is cooking, boil water for the noodles, cooking for as long as needed. In another small pan, heat the oil until hot. Take a few strands of cooked and well drained noodles at a time and gently drop them into the hot oil. They will fizzle and puff up instantly. Scoop them out, and drain on kitchen paper. 


Assembly time- place the drained noodles in the bottom of a serving bowl. Spoon over a ladle of the curry. Place some of the crispy deep fried noodles on top and finally squeeze over the lime juice.

Sunday, 26 October 2014

Gaeng Phed Gai (Red chicken curry)


I tend not to make too many coconut based curries, partly just because there’s so many other Thai dishes to make and red/ green curries crop up just about everywhere but since I was in the mood for one, and I hadn’t covered the recipe for it to date, saw no reason not to include it; there’s a reason it’s one of the most well known Thai dishes! I’ve mentioned it before in the post I did for Green curry http://iwishiwasinthailand.tumblr.com/day/2014/07/27/  but I prefer to use a thinner, less sweet sauce so use half coconut milk half water. By all means if you prefer a thicker, sweeter sauce, use all coconut milk.


For 4 small portions/ 3 big, use:

  • 2 small chicken breasts/ 4 skinless thighs, chopped into small cubes

  • 50g of red Thai curry paste- use a good one without unnecessary fillers such as Maesri or Mae Ploy

  • 200ml coconut milk (freeze the other half if using a tin)

  • 200ml water

  • mixed crunchy vegetables- I used a packet of pea aubergines, 8 baby corn, halved, a small tin of bamboo shoots and a small handful of green beans, trimmed and halved

  • 5 red chillies, chopped

  • a nobble of galangal, peeled and finely shredded

  • a big splash of fish sauce

  • a big pinch of sugar

  • 4/5 kaffir lime leaves, rolled into a cigar and finely shredded

  • half a packet of Bai Horapha leaves (Thai sweet basil)

  • small splash of vegetable oil for frying

Heat the oil in a wok and throw in the curry paste- many kudos if you’ve decided to make your own version (I’m just too lazy and I think the Thai branded versions are excellent). Stir fry the paste for about 30 seconds, making sure it doesn’t burn before adding the coconut milk. Keep stirring, and you should start to see some of the red oils on the top. After 5 minutes of so, add in the raw chicken- stir, and cook for about 5 minutes before adding in the water and tougher vegetables such as the pea aubergines and green beans. Give it another 5 minutes or so before adding in the rest of the veggies, fish sauce, galangal and sugar and cook for a final 5 minutes. When cooked, lightly stir through the sweet basil leaves, they don’t need any cooking as such and sprinkle over the shredded lime leaves and red chilli.

Wednesday, 22 October 2014

Gai Haw Bai Toey (Chicken Wrapped in Pandan Leaf)


Totally fallen in love with these little guys! I’ve had them once or twice before in Thai restaurants but they always seemed dried out and kind of bland- not so with this recipe. Pandan (or screwpine) is basically just a stiff spiky leaved South East Asian plant that has a slightly perfumed/ grassy flavour when fried. The leaves are just a wrapper, and are not meant to be eaten. I did make a pandan and coconut jelly with the spare leaves but that’s another story for another day….


for 2 people/ starters for 4, use:


  • two chicken breasts/ 4 thighs, trimmed of fat and cut into chunks bigger than bite size

  • a pack of pandan leaves (only available at Asian grocers), banana leaves are a good substitute.

  • a big hefty shake of oyster sauce

  • a big splash of light soy sauce

  • a small splash of sesame oil

  • a small splash of Shaoxing rice wine/ sherry

  • a pinch of sugar

  • a small handful of fresh coriander, roughly torn

  • 4 cloves garlic, peeled

  • a big pinch of black pepper

  • vegetable oil for frying


Pound up the coriander into a paste, add in the garlic cloves and black pepper until you have a reasonably fine paste. Throw this into a bowl and on top, add the four sauces and sugar. Put into this mix the chunks of chicken and give everything a good stir through. Leave to marinade for one hour, making the dipping sauce in the meantime.


For the dipping sauce, gently warm through…


  • a big splash of light soy sauce

  • a small splash of dark soy sauce

  • a small splash of water

  • a finely chopped red chilli

  • a sprinkle of sesame seeds


There are basically two ways to wrap up your chicken in the pandan leaves. The easiest way is to take half a strip and just keep wrapping it round the meat, pinning in place with a cocktail stick. The other way is to use the top halves of two leaves ( the pointed tip end); hold these in a V shape, with the base of one leaf on top of the other. Place the chicken ontop of the intersection of the leaves folding left over, then right over, alternating until you reach the end and everything is encased in a little parcel. See my photo above for both types of wrapping.


Set up a steamer/ colander over boiling water and steam the pandan parcels for 10 minutes. They’ll now be cooked but look pasty and dull. Fill the bottom on a wok with oil and now fry them for 5 minutes or so until the leaves are crisp and the chicken has taken on a golden brown colour.


Unwrap and discard the leaves (they’re not meant to be eaten) and dip into the sauce.

Thursday, 16 October 2014

Yam Hua Plee Gai (Banana Blossom & Chicken Salad)

image


This was one tasty salad- a bit like my favourite Som Tam, it’s kind of an addictive salad- fresh, crunchy, nutty, salty, hot, sweet and sour- it’s pretty much perfect! I think there must be a lot of Vietnamese/ Cambodian influence in this salad as it’s so similar in style- lots of mint and crunchy raw veggies. The banana blossom although looking beautiful isn’t really essential and could easily be substituted with white cabbage.


For two portions use:


  • two chicken portions ( thigh/drumsticks or breasts)

  • half a red onion, shredded

  • 1 banana blossom or ¼ of a white cabbage

  • white (wine) vinegar if using a banana blossom

  • a small handful of peanuts

  • 1 lemongrass stalk, trimmed, outer layer peeled off, finely chopped

  • a few kaffir lime leaves (optional) ripped into small bits

  • a big handful of mint leaves

  • 4 cloves of garlic, 2 finely chopped

  • 2 red chillies, roughly chopped

  • a teaspoon or so of chilli flakes

  • juice of 1 lime

  • big splash of fish sauce

  • a big pinch of sugar

  • a small amount of veg oil for frying


Start by poaching your chicken, plain water is fine, until they are fully cooked, 30-40 minutes should do it.


While this is going on, prepare the banana blossom if you are using one. In a bowl fill it half way with cold water and add a hefty splash of white vinegar- this will stop the banana blossom oxidising and going brown after its peeled. Start by peeling off all the purple outer petals, stopping when you get to the creamy white ones. Trim the stalk and tip and cut the whole thing in half lengthways. Place the flat side down on your board and slice thinly widthways. Get the sliced blossom submerged in the vinegary water straight away. 


Make the dressing- pound up the chillies and 2 whole garlic cloves until you have a rough paste. Add in the sugar, pound, then stir in the fish sauce and lime juice. Leave this to one side for now.


The frying bit- add a small amount of oil to a wok or frying pan and heat quite high. Fry the red onion until it starts to get a bit crispy, throw in the chopped garlic, lemongrass, peanuts and lime leaves for the last minute or so and then turn the whole thing out into a bowl. 


Once the chicken’s cooked, leave it to cool for a while before shredding all the meat. Mix this with the cooked ingredients, mint leaves, chilli flakes and (drained) banana blossom. Tip the dressing over and use your hands to give everything a good stir though. If you’ve used them, serve the salad on top of the banana petals.

Monday, 25 August 2014

Gaeng Massaman Gai (Muslim Curry with Chicken)


The name reflects this curry’s historic roots. Massaman or Matsaman is a deviation of the word Muslim and this dish borrows it’s flavours from southern Thailand and Malaysian cuisine where the local population is of a majority Muslim faith. That said, you won’t find pork in this curry, unlike many other Thai dishes from central or Northern Thailand where the majority faith is Buddhism and pork is widely eaten. Massaman curries are easy to make, have very few ingredients, are creamy, salty, a little sweet and are very mild due to the lack of chillies.


For 3 big or 4 smaller portions, use:


  • 2 big chicken breasts, cubed

  • 2 big potatoes, cut in large chunks

  • 1 onion, cut into large pieces

  • a small handful of peanuts (lightly salted or unsalted)

  • 50g Massaman curry paste (I’ve used Aroy- D brand but some supermarkets sell their own Massaman pastes)

  • 1 can (400ml) coconut milk

  • 1 cup water (maybe more, maybe less depending how thin you want your curry to be)

  • a big pinch sugar

  • a big splash of tamarind concentrate (use more lime juice if you don’t have access to an Asian supermarket for this) 

  • a big splash of fish sauce (nam pla)

  • a lime for squeezing over


Boil a pan of water, when boiling add the cubed potatoes and par boil for just 5 minutes. Drain and save them for later. In the now empty pan, heat on high and add the coconut cream- the thick part of the contents of the tin, throw in the curry paste and stir to mix through, you should start to see the red oils separate. When this happens, add the chicken and stir for a moment before adding the thin coconut milk, stir and turn the heat down to a simmer. Add the water. I prefer a thinner curry so use almost equal amounts of water and coconut milk. If you prefer a thicker curry, use less or even no water. Let this cook for 10 minutes before adding the onions and potatoes. Add in the fish sauce, sugar and if you have it, the tamarind (or lime juice). After another 5 minutes it should be ready. Stir half the peanuts through and sprinkle the other half over the top of the curry when you dish it out. Squeeze more lime over and serve with hot fluffy white rice.

Sunday, 27 July 2014

Gaeng Khiao Wan Gai (Sweet green chicken curry)


It’s a toss up between this and Pad Thai as to the most widely eaten dish found in Thai restaurants worldwide. It’s just as popular in Thailand, particularly with tourists and it’s a recognisable and very tasty dish. Strangely though, despite it being the Thai dish I’ve been cooking the longest, it’s also the one that has taken me the longest to get right. Like any Thai recipe, there’s a lot of personal preferences involved but I like my green curry with a thin sauce, not too sweet, pretty hot and with an equal balance of salty and sour.


For three portions, use:


  • a small amount of vegetable oil, for frying

  • two medium chicken breast, finely sliced

  • a handful of bamboo shoots, cut into matchsticks

  • a handful of green beans, trimmed and cut into two

  • your choice of extra veggies- I’ve used carrots cut into rounds, some pea aubergines and some water chestnuts that were leftover

  • a big handful of Thai basil, or use tarragon

  • 200ml of coconut milk (it freezes well if you end up buying a 400ml can)

  • 50g of Thai green curry paste (If you can get it, use Mae Ploy brand which is excellent)

  • 100ml- 200ml of water

  • a big splash of fish sauce (nam pla) all supermarkets have it

  • a big pinch of sugar

  • 3 or 4 red chillies,cut into slivers

  • 4 or 5 kaffir lime leaves (bigger Sainsburys sell them fresh and most other supermarkets sell them dried) rolled up in a cigar, and finely shredded 

  • a wedge of lime

Heat the oil in a wok and when it’s hot, add in the green curry paste, stir fry for just 30 seconds, otherwise it’ll burn before adding in the coconut milk. Stir and after a few minutes you start to see the oil separating from the sauce- this is a good thing! Add in half of the water, the fish sauce and sugar and the chicken. Stir and cook for 5 minutes or so until fully cooked before adding in the veggies. Cook these for five minutes more before having a taste; if you think it needs it, add more water, sugar and/or fish sauce. Once the curry is cooked, turn off the heat and stir through the kaffir lime leaves and Thai basil for a few seconds. Turn the curry out into a serving dish, top with the chilli slivers and squeeze over the wedge of lime.

Wednesday, 23 July 2014

Gai Yang & Nam Jim Jaew (Grilled chicken with dipping sauce)


Grilled meats are a Northern Thai speciality. Often, you’ll come across gai yang served alongside my favourite Som Tam (papaya salad) and Khao Niew (sticky rice). The dipping sauce is one of several Nam Jim sauces that are made in Thailand and at some point I’ll do a post just about sauces and condiments. Anyway, Nam Jim Jaew is the type of sauce that’s specific to grilled meats, there are several other varieties.


For 4 (snack) or 2 (main course) You’ll need:

  • 2 chicken breasts, trimmed of fat and each cut into 4 strips

  • 2 stalks lemongrass, top, bottom and outer layers peeled off and the rest very finely chopped (all the big supermarkets sell it fresh)

  • 6 cloves of garlic

  • a small handful of coriander stalks, or roots, chopped

  • a big splash of fish sauce (nam pla- an easy supermarket find)

  • a small splash of dark soy

  • a big pinch of sugar

  • a sprinkle of white (or black) pepper

In a pestle and mortar, bash up the lemongrass, garlic, coriander, pepper and sugar. Do it bit by bit if you need to. Add the rough paste to a bowl with the chicken. Pour on the soy and fish sauce and mix well. Leave it to marinade for as long as you can, ideally a few hours.


While marinading, make the Nam Jim Jaew sauce. You’ll need:

  • 1 level teaspoon of white rice

  • 4 red birds eye chillies

  • 2 cloves garlic

  • a few stalks and leaves of coriander, very finely chopped

  • a pinch of sugar

  • juice of 1 lime

  • a good splash of fish sauce

  • a very small splash of dark soy sauce

Start by dry frying the small amount of rice in a really hot wok or frying pan. When it’s toasted and light brown get it quickly into a pestle and mortar or it’ll burn. Grind it up into a fine powder and pour it aside for now. In the now empty pestle and mortar, bash up the chillies and garlic into a rough paste. Tip this into a small bowl along with the chopped coriander and sugar. Pour on the soy and fish sauces and finally stir through the powdered rice (known as Khao Khua) which will thicken the sauce slightly- if it’s over thick, add extra lime juice and fish sauce.


Back to the chicken- lay on a grill tray/ baking sheet and grill at 200 degrees/ 400f/ gas 6 and grill for about 5 minutes either side until really hot all the way through. Serve piled high alongside the dipping sauce.