Showing posts with label meat dishes. Show all posts

Thursday, 6 April 2017

Bami Haeng Bhet (Duck with Noodles)


Hello! It's been a long time since I've last posted anything on my blog. I guess I'd simply comes the point where I'd run out of of recipes to post, and was struggling for ideas. There has also been a distinct lack of travelling with life getting in the way and incredibly, a new baby shortly arriving in our household! So while I can still have the opportunity, I'm going to be doing a bit of posting for the time being. Interestingly for me, pregnancy hasn't diminished my love for Thai food (or any food!!) as I've had a great appetite, very little morning sickness and no odd cravings. I'm hoping that my baby girl will also eventually love these flavours as much as I do as she takes in and tastes tiny amounts of whatever I eat. Time will tell!

 To ease back into blogging, I've been bringing together collections of my old recipes on Tumblr and now have a few new ones to add as well.

This new recipe is called 'bami haeng bhet' which can simply be translated to duck with dry noodles. It's quite a simple dish, featuring a pan roasted duck breast, sliced over fresh egg noodles with a side of Asian green vegetables, or in this case, chard, with a rich sticky sauce drizzled over and crunchy bits of garlic and spring onion to top it off.

I really enjoy using fresh egg noodles, as they've a much better texture than the dried ones and are much less likely to clump together. By the way, don't be put off that the recipe suggests the noodles are dry, it just refers to the fact that they're not in a soup.


This recipe serves two

You'll Need:


  • Two duck breasts, with skin, trimmed of excess flabby bits
  • A pack of fresh egg noodles (ba- mi), loosened
  • A large handful of your chosen Asian leafy green vegetables, roughly chopped- choi sum, pak choi etc. or in my case, rainbow chard as we grew it in our allotment
  • 4 cloves of garlic, chopped
  • two spring onions, chopped
  • vegetable oil for frying
For the sauce:

  • A big splash of light soy sauce
  • a small splash of oyster sauce
  • a small splash of water
  • a level dessertspoon of palm sugar (or light brown sugar)

Begin by getting a pan of water on to boil and set a steamer over it. 

Let's start off by making some crispy garlic, this gets sprinkled over the finished dish. Heat a generous splash of vegetable oil in a frying pan until reaching a medium heat but definitely not smoking or the garlic will burn. Pop in the garlic, moving it from time to time, letting it slowly sizzle and gently crisp and turn golden brown over a few minutes. Drain out with a slotted spoon onto absorbent kitchen paper.

Retaining the garlic flavoured oil and a medium heat, place the duck breasts skin side down in the pan. Press firmly down to keep the meat flat and help the fat to render out and cook for around ten minutes until the skin is browned and crisp. Flip over and cook on the meaty side for a further two- three minutes, then set to one side and rest. If there is an excessive amount of oil in the pan, drain some off but leave any brown and crispy bits for now.

Hopefully your pan of water is now boiling. Set your green veggies off to steam- giving them a few minutes. Your fresh egg noodles can go in the water but will only take around one minute to cook. Drain both and set them ready in serving bowls.

Finally, to make the sauce that will go over the duck and noodles, heat up the frying pan with the garlic/duck flavoured oil and when hot, add in the soy and oyster sauces, sugar and if needed, a splash of water to bring everything together; scrape and mix in any crispy pan residue and stir, heating for a minute or two; however- don't over- reduce as you'll want some sauce to get down to the noodles below.

Slice the rested duck, place on top of the noodles and pour over the sauce, sprinkling with the crispy garlic, fresh spring onions and in Thai style, any other seasonings you fancy, such as chilli flakes, vinegar, peanuts or a little more sugar.



Tuesday, 7 June 2016

Pad Woon Sen (Stir Fried Vermicelli Noodles)


Pad woon sen, a speedy stir-fry dish for when you don't know what else to cook!! Joking aside this is possibly one of the most versatile dishes you will find in the Thai repertoire. There is very little that can't be substituted or skipped. As long as you're frying a combo of meats and/or vegetables with fine mungbean glass (vermicelli) noodles, you can't go far wrong. There does seem to be a common theme of cabbage, beansprouts, tomatoes and Chinese celery but, whatever you have can go in. It's another cross over dish- very definitely exported from Chinese cuisine along the way.

                                                                           *

I also want to give you a heads up that I'm going to be away on holiday for a few weeks- sadly, no not Thailand (although it is exactly one year already since I was in Malaysia- I do miss it and would love to go back to Kuala Lumpur again one day). This time we're going to be in the USA. We've been quite a few times already and tend to do big road trips; two years ago it was the Deep South, this time it's New England.

For the next three weeks, I'll be travelling and eating my way around Boston, Cape Cod, the Hudson Valley, the Adirondacks, Vermont/ New Hampshire, Mt Desert Island, Portland and Salem. Hopefully  eating a LOT of fresh seafood, buffalo wings, popovers, pies etc. I am particularly looking forward to experiencing Boston's Chinatown; I hope to post from there.

If you've any recommendations- it doesn't need to be Thai/Asian food, I love all food- then I would be thrilled to hear from you. And now back to my version of Pad Woon Sen....

                                                                             *
Okay so this recipe will make plenty for 2 and still enough for 3

You'll need:

  • 2 sheets/nests of dried mungbean/glass vermicelli noodles (they're transparent)
  • A small bag (200-250g) of raw king prawns/shrimp
  • 2 small pork chops or steaks, fat trimmed off and cut into strips
  • 2 eggs, beaten
  • 1 carrot, peeled and cut into coins
  • About a 1/4 of a white cabbages, cut into large squares (cut a thin slice off one side, then chop)
  • 3 or 4 stalks of Chinese celery, chopped into large pieces. Regular celery leaves are great too
  • 3 or 4 spring onions, trimmed and cut into large pieces
  • 4 cloves of garlic, finely chopped
  • A big splash of oyster sauce
  • A big splash of light soy sauce
  • A small splash of dark soy sauce
  • A big pinch of sugar
  • A big punch of black pepper
  • Vegetable oil for frying

Soak your vermicelli noodles by submerging them in cold water for 10-15 minutes, breaking them up as they soften. Drain and keep handy.

Heat a wok up until very hot, almost smoking and add in the oil, swirling to coat the base. Throw in the pork and stir fry for 1 minute, until mostly cooked through. Add in the raw prawns and stir fry for a further minute until they've mostly turned pink. If by any chance you're using pre-cooked prawns, add them in later (at the point that the celery and spring onions go in).

Next in goes the garlic, just toss it very lightly for a few seconds before adding in the carrot and cabbage, stir frying for around 1 minute. Now shove all these ingredients to one side of the wok, leaving them for a moment and pour the beaten egg into the empty side. Let the egg start to cook before lightly scrambling it before letting it set again. Repeat the setting scrambling until it's 90% cooked before mixing all the ingredients back together again, making sure the egg's well distributed.

Now throw the celery and spring onions into the pan, stir fry them for minute before adding in the noodles, 3 sauces, pepper and sugar. Stir well,the sauces will soften and darken the noodles and mix all the ingredients today. Try and let the noodles stick to the base of the wok a bit; it'll give you some nice crunchy bits. Cook for a final minute or two and serve.


Thursday, 26 May 2016

Kai Jeow Moo Saab (Fluffy Omelette with Pork Mince)


After cooking some fairly elaborate dishes over the last few weeks I thought a change to something really easy would be nice and made a simple fluffy Thai omelette.

I'm also still getting used to using my new carbon steel wok. It was a very welcome Christmas present but due to the amount of time needed and smoke created in order to season a new wok I've waited until it was a bit warmer and I could have the doors and windows right open! About a month in with my new wok and I love it, I can use my metal food turner with it and it already it's pretty much non-stick.

Back to omelettes...

Thai omelettes are a lot fluffier, a bit crispier and a little more unhealthy but other than that, they're still very straightforward and ready in less than 5 minutes.

For 1 omelette you need:

  • 2 large or 3 medium eggs
  • a very small splash of fish sauce
  • a very small splash of light soy sauce
  • a big pinch of black pepper
  • 75g of pork mince
  • half a cup of vegetable oil

Beat your eggs in a bowl with the sauces and pepper. Add in the pork and mix well to break up.

Heat a wok on a high heat and when smoking, add in the vegetable oil, let it heat up almost until smoking again.

Tip your egg mixture into the hot oil from about 1ft above but please, be careful! This action will cause the omelette to instantly start puffing up around the edges. Use a spatula to allow oil to move all around the edges and let it cook, undisturbed for a couple minutes (the centre may still be raw- that's fine).

Use a wide spatula (or get a friend with a second spatula) to carefully flip over the omelette; any raw mixture is now underneath and will cook in the oil. Let the other side cook for a couple of minutes and get golden brown. 

When cooked, carefully lift out. Serve with Sriracha chilli sauce, white rice and something like pad pak bung fai daeng (Stir fried morning glory), one of my favourite vegetable dishes.


Wednesday, 18 May 2016

Karipap Gai (Chicken Curry Puff)


Today's post is a substantial hike in the difficulty levels! Normally I try and make dishes that are easy to follow and make but Karipaps (Curry Puffs) are particularly difficult, or the pastry is at least. As you might be able to see it's a multi-layer puff pastry that is folded in such a way that ends up with an open spiral-like finish. This is the first time I've ever tackled anything like this so it really was a challenge but with a bit of practise, hopefully you can manage it too.

The filling is a fairly simple chicken and potato curry-at least that part is easy to do!

The pastry involves making two lots of dough, both slightly different mixes.

For 8 curry puffs, you'll need:

For the Inner Dough:

  • 120g plain flour
  • 1/3 cup vegetable oil
For the Outer Dough:

  • 300g plain flour
  • 1/3 cup vegetable oil
  • 1/3 cup water (you may not need all of it)
  • big pinch salt
  • big pinch sugar
For the Curry Filling:

  • 4 small/2 medium potatoes, peeled, cut into 2 cm squared cubes and pre-boiled for 3-4 minutes
  • 2-3 chicken thighs, cut into 2 cm squared pieces
  • 1 small onions, finely chopped
  • 1 tablespoon mild curry powder
  • 1 teaspoon of chilli powder
  • 1 teaspoon turmeric powder
  • a big pinch salt
  • vegetable oil for frying

Start by making the filling, as it'll need to be cool by the time you make the doughs.

Heat a small splash of vegetable oil in a pan until hot, then fry the onions until softened. 

Add in the chicken pieces, frying until cooked; about 2-3 minutes. Pop in the spices and salt and mix well. 

Gently add in the cooked potato, stir everything well and cook for a couple minutes more. Leave to cool while you make the pastry...


Make the inner dough

Pour the oil into the flour, it'll quickly and easily make breadcrumbs and then with a little further squeezing and kneading will become a smooth, oily dough. Divide into 8 equal balls (each will be about golf ball size).

Make the outer dough

Put the sugar and salt into the flour, add the oil as before, using your fingertips to make 'breadcrumbs'- this will be a dry mix at this stage. Slowly add in the water bit by bit, kneading gently to bring the dough together. You do not want a dry crumbly dough, it needs to hold together so add enough water to make sure you've got a smooth, pliable dough that will hold itself together.

Divide the outer dough into 8 equal sized balls and use a rolling pin to roll them into a flat circle.

No need to leave the dough to rest, lets move straight on to the rolling....


Making the pastry...

Work on an oiled work surface or board to make life a lot easier for yourself.

Place a ball of the inner dough into the middle of a flat circle of outer dough and fold and squeeze the outer dough around the inner dough ball so it's fully encased. Repeat for the rest of the dough. You now have 8 enclosed dough balls.

Take one of the enclosed dough balls and roll it flat rolling only forwards and backwards- you want a long, narrow 0 shape to the dough, as thin as you can get it.
Loosening the dough from the work surface, roll it up like a cigar, rolling away from yourself (open rolled ends are to your left and right)

Pick up the rolled dough and turn it 90 degrees (an open rolled end is facing you). Use the rolling pin to roll out the dough, like we did at the beginning, into a long narrow 0 shape. Again, use your hands to roll it up like a cigar (or sausage roll!) pushing it away from you before turning it 90 degrees.

Rinse and repeat... 

Altogether I did 3 cycles of rolling out, cigar rolling and turning. As long as you do the same actions each time and turn the dough in the same direction you'll be fine.

On the final cigar roll, smooth the roll off, smoothing the ends into the dough as much as possible and gently manipulate into a more even roll. Cut this roll into 8 equal slices, leaving you with something resembling the picture above.

Give yourself a well deserved pat on the back!!

Filling & Cooking

Heat a deep fat fryer or heavy pan of vegetable oil while you start to fill the dough. Yes more oil, these are not healthy snacks!!

Take one of the dough slices, placed flat on the work surface and roll flat with the rolling pin straight down on top of the layers, again, aiming for an elongated '0' shape. As you roll, you'll see the layers start to stretch and open up. Aim to get the dough quite thin, about 5mm is ideal.

Lift up the rolled dough and place a tablespoon of the cooled curry filling into the inside, fold both halves of the dough together and pinch and twist the edges to seal it tightly.

Repeat with the remaining pastry and filling.

Cooking in batches, deep fry for 6-8 minutes until crispy and light brown.

Serve with pickled cucumber/chilli/shallot (known as ajaad- click for the recipe) to help cut through the rich pastry.

Fall into a heap!!


Thursday, 5 May 2016

Nam Nuang (Grilled Pork Fresh Spring Rolls)


So following on from last Sunday's post about fresh spring rolls, here's part two- the Vietnamese style 'nam nuang'. I was initially quite confused by the name; 'nam' meaning liquid/water/sauce in Thai. After a bit of nosing around I discovered that they are known as 'nem nuong in Vietnamese (nuong simply means grilled in Vietnamese and across a few borders, they have become Nam Nuang in Thailand. These spring rolls are a simplified version of the original but are no less tasty for it...

This recipes makes about 8 rolls; use:

  • 8 dried rice paper circles
  • A shallow dish of cold water

For the sausages:
  • 250g of pork mince
  • a heaped teaspoon of black pepper, ground finely
  • a small splash of soy sauce
  • a small splash of oyster sauce

For the sauce:
  • a very big splash of tamarind concentrate
  • a big splash of water
  • a small splash of fish sauce
  • a big pinch of sugar
  • a small handful of chopped peanuts
  • a small pinch of chilli flakes

And for filling the rolls a selection of:

  • shredded lettuce and/or whole baby leaves
  • mint leaves
  • fresh coriander
  • shredded cucumber
  • sliced red chillies

First make the sauce by heating the first four ingredients in a small pan, reducing down until the sauce takes on a thin caramel consistency. There should be a good balance of sweet, sour and savoury. Sprinkle over the chopped peanuts and chilli flakes. 

Next prepare all the herbs and vegetables and set out on a plate with the sauce.

Now comes the sausages- dead easy to make, just mix all four ingredients in a bowl by hand. Take a handful and shape into a chunky sausage shape (it should be at least a couple inches smaller than the width of your rice paper circles. Place the sausages on a foil lined tray and grill on a low-medium heat until fully cooked and browned (about 6-10 minutes).

With everything ready to serve, the rice paper comes last. Take a dried disc of rice paper and dunk it into the dish of water for about ten seconds before lifting out, turning over and dunking for ten seconds more. It should now feel fairly flexible. If not, and you still feel it will snap if you tried to fold it, dunk for a further ten seconds then shake off the excess water.
Place the damp rice paper sheet on a board (it will continue to soften and become gelatinous) and fill with your choice of veggies/herbs placed horizontally across the middle of the sheet. Place a sausage on top, drizzle over some of the sauce and roll up by folding the sides into the middles then roll up from bottom to top, using your fingers to hold all the ingredients inside the wrapper.

If you're feeling sociable, serve everything on a big platter and let your guests make and wrap their own nam nuangs!


Monday, 25 April 2016

Pad Horapha Moo Grob Gwang Tung Kai Dao (Deep Fried Pork with Sweet Basil and Choi Sum with a Fried Egg)


What's not to love, crispy sticky deep fried pork, a crispy but runny fried egg, fragrant anise flavoured basil and some crunchy fresh greens over rice. It's a quick (mostly unhealthy, yes) but very satisfying one plate meal. Speaking one one plate dishes or ahaan jan diew (lit. one dish food) in Thai, they're some of my favourite things to cook and exactly what I want to eat when I don't want to cook anything elaborate or time consuming. They're the classic type of food you expect to find for lunch at a street food stall (usually served on the omnipresent plastic pastel- coloured plate. By the way if you know of anywhere in the UK that sells those thick melamine plates used in South East Asia, do let me know, I've been after them for years!!

This recipe is in essence a combination of three of my earlier recipes- 

Pad Grapao Gai (Chicken fried with holy basil), Pad Horapha Bhet Yang (Roasted duck fried with sweet basil) and Moo Grob Pad Pak Got Shangai (deep fried pork fried with pak choi). It combines the best of everything in one dish.

For two portions use:

  • 300g of pork shoulder, rind and excess fat trimmed off, cut into 1 inch cubes
  • 2 eggs
  • a large double handful of choi sum (or pak choi/gai lan etc,) cut into 2 inch pieces
  • a handful of Thai sweet basil leaves
  • 3/4 small red chillies, roughly chopped
  • 4 cloves garlic, peeled
  • a big splash of oyster sauce
  • a big splash of light soy sauce
  • a small pinch of sugar
  • vegetable oil for deep frying and for stir frying
  • Freshly cooked rice
Boil water and get the rice cooking before starting.

Heat the deep frying oil and when hot, carefully drop in the pork. Deep fry until dark golden brown and crispy (roughly 6-7 minutes) before draining onto kitchen paper.

In a pestle a mortar, lightly pound the chopped chillies and garlic into to rough paste, leave for a moment.

Heat a splash of oil in a wok and when hot, throw in the garlic chilli paste, stir for a few seconds before adding in the crispy pork, stir frying for 20//30 seconds. Tip in the vegetables and stir fry for about 1 minute, no more as you want some crunch to be retained.

Pour in the sauces and pinch of sugar, coating everything well before turning off the heat and lightly toss through the sweet basil leaves.

Heat a separate frying pan/wok (or decant your stir fry into a dish) and keep warm somewhere while you quickly do the fried eggs. Heat a large splash of oil in a clean wok/ frying pan and when very hot crack in an egg, let the bottom get crispy and spoon hot oil over the yolk until it's reached your desired crispy/runniness. Briefly blot on kitchen paper.

Drain the rice, plate up with the stir fry and place the fried egg over the top. 

Jobs a good'un!


Tuesday, 19 April 2016

Gaeng Jued Woon Sen (Clear Broth with Vermicelli Noodles)


Yesterday I had a poorly sick husband and unfortunately even this soothing bowl of gaeng jued (plain or clear broth) didn't help; it did mean I got to take it to work for my lunch though!!! As this is such a nutritious, dare I say it- plain dish (and by plain, it's far from boring; it just doesn't have the usual variety of herbs, spices and chillies that usually feature in Thai food) I had been saving making it for the next time my husband was feeling under the weather, which doesn't happen very often so it's been on my to do list for ages now!

In this recipe the vegetables, not the meat are the main ingredients, it can easily become vegetarian or vegan by using a vegetable stock, and substituting the meatballs with more tofu and mushrooms. 

Those of you paying attention may wonder where the curry is; 'Gaeng' is the somewhat unspecific Thai word for a soupy sauce or stew, it just so happens that most dishes with 'gaeng' in the title (Gaeng Massaman, Gaeng Kari, Gaeng Kiew Wan etc.) are what we in the west traditionally lump under the generic term 'curry'. Gaeng Jued, fits much better in the 'stew' category.

That cleared up, here's the recipe; it's a versatile dish- as long as there's lots of vegetables, feel free to chop and change your veggies and proteins. It is quite a long list but as everything is just getting boiled up together in a pot, it's not too onerous.

For 2 big bowls use:


  • 200g pork mince
  • 6 shitake mushrooms (soaked in boiling water for 20 mins)
  • a small handful of Chinese jelly/wood mushrooms (soaked in boiling water for 20 mins)
  • a small tube of soft egg tofu, cut into slices
  • 1 carrot, peeled and sliced
  • 5 leaves of Chinese cabbage, cut into large chunks
  • 4 spring onions, cut into chunky slivers
  • a good handful of coriander, stalks separated from leaves
  • 1 nest of vermicelli (cornstarch/mungbean) noodles (soaked in boiling water for 10 mins)
  • 500ml of pork stock
  • 2 lemongrass stalks, lightly bashed
  • vegetable trimmings (carrot peelings, spring onion trimmings, a celery stick
  • a teaspoon of black pepper
  • 3 cloves garlic, peeled
  • a small splash of fish sauce

Start off by making your stock [I admit I had a head start as I already had some concentrated pork stock in the freezer that I had left from another recipe. I added 500 ml of water to the jelly stock to make it liquid again.]

To make the stock even more flavoursome add the trimmings of carrot, spring onion, coriander stalks (reserving the leaves for later) and a bit of celery, plus the lemongrass stalks into a large pot and cook over a low heat for around an hour, topping up with water if it gets too low.

While the stock is cooking make the meatball mixture. First pound up half of the coriander leaves, garlic and black pepper into a smooth paste. Mix this through the mince with the splash of fish sauce. Leave to one side for later.

After an hour, use a strainer to scoop out and discard all the solids, leaving behind a rich light brown clear broth. You still need about 500ml of liquid.

With all ingredients prepared and ready to go, heat the broth over a medium heat. Pop in the carrots and let them soften for about 5 minutes before adding both mushroom (sliced if they are large) for a further 5 minutes. Next in goes the noodles (loosen them in the broth) and the Chinese cabbage, cooking for a minute.

Grab the meatball mixture and use a large spoon to make egg shaped meatballs by pressing the mixture against the side of the bowl. Very carefully, push the mixture into the simmering broth; don't stir but flip them over after a couple minutes.

Finally slide in the tofu slices and heat through for a final minute.

Scoop a big ladleful of ingredients into a bowl along with plenty of broth, topping with a sprinkling of spring onions and some of the remaining coriander.

Wednesday, 13 April 2016

Khao Pad Gaeng Kiew Wan (Green Curry Fried Rice)


After a rather busy last few days for me I'm ready to get back writing again, It's been my birthday weekend and we decided to take a trip down to see my parents near the south coast. We ended up having an impromptu night in Brighton, a full on day in London (involving a rapid trip to Brick Lane for Indian food supplies, amongst other things, a days walking in the Ashdown Forest and an equally full on day getting gooey-eyed at the amazing Bodleian Library and various colleges during a stop off in Oxford before the long drive back to Lancashire.

It's taken another couple of days getting back in the swing of things but I've finally found time to post this recipe for Khao Pad Gaeng Kiew Wan (Green curry fried rice). Now we're well into April it's now getting so much easier to take photos again as there is still daylight when I'm cooking, Long way it continue!

Like the last recipe I posted (Chicken stir fried with ginger) this is also a common restaurant dish found here in the UK. The red curry paste version is equally common. If you're not in the mood for sharing a bowl of curry or you need to take a portion for the next day, this fried rice version is definitely the easy option and dare I say it, preferable to the usual curry.

It still has all the same flavours that you would expect from a green curry, just in a neater package.

For two large portions use:

  • 2 cups of cooked, cold rice (ideally cooked yesterday)
  • a tablespoon of green curry paste (I use Mae Ploy brand)
  • 2/3 skinless chicken thighs, trimmed of fat and cut into cubes (i've also used up some pre-fried tofu pieces cut into small cubes)
  • your choice of crunchy vegetables, cut into inch long pieces- I've used baby corn, green beans and pea aubergines
  • a small handful of Thai sweet basil (or tarragon as a substitute- never Mediterranean basil!!)
  • 1/2 can of coconut milk
  • a big splash of fish sauce
  • a big pinch of sugar
  • 4/5 limes leaves, finely shredded
  • 4/5 small red chillies or 1 large, finely sliced
  • (optional) a few stalks of green peppercorns

In a large wok, heat the coconut milk until it bubbles, add in the green curry paste and stirring regularly, fry for a few minutes until you can see some oil separating.

Pop in the chicken and cook in the sauce until nearly cooked (2/3 minutes). 

Add in the seasonings- lime leaf, sugar, fish sauce, then the crunchy vegetables, cook for 3/4 minutes until they lose their rawness but not soft.

It should still resemble a very thick green curry at this stage- now tip in the rice and gently mix so everything gets well coated in the sauce. there will no longer be any obvious sauce.

Mix through the basil leaves, chillies and (if using) green peppercorns. Sprinkle over any remaining chillies, shreds of lime leaf or Thai basil for decoration.


Wednesday, 6 April 2016

Gai Pad King (Chicken Fried with Ginger)


This ubiquitous dish is found on every Thai restaurant menu up and down the country (UK), it's one of those dishes that gets overlooked in favour of something more exotic, spicier and perhaps ''more traditionally" Thai. However, it's one of the healthiest stir fries out there with lightly cooked crunchy vegetables, low fat- high protein chicken and mushrooms and immune boosting ginger and chillies.

The ginger is used as a vegetable meaning this stir fry is full of fragrant and peppery ginger flavours. Easy to make, very quick to cook, colour and packed with flavour, it made a great weekday dinner.

For two people use:

  • two small chicken breasts, cubed
  • 1 small onion, cut in slivers
  • 3/4 spring onions, cut in inch long pieces
  • a large piece of ginger, peeled (2-3 inches long) and cut into thin slivers
  • a handful of Chinese wood/jelly ear mushrooms, soaked in hot water until soft then drained and cut into strips
  • 3 cloves garlic, peeled and finely chopped
  • 3 small red chillies, chopped
  • a pinch of sugar
  • a big splash of light soy sauce
  • a big splash of oyster sauce
  • a small splash of fish sauce
  • a small splash of vegetable oil for frying
Get the oil heated up in a wok until it's nice and hot, throw in the onion and stir fry, letting it get some colour. Next in goes the chicken, stir frying for a couple of minutes until it's white and mostly cooked through. Add the garlic and spring onions next, giving them a quick turn in the wok. Now add in the mushrooms, ginger and chillies and mix well.

Finally add the sugar and three sauces, toss everything to get it well coated and serve- it shouldn't take more than five minutes to cook.


Thursday, 31 March 2016

Moo Hong (Stewed Pork)


I've been looking forward to making this sticky, sweet braised pork dish for a while now and it did not disappoint. Moo Hong belongs to a family of similar Chinese influenced, dark coloured stews that also includes khao kha moo (stewed pork leg) and moo paloe (pork braised with eggs). They all share some common ingredients: soy sauce, star anise, long cooking time and fatty cuts of pork but it's down to the consistency and what they're served with that makes for some subtle differences.

Moo Hong uses large chunks of belly pork and is cooked down until you're left with a rich, peppery, sweet and sticky sauce and meat that is soft and unctuous. Although it needs just over an hour to cook it's very easy to make.


For two large portions use:


  • 400g of pork belly, rind removed and cut into inch square pieces. Try to find a piece that is fairly even in thickness and has a good meat/fat ratio
  • half a bulb garlic, peeled
  • a dessert spoon of black peppercorns
  • a small handful of coriander roots or stalks (roots seem impossible to find in the UK)
  • a golf ball size chunk of palm (or light brown) sugar
  • 3 star anise
  • a big splash of oyster sauce
  • a big splash of light soy sauce
  • a big splash of dark sweet soy sauce (I use Indonesian kecap manis)
  • 2-3 cups of water (you may need a bit more)
  • small splash of oil for frying

Make a well blended paste by bashing the black pepper, palm sugar, garlic and coriander in a mortar; by adding the harder ingredients first and adding the softer ones last you should end up with a fairly smooth paste.

Heat a splash of vegetable oil in a deep pan until medium hot. Carefully add in the cubed pork belly and fry for 3-4 minutes until some of the fat has rendered out and the pork is lightly browned. Pour off the excess fat from the pan (there'll be plenty in the dish as the pork cooks down).

Pop in the spice paste and stir well for a moment or two; the sugar in the paste will make the pork sticky but be careful not to let it sit and burn. 

Pour hot water over to just cover the pork then add in the rest of the ingredients (sauces and star anise). The sauce will be dark but very thin. Pop on a lid and lower the heat to a gentle simmer, let the pork reduce and cook down for around 75-90 minutes. Check it and stir gently every now and again, making sure there's still enough liquid; top up with a little water if need be.

The final sauce should be thick and sticky (of a honey- like consistency). Serve with freshly cooked rice and some extra coriander.

Monday, 21 March 2016

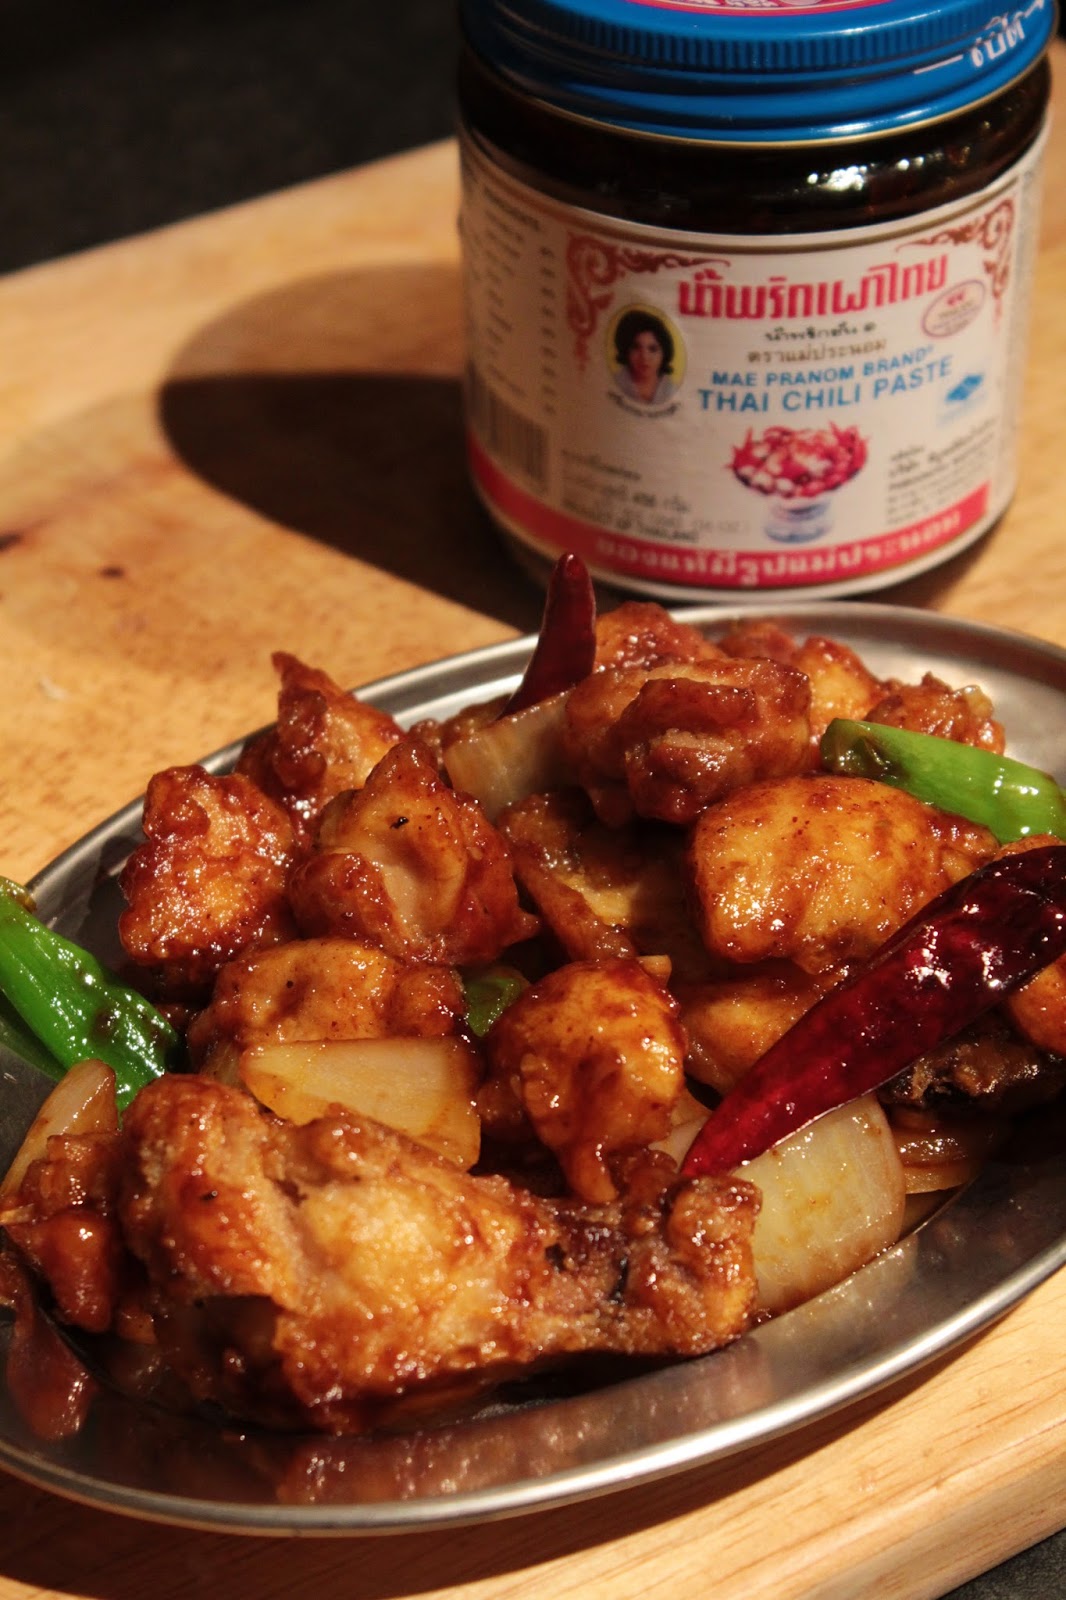
Gai Tod Pad Nam Prik Pao (Fried Chicken Stir Fried with Roasted Chilli Paste)


It's very rare these days that we would ever buy a takeaway, I've just had way too many identical oil drenched, msg ridden, jam-like, tummy ache laden meals to ever optionally order one then pay through the nose for the privileged. however that's not to say I eat healthy all the time. Like most, I occasionally like deep fried food, I just like my salt, sugar and fat in reasonable amounts and I think takeaway places (by and large) rely on pre made cheap fixes.

Ranting over, when I do want something takeaway like, I'd much rather make it myself, lets face it, as long as you have the ingredients in, you can be eating this quicker than it would take for a takeaway to be delivered. I guarantee this crunchy, spicy, sticky stir fry will satisfy all your takeaway urges!! It differs quite substantially from all the other English written versions of gai tod nam prik pao, this is taken directly from a Thai recipe and is the real thing!

As an added bonus, it's a 2 in 1 dish. If you just want the chicken as a starter/snack, use wings and forgo the vegetables. If it's a whole meal, keep the veggies in and serve with rice.

For the stir fry version for two people use all the ingredients:
For the chicken wing snack version use just the ingredients with a * next to them
  • 4 large chicken thigh fillets, skinned and cut into large cubes or 10 wings, jointed*
  • 1 large onion, peeled and cut into large chunks
  • 2 spring onions, kept in large chunks
  • 4 cloves garlic, peeled and finely chopped
  • a small handful of dried red chillies
  • a heaped dessert spoon of roasted chilli paste (nam prik pao)*
  • a big splash of light soy sauce*
  • a big splash of oyster sauce*
  • a big pinch of brown or palm sugar*
  • rice flour for dredging the chicken (plain flour is ok too, just not as light and crispy as rice)*
  • salt and pepper*
  • oil for deep frying and splash for stir frying*

Season the chicken with salt and pepper, then dredge it through the rice flour, shake off the excess.
Heat a deep fat fryer to 190 degree Celsius or use a heavy pan and watch it carefully.
Pop in the chicken pieces and cook until deep golden and crispy (3-5 mins). Drain on kitchen paper.

Heat a small splash of oil in a wok until hot then throw in the onions and stir fry on a high heat to get some colour. Throw in the dried chillies and garlic and stir fry for a few minutes. Throw in the spring onions and the drained fried chicken.

Add in the roasted chilli paste, coating the chicken well, then the remaining sauces and sugar. Everything should be nice and sticky.

* If you make the wings snack version make the sauce in a wok- heat a small splash of oil before adding the roasted chilli paste, sugar oyster sauce and soy sauce, blend well and put the fried chicken wings in, stirring well so everything is coated.


Thursday, 25 February 2016

Pad Kee Mao Moo (Drunk's Noodles with Pork)


I'm spending quite a bit of time at the moment re-visiting some of my earlier recipes, making some amendments where needed and updating the photos- some of my earlier attempts were not very pretty!! Pad Mee Mao (Drunk's noodles; so named as they're just right after a night's drinking- think spicy, greasy and quick to make- sooo much better than a nasty takeaway kebab!) hold a special place in my heart; it's the meal I had in Manchester's China town whilst on my hen do back in 2009 and I made a point then of learning the recipe.

There are a couple of changes to the other version of this recipe I made back in 2014- simply I've changed a few of the veggies and I now use the (optional) additions of green peppercorns and krachai (fingerroot) for added punchiness. I also think it's essential that you try to get fresh wide rice noodles (sen yai) for this dish- they're soft and stretchy but not chewy and suck up all the sauce, giving you a relatively dry dish. I've used pork rather than chicken but that's totally up to you, this is a very good candidate for a purely veggie version.

For 4 small/ 3 large portions use:

  • 2 pork steaks, trimmed of fat, cut into thin slices
  • 400g or thereabouts of fresh rice noodles, separated into individual strands
  • a handful of green beans, cut into inch long pieces
  • a carrot, peeled and sliced- I have a fancy gadget- a komkom that does the star shaped edges
  • 6-8 baby corn cobs, sliced into inch long pieces
  • a large bunch of sweet basil or holy basil, leaves ripped off stems
  • (optional) a tablespoon of green peppercorns
  • (optional) a few fingers of krachai (fingeroot), cut into thin slivers
  • 4 large cloves of garlic, peeled
  • 4 small red chillies
  • a very big splash of oyster sauce
  • a big splash of light soy sauce
  • a small splash of fish sauce
  • a small splash of dark soy sauce
  • a pinch of sugar
  • vegetable oil for frying

  • Lightly bash the garlic and red chillies into a rough paste
  • Heat a splash of oil in a wok until hot and very briefly fry the garlic/chilli paste
  • Throw in the pork (if using) and stir fry for a minute
  • Throw in the veggies and stir fry, tossing everything together
  • If using, throw in the green peppercorns and krachai and mix, cooking for 2 minutes
  • Put all the sauces and sugar in together, stir the ingredients through.
  • Put in all the noodles, mixing very well so they absorb the sauces and colour. Careful not to overcook- rice noodles can become stodgy very quickly- only cook as long as needed, around 1 minute.
  • Toss through the sweet basil leaves, sprinkling some over the top of the finished dish.


Saturday, 20 February 2016

Guay Tiew Nam Moo (Pork Noodle Soup)


There's nothing quite like slurping down a bowl of well seasoned noodles in a savoury broth and guay tiew nam (rice noodle soups) are perfect for that. They can be more or less whatever you want them to be using any kind of combinations of ingredients and seasonings. They are both hearty and filling but very healthy too, just right for a cold February evening. You'll find noodle soup sellers up and down Thailand on any available street corner working from restaurants, stalls and push carts and they're one of the easiest and most popular dishes to grab on the go.

For two big bowls use:

  • a small pack of fresh rice noodles (around 200g) (or 2 leaves of dried- prepared to pack instructions), loosened and separated into individual strands
  • 2 handfuls of beansprouts
  • 2 spring onions, finely sliced
  • 200g pork mince
  • 1 litre water
  • 2 handfuls of chicken bones, raw or cooked, meat on or off. I used chicken wing tips and will save the wings for another recipe.
  • half a bulb of garlic, 1 clove finely chopped, the rest just cut in half
  • a handful of coriander- half finely chopped, half just very roughly cut
  • a tablespoon of black pepper
  • a small splash of fish sauce
And for seasonings, choose from: chilli flakes, sugar, sliced chillies & garlic in vinegar or in fish sauce, lime wedges, peanuts, shredded coriander- it's your choice!


Place the broth ingredients: water, chicken bones, the roughly cut garlic and coriander and 3/4 of the black pepper in a large pan. Bring to the boil and simmer slowly for at least an hour for the flavour to develop.

While the broth cooks make the pork balls; mix mince, finely chopped garlic and coriander, the last 1/4 tablespoon of pepper and the fish sauce together in a bowl. Using your hands, form them into golf ball sized meatballs and leave to one side.

When the broth is ready, use a small sieve or strainer to scoop out and discard all the solids. Turn up the heat and drop in the rice noodles, not for long, around 20 seconds, much longer and they'll turn to mush. Scoop out and place in bowls along with a little broth so they don't clump together.

Into the simmering broth, gently place the pork balls which will cook quickly; around 3 minutes- cut one if half to check if need be. Scoop them out when cooked and place onto of the noodles.

Finally, put in the beansprouts and blanch for no more than 20 seconds so they don't lose their crunch. strain and place in the serving bowl before ladling  over a decent amount of broth to fill the bowl.

Sprinkle over the chopped spring onions and whatever seasoning you like. Feel free to slurp, it's good manners!!


Thursday, 11 February 2016

Gai Khua Kem (Salty Roast Chicken)


I've been making this for years now and had affectionately named it 'stinky chicken' due to the huge amount of garlic and chillies I use in it but only recently did I discover it is actually made in Thailand and even has a name; Gai Khua Kem (Salted Roast Chicken).

I eat this as a guilty pleasure usually over pork ribs or just with chicken wings but this version can best be described as a form of a 'hash', I guess. Anyway, it's a great way to use up a roast chicken.


For 4 small or 2 large portions, use:


  • A roast chicken (or part of)- I had used the breasts for another recipe so mine was mostly comprised of leg, crispy skin, wings and some spare bits from underneath! I chopped the roasted chicken into varying size bits, keeping some on the bone. This allows for a range of textures in the final dish.
  • A whole bulb of garlic, peeled and finely chopped
  • 3-5 hot Thai chillies, or more if you wish
  • 4 spring onions, finely sliced
  • A small splash of oyster sauce
  • A small splash of light soy sauce
  • A big pinch of salt
  • A teaspoonful of ground black pepper
  • A large splash of vegetable oil for frying

Heat the oil in the wok to a low/medium temperature. Add in all the chopped garlic and gently fry, stirring from time to time for 3-5 minutes over a fairly low temp until the garlic is a light brown and crispy. Scoop out and drain on kitchen paper, leave the garlic oil in the wok.

Turn up the heat on the garlicky oil and pop in the chopped chicken, Toss the chicken every now and then to allow crispy bits to develop. Fry for around 5 minutes so the chicken has time to get some colour and crisp.

Throw in the salt and pepper and mix well. Pour in the oyster and soy sauces and stir. Cook until the liquid has evaporated and the sauces have coated the meat well (about 2 minutes).

Next fling in the chillies, stir, then the crispy garlic, stir again and lastly, the spring onion.

Serve with some fluffy white rice.


Saturday, 30 January 2016

Gaeng Pa Moo (Pork Jungle Curry)


Like any recipe, over time you make amendments and adaptations, you find better ways to make a dish or variety of ingredients that have a better 'fit' and are truer to the authentic version of a dish.

This is one such recipe- way, way back in June 2014, jungle curry was one of the first recipes I put up on my blog- click here for beef jungle curry. However, despite being my favourite type of Thai curry, it was always one I felt I couldn't quite do justice to and wasn't as good as I wanted it to be. Over the last couple of years I've been fiddling with both the way the curry is cooked and the ingredients. 

Jungle curry, is a northern Thai curry, heavy on the vegetables, typically one of the hotter Thai curries and is made without coconut milk. If you like spicy hot, herbal flavours with lots of crunchy textures, you'll love Gaeng Pa. It's very easy to do. It's also easily adaptable to be a vegetarian dish- just add more of the meaty king oyster mushrooms and substitute the fish sauce for a big pinch of salt.

So may I present the upgraded- Gaeng Pa Moo (Pork jungle curry)...

This make four portions:

  • 300g of lean pork, sliced thinly
  • 5 baby corn cobs, cut into chunks
  • a small handful of green beans, cut into chunks
  • a large handful bamboo shoots, drained and rinsed
  • 2 king oyster mushrooms, cut into wedges
  • a large handful of pea aubergines/eggplants
  • a large red chilli, sliced
  • 3 fingers of krachai (finger root), finely shredded
  • a tablespoon of green peppercorns
  • a handful of holy basil (or sweet basil- but NOT Mediterranean basil!!)
  • a few kaffir lime leaves, ripped into small pieces
  • a large tablespoon of red curry paste (I use Mae Ploy brand)
  • 300ml of meat stock
  • a small splash of fish sauce
  • a small pinch of palm sugar (or light brown sugar)

  • Heat the stock in a pan (no wok needed for this recipe) until simmering. Add in the pork; it's thinly sliced so will cook quickly, in around 2 minutes. 
  • Add in the red curry paste and stir until thoroughly mixed into the stock. 
  • Add in the lime leaves and krachai strips, which will start to infuse into the broth. 
  • Next pop in the chunkier vegetables; green beans, pea aubergines, baby corn cobs and bamboo shoots, let them cook down for a few minutes then add in the king oyster mushrooms, green peppercorns, sugar and fish sauce. 
  • Cook for a few more minutes, stirring every so often; the vegetables should still retain some crunch. 
  • Just before serving, stir in the basil and chilli slices and serve with rice.


Sunday, 29 November 2015

Moo Ping, Som Tam & Khao Nieow (Grilled Pork Skewers, Papaya Salad & Sticky Rice)


If I was to ever find myself on death row and had to pick a final meal, it would be this. Everything about these three relatively simple components equals complete perfection. Ever so slightly charred, grilled pork skewers (moo ping), juicy and rich with garlic and black pepper with a hint of coconut. My long time favourite, som tam (papaya salad) with it's addictive crunch and astringent sour and hot flavours and to round the whole thing off and soak up all the flavours; sticky rice (khao niew) eaten by hand. It's no wonder they're regularly found in this combined set in Thailand.

Isaan (or north eastern Thai) food is for me the pinnacle of Thai food. The use of fresh herbs and strong pungent flavours, paired with grilled meats, salads and less use of creamy/soupy based dishes equates to food heaven for me.

Doing these dishes also gave me chance to try out and show off some of my new kitchenware- the large terracotta mortar and wooden pestle (informally known as a pokpok) used for gently bashing ingredients- ideal for som tam and the woven sticky rice holder- which I lined with cling film before putting the rice in. It keeps the rice warm and finished off the cooking so the rice is the proper consistency at serving.

For the moo ping skewers (this makes 6 large) use:


  • 3 pork steaks (ideally with some fat, though cut off any large rinds), cut into thin pieces
  • a small handful of coriander stalks or roots
  • a teaspoon of black pepper
  • 4 garlic cloves, peeled
  • a big splash of oyster sauce
  • a big splash of light soy sauce
  • a small splash of fish sauce
  • a big pinch of brown or palm sugar
  • 100ml of coconut cream (the thick part off the top of a can)
  • 6 bamboo skewers

In a mortar (a regular granite one, not the terracotta one above) bash up the black pepper, garlic and coriander stalks into a paste. Add this to a bowl along with the pork pieces. As a rough guide for the pork, I cut each steak into three strips lengthways and then thinly sliced each strip across (roughly 4mm wide.) I ended up with lots of small pieces. 
Into the bowl add in the three sauces and sugar, mix well and leave to marinade for around an hour.

In the meantime, soak the skewers in water (a tall flower vase works well!) so when you grill them they won't burn.

If you make a som tam salad or are doing sticky rice, now is the time to prepare the ingredients and get them ready.


Here's the link, Som Tam Recipe - it was the second ever recipe I did for this blog!

For the sticky rise it's best to just follow the recipe on the packet/ bag that you're using as it'll require a fairly specific quantity of water.

Back to the pork. Take the skewers out of the water and begin to thread the meat onto the stick; the meat strips should sit perpendicular (across) the skewer, not lengthways along it. Skewer it through the thinnest edge so that the maximum amount of meat is exposed to the grill and is easier to pull off when eating. Put plenty of meat on each skewer and pack it down; don't worry about the cooking- it's thin pieces so it will cook through.

Heat the grill medium-high and place onto a wire rack or as I did, on a baking tray with the edges of the bamboo skewers resting on either side of the tray so the meat sits clear of the bottom. The grilling takes about 10-15 minutes and twice during the cooking, take the skewers out and baste them with a light coating of the coconut cream. They're ready when they're a little smoky, have a little bit of light char and and golden brown.

Serve with the som tam and sticky rice- you'll thank me!


Wednesday, 25 November 2015

Khao Moo Tod Gratiem ( Rice with Crispy Pork & Garlic)


So along with the Yam Makeua Yang (grilled aubergine salad), I served this little beauty- khao moo tod gratiem- marinated pork, fried until crisp, along with freshly cooked rice, a runny fried egg and crispy fried garlic. This dish makes no pretense- it's totally unhealthy but as a treat, it's a cracker. You can find these classic one plate dishes served up at food carts up and down Thailand- they're popular for a reason!

For two people you'll need:


  • Two bowls of freshly cooked white rice
  • Two fried eggs (fry lightly and leave on kitchen paper in a warm oven)
  • Around 300g of lean pork shoulder, cubed
  • 3 cloves garlic
  • teaspoon of white peppercorn
  • small splash of fish sauce
  • big splash of soy sauce
  • big splash of oyster sauce
  • 1/2 bulb of peeled and chopped garlic
  • a big splash of vegetable oil for frying
  • token gesture sprig of coriander!
Use a mortar to pound up the peppercorns and the 3 cloves garlic into a rough paste. Put this with the cubed pork into a bowl and add in the three sauces. Leave to marinade for about an hour. 
In the meantime, fry the garlic. Heat the vegetable oil in a wok on a low-medium heat and gently fry the garlic until a light golden brown (takes 6-10 minutes). Then scoop out and drain onto kitchen paper, retaining the oil.

Next cook the rice and keep covered until ready to serve.

Finally, heat the flavoured garlic oil and when hot, carefully spoon in the pork. Fry on a medium heat until the pork is crisp and dark golden brown.

Plate up over the rice, pop on the fried egg and sprinkle over the crispy garlic. Serve with some green stuff!

Monday, 16 November 2015

Giew Nam (Dumpling Soup)


What could be better than fragrant pork stuffed wontons in a savoury broth topped with crispy fried garlic? I love this recipe and it's a firm favourite in our house. It doesn't take as much time to make as you might expect and is just what you want on a dark wintery evening. There's a clear Chinese influence with this dish but with a subtle twist to make it firmly Thai. Enjoy slurping your way through your bowl of giew nam, just make sure there's enough for a second bowl!

For 4 bowls of giew nam use:

  • A pack of wonton dumpling skins (I buy them frozen but leave them to slowly defrost still sealed in their packet throughout the day)
  • around 300g of pork mince
  • a fist size chunk or thereabouts of napa cabbage, very finely chopped
  • 3 cloves garlic, finely chopped
  • a few springs, stalks and roots of coriander
  • a spoonful of oyster sauce
  • a small splash of soy sauce
  • a big pinch of black pepper
  • 3 spring onions, sliced finely
  • 300ml of chicken stock
  • half bulb garlic, cloves peeled and chopped finely
  • a big glug of vegetable oil for frying the garlic

Make a quick paste out of the 3 garlic cloves, coriander and black pepper and mix this well with the pork mince. Add in the oyster and soy sauce and then the chopped napa cabbage and mix into a smooth paste.

Take up a wonton skin and dipping your finger into a small cup of water, wet lightly around the edges of the skin. Place a walnut sized ball of the pork mixture in the middle and press the sides evenly together, sealing in the meat- if you want to be fancy, try pleating the edge! Leave them to one side for now...

Heat the vegetable oil in a small pan on a fairly low heat. Add in all of chopped half bulb of garlic- it should gently sizzle. Cooking it over a low flame will take about 5-6 minutes to turn the garlic crispy and light golden brown. Use a slotted spoon to scoop out the garlic and drain onto kitchen paper.

Heat a large pot of water until boiling and working in batches, gently place the prepared dumplings into the water. As they cook, they will rise to the surface. Three minutes should do it.

Scoop them out and place to one side on a large plate. Don't try and drain all the water off them- keeping them in some of the residual hot water will stop them sticking to the plate and each other.

Heat the chicken stock and when ready to serve, quickly heat the dumpling up in the stock for a couple of minutes before ladling out a helping of the broth with 8 or so dumplings in. Sprinkle over the chopped spring onions and a good helping of the crispy fried garlic. 

Don't forget to add chillies or rice vinegar if you would like and eat as the Thai's do with soup dishes- use a spoon for the broth and chopsticks for the noodles (or wontons in this case)


Wednesday, 11 November 2015

Gaeng Om Gai (Herbal Chicken Curry)


Gaeng Om is the ultimate meal if you are feeling under the weather, if you're eating light and fresh or it's dark, cold and raining outside. It's light but filling, fresh tasting but complex and is versatile and quick to make. It's also not exactly a curry (though it does start with a paste) and is more broth like so it can be eaten with rice or alone as a soup. Like other northern Thai dishes (jungle curry, hanglay/northern curry) it doesn't use any coconut milk.

For 3-4 portions, use:

  • 2 large lemongrass stalks, peeled and finely chopped
  • 4 shallots, peeled and chopped
  • 4 large garlic cloves, peeled and chopped
  • 3 red chillies, chopped
  • a chunk of galangal, finely chopped
  • a small handful of lime leaves, ripped up
  • a few dried red chillies
  • 2 small chicken breasts/ 4 thighs, trimmed of fat and sliced into thin pieces
  • a handful each of dill and Thai sweet basil
  • 3 spring onions, chopped in a few pieces
  • 3 or 4 shiitake mushrooms, stems removed and sliced
  • a large splash of fish sauce
  • 300ml of chicken stock
Start by making a paste of the first 5 ingredients by pounding them up in a mortar. It'll take some time (10-15) but stick with it and you should have a fairly smooth paste by the end of it.

Heat half the chicken stock in a large pan and add the paste, heat until fragrant and some of the rawness is cooked out. Next add the chicken and mushrooms and cook for around 10 minutes until the chicken is fully cooked. Next in goes the dried chillies, lime leaves and fish sauce and the remainder of the stock; the consistency you're looking for should be broth like, rather than curry sauce so add a little more water if needed, or reduce down if it's a bit too watery. When the gaeng om has reached the desired thickness, add in the spring onions and herbs... 

(The observant among you will notice I haven't used Thai basil but tarragon; unfortunately there was none to be found when I made my gaeng om and tarragon is the best substitute to my mind with its anise flavour- never mediterranean basil which so many UK restaurants resort to- ugh)...

Back to it- once the herbs and spring onions have gone in, you can turn off the heat and simply stir them through the broth, they'll wilt quickly. Serve either with rice or a big spoon and feel gaeng oms healthiness sink in!


Thursday, 5 November 2015

Ba Mee Moo Daeng (Red Pork & Egg Noodles)


If I'm honest, I've always been more of a fan of egg noodles than wide rice noodles which is unfortunate since rice noodles are much more common in Thai food than egg noodles which originate from China. So this Chinese influenced dish is one that makes me very happy. 

I took another trip through to Liverpool the other day and was excited to pick up a very long packet of fresh egg noodles in a Chinese wholesalers there so this dish NEEDED to be made! It's another classic street food dish and as ever, with all Thai street food and especially with noodles, it's fully expected that you will want to add your own flavourings to the finished dish. Just a note regarding the colour- I'm not a fan of artificial colouring and as such, the red on the pork is much more subtle than some luminous versions you can find that use food colouring to achieve a bright red shade.

For 4 portions, use:

  • 1 large pork tenderloin
  • 100ml of light soy sauce
  • 25ml of dark soy sauce
  • a big shake of Chinese 5 spice (ground fennel, cinnamon, cloves, szechuan pepper & star anise)
  • fresh egg noodles (hard to give a specific amount- use your judgement!)
  • 2 big handfuls of leafy/ crunchy green veg- choi sum, bok choi, pak choy etc.
  • 4 cloves of finely chopped garlic
  • 3 (or more) chopped red chillies
  • a big splash of rice vinegar (the clear sort)
  • a splash of fish sauce
  • a splash of vegetable oil
  • some sprigs of fresh coriander

Begin by marinating the pork loin in a bowl in the mix of light and dark soy and 5 spice. Let it marinate for an hour then lift the loin out, placing on a baking tray and cook in the oven at 160 degrees celsius for around 20 mins. Use your discretion, if you've used a very large large loin, it may take longer.

While the pork cooks make the sauce; mix the vinegar, fish sauce and chillies. Also make the garlic oil; heat the oil and when medium hot, fry off the chopped garlic- only lightly as it's more to flavour the oil. Get a large pan of water on the boil.

Back to the pork. Although not advised, I do prefer my pork to be slightly pink on the inside so if you want it fully cooked, allow 5-10 minutes more. Leave it to rest and cool down for a bit then cut the loin into equal slices- about  6-8mm is perfect if you want to be specific.

When the water's at boiling point, drop in the noodles- if you use fresh they won't take long- 2/3 minutes should do it. Quickly scoop them out of the water and toss the noodles in the garlic oil so they won't stick. Throw the green veggies into the leftover boiling water and blanch for a minute (no more) before draining.

Plate everything up- flavoured noodles, a few slices of pork, some of the vegetables and pour over a generous splash of the sauce. Give the noodles a good mix and eat alongside a few stalks of coriander.