Showing posts with label deep fried dishes. Show all posts

Thursday, 20 April 2017

Tod Mun Pla & Nam Prik Waan (Fried Fishcakes & A Sweet Chilli Sauce)


A good long while back I wrote a post about how to make Tod Mun Pla, whilst I was always happy with the flavour, I was never really happy with the texture; although good and crispy they didn't have that rubberiness or bounciness that is expected in a Thai fish cake. This has led over the last few years to a bit of experimentation with both the recipe and the method and I'm pleased to say that now I think I've finally conquered how to create the perfect bouncy fish cake. The recipe will stay pretty much the same as before except there is an addition of some baking powder and an egg is no longer needed but otherwise it remains the same recipe. The key difference is in the cooking and preparation method- chilled, boiled (yes- boiled!) then fried.

You'll just need a few additional tools to help create the fish cakes. I've also served them alongside a sweet and hot chilli sauce which is different from the cucumber pickle that was used last time, though you could use either or both as they both make a really nice accompaniment to the fish cakes.

For around 15 so fishcakes you'll need:
  • 2 fillets of skinless, boneless, firm white fish such as basa
  • About six green beans sliced very finely
  • A heaped tablespoon of red curry paste, I use Mae Ploy brand
  • A good splash of fish sauce
  • 4 or 5 kaffir lime leaves, rolled up into a cigar and shredded extremely finely
  • A large pinch of sugar
  • A heaped teaspoon of baking powder

And for the sauce you will need:

  • Two large red chillies, chopped (deseeded if you don't want it too spicy)
  • 4 cloves of garlic, chopped
  • A chunk of ginger peeled and chopped
  • Half a cup of tamarind puree
  • A golf ball sized piece of palm sugar
  • A pinch of salt
  • A small splash of the juice from a jar of pickled garlic
  • A level teaspoon of cornflour mixed into a thin paste with a little water

Begin by making the sauce by pureeing together the chillies, ginger and garlic cloves.
In a small pan over a low heat, melt the palm sugar with the half cup of tamarind puree, adding the splash of pickled garlic juice and mix well. When everything is dissolved, add in the chilli garlic and ginger puree along with the pinch of salt and let the mixture cook down for a few minutes and then finally stir in the corn flour blend just to thicken everything up. 
Once this is done put to one side until later. 

Now we move onto the fish cakes. Begin by blending all the fish in a food processor or blender until it's minced into a paste. Put in the sugar, red curry paste and fish sauce and blend again until it's as fine as you can make it. Using a spatula, mix in by hand the green beans and kaffir lime leaves and spread the mixture out thinly onto a plate, covering with cling film. Place the the plate into a freezer and allow it to cool down for 10 to 15 minutes; this will make sure that the mixture firms up and is it easier to work with. 

While the mixture is in the freezer, get a few items ready; bring a large pan of water up to a simmer and make sure you have a vinyl or latex glove handy (make sure it's a non-powdered glove). You'll also need a flat utensil such as a fish slice or a wok turner and a jug of cold water to hand. 

After taking your mixture out of the freezer; begin by popping on your glove and use a spoon to portion out a golf ball sized piece into your gloved hand. Dip your fish slice or wok turner into the jug of water and use it to flatten out and shape the ball of fish paste into a thin 1cm patty. As each patty is formed, again use the slice or turner to gently ease it off your hand and slide it into the pan of simmering water. Continue doing the same until all the mixture is used up and all the patties are simmering. You will notice as they cook they rise to the surface of the water. Make sure that they are fully cooked which won't take long, about four minutes or so and once they are done, scoop them out and let them dry on some kitchen paper for a moment or two. 

You can now heat up a frying pan with oil to the depth of about two centimetres and when hot, fry them for about 2 minutes on either side until dark golden and crisp. Boiling first has the added benefit of stopping the fishcakes from becoming greasy too.

Set along side the sauce you made earlier and you have the perfect bouncy Thai fish cake just like the restaurants



Friday, 8 July 2016

Holidays in New England


Hey Folks,

It's been a long time, over a month since I was last on here, I'm now getting caught up with work, jobs to do, got over the holiday jet lag etc. What a great trip- New England really is such as beautiful and diverse part of the USA, almost everyday there was a change of scenery- historic Boston, stunning wild Cape Cod with it's beautiful houses and gardens, sweeping river valleys, lush green mountains in the Adirondacks, laid back Portland and a rather quirky Salem. The sea and seafood in general was a major player in our diets- we had some amazing lobster at a place called Thurston's Lobster Pound on Mt Desert Island, Maine. As ever, I would kill to be able to get such fresh, tasty and affordable seafood here in the UK. I could almost imagine all the Thai recipes I could have used it in.

Not to worry, the one thing I always miss when travelling in either Europe or the US is the lack of spice. Last time we were travelling in the USA, we were in the far south east, being so near to Cuba and also lots of Mexican influences meant we weren't short of flavours and spices so on this trip we did make one or two excursions in order to get our taste buds going.

Thai however was not on the menu (per se) as at no point did we come across any Thai restaurants I would say that felt authentic and not the usual identical westernised versions.

We did however spend several hours in Chinatown in Boston; right as the day was getting going and just as Saturday evening was ramping up (and the city's Gay Pride event was winding down- what a fantastic atmosphere there was).

We ended up, at the recommendation of a Time Out article giving 'The Dumpling Cafe' (www.dumplingcafe.com) a whirl where their 'juicy pork dumplings' are particularly recommended.


We chased our juicy dumplings; which are bitten, slurped then topped with ginger with some pan fried dumplings (very much like Japanese gyoza) and some very garlicky stir fried morning glory.
Service was cool, brisk and the food was a little on the greasy side but the flavours were strong, punchy and the food was fresh and tasty.

A few days later we had travelled to Cape Cod where we spent our first full day in the beautiful Provincetown in the 'toe' of the peninsula. Of all the places on our trip that we visited, this was my favourite spot.

We did a bit of research and heard very good things about a place called 'The Canteen' (www.thecanteenptown.com) a busy, slightly hipster-ish place which served an eclectic mix of food and local craft beers. My eye was immediately draw to the Vietnamese cod banh mi sandwich and greedy thing that I am, to their intriguing house speciality; deep fried Brussels sprouts in fish sauce.


The cod banh mi was excellent and just what I was looking for but let me tell you something, those ugly looking crisped up sprouts were A-M-A-Z-I-N-G!! wow, so simple but I couldn't stop eating them- I wanted more! As far as I can tell, the crispy fried sprouts are simply tossed in a nam jim seafood sauce (fish sauce, lime juice, chilli, coriander and perhaps a pinch of sugar). with the local beer, the food went down a treat; do try them if you're visiting Cape Cod.

And so, normal life resumes once again, and as usual, I'm already thinking of where my next travels will take me....

Thursday, 26 May 2016

Kai Jeow Moo Saab (Fluffy Omelette with Pork Mince)


After cooking some fairly elaborate dishes over the last few weeks I thought a change to something really easy would be nice and made a simple fluffy Thai omelette.

I'm also still getting used to using my new carbon steel wok. It was a very welcome Christmas present but due to the amount of time needed and smoke created in order to season a new wok I've waited until it was a bit warmer and I could have the doors and windows right open! About a month in with my new wok and I love it, I can use my metal food turner with it and it already it's pretty much non-stick.

Back to omelettes...

Thai omelettes are a lot fluffier, a bit crispier and a little more unhealthy but other than that, they're still very straightforward and ready in less than 5 minutes.

For 1 omelette you need:

  • 2 large or 3 medium eggs
  • a very small splash of fish sauce
  • a very small splash of light soy sauce
  • a big pinch of black pepper
  • 75g of pork mince
  • half a cup of vegetable oil

Beat your eggs in a bowl with the sauces and pepper. Add in the pork and mix well to break up.

Heat a wok on a high heat and when smoking, add in the vegetable oil, let it heat up almost until smoking again.

Tip your egg mixture into the hot oil from about 1ft above but please, be careful! This action will cause the omelette to instantly start puffing up around the edges. Use a spatula to allow oil to move all around the edges and let it cook, undisturbed for a couple minutes (the centre may still be raw- that's fine).

Use a wide spatula (or get a friend with a second spatula) to carefully flip over the omelette; any raw mixture is now underneath and will cook in the oil. Let the other side cook for a couple of minutes and get golden brown. 

When cooked, carefully lift out. Serve with Sriracha chilli sauce, white rice and something like pad pak bung fai daeng (Stir fried morning glory), one of my favourite vegetable dishes.


Wednesday, 18 May 2016

Karipap Gai (Chicken Curry Puff)


Today's post is a substantial hike in the difficulty levels! Normally I try and make dishes that are easy to follow and make but Karipaps (Curry Puffs) are particularly difficult, or the pastry is at least. As you might be able to see it's a multi-layer puff pastry that is folded in such a way that ends up with an open spiral-like finish. This is the first time I've ever tackled anything like this so it really was a challenge but with a bit of practise, hopefully you can manage it too.

The filling is a fairly simple chicken and potato curry-at least that part is easy to do!

The pastry involves making two lots of dough, both slightly different mixes.

For 8 curry puffs, you'll need:

For the Inner Dough:

  • 120g plain flour
  • 1/3 cup vegetable oil
For the Outer Dough:

  • 300g plain flour
  • 1/3 cup vegetable oil
  • 1/3 cup water (you may not need all of it)
  • big pinch salt
  • big pinch sugar
For the Curry Filling:

  • 4 small/2 medium potatoes, peeled, cut into 2 cm squared cubes and pre-boiled for 3-4 minutes
  • 2-3 chicken thighs, cut into 2 cm squared pieces
  • 1 small onions, finely chopped
  • 1 tablespoon mild curry powder
  • 1 teaspoon of chilli powder
  • 1 teaspoon turmeric powder
  • a big pinch salt
  • vegetable oil for frying

Start by making the filling, as it'll need to be cool by the time you make the doughs.

Heat a small splash of vegetable oil in a pan until hot, then fry the onions until softened. 

Add in the chicken pieces, frying until cooked; about 2-3 minutes. Pop in the spices and salt and mix well. 

Gently add in the cooked potato, stir everything well and cook for a couple minutes more. Leave to cool while you make the pastry...


Make the inner dough

Pour the oil into the flour, it'll quickly and easily make breadcrumbs and then with a little further squeezing and kneading will become a smooth, oily dough. Divide into 8 equal balls (each will be about golf ball size).

Make the outer dough

Put the sugar and salt into the flour, add the oil as before, using your fingertips to make 'breadcrumbs'- this will be a dry mix at this stage. Slowly add in the water bit by bit, kneading gently to bring the dough together. You do not want a dry crumbly dough, it needs to hold together so add enough water to make sure you've got a smooth, pliable dough that will hold itself together.

Divide the outer dough into 8 equal sized balls and use a rolling pin to roll them into a flat circle.

No need to leave the dough to rest, lets move straight on to the rolling....


Making the pastry...

Work on an oiled work surface or board to make life a lot easier for yourself.

Place a ball of the inner dough into the middle of a flat circle of outer dough and fold and squeeze the outer dough around the inner dough ball so it's fully encased. Repeat for the rest of the dough. You now have 8 enclosed dough balls.

Take one of the enclosed dough balls and roll it flat rolling only forwards and backwards- you want a long, narrow 0 shape to the dough, as thin as you can get it.
Loosening the dough from the work surface, roll it up like a cigar, rolling away from yourself (open rolled ends are to your left and right)

Pick up the rolled dough and turn it 90 degrees (an open rolled end is facing you). Use the rolling pin to roll out the dough, like we did at the beginning, into a long narrow 0 shape. Again, use your hands to roll it up like a cigar (or sausage roll!) pushing it away from you before turning it 90 degrees.

Rinse and repeat... 

Altogether I did 3 cycles of rolling out, cigar rolling and turning. As long as you do the same actions each time and turn the dough in the same direction you'll be fine.

On the final cigar roll, smooth the roll off, smoothing the ends into the dough as much as possible and gently manipulate into a more even roll. Cut this roll into 8 equal slices, leaving you with something resembling the picture above.

Give yourself a well deserved pat on the back!!

Filling & Cooking

Heat a deep fat fryer or heavy pan of vegetable oil while you start to fill the dough. Yes more oil, these are not healthy snacks!!

Take one of the dough slices, placed flat on the work surface and roll flat with the rolling pin straight down on top of the layers, again, aiming for an elongated '0' shape. As you roll, you'll see the layers start to stretch and open up. Aim to get the dough quite thin, about 5mm is ideal.

Lift up the rolled dough and place a tablespoon of the cooled curry filling into the inside, fold both halves of the dough together and pinch and twist the edges to seal it tightly.

Repeat with the remaining pastry and filling.

Cooking in batches, deep fry for 6-8 minutes until crispy and light brown.

Serve with pickled cucumber/chilli/shallot (known as ajaad- click for the recipe) to help cut through the rich pastry.

Fall into a heap!!


Monday, 25 April 2016

Pad Horapha Moo Grob Gwang Tung Kai Dao (Deep Fried Pork with Sweet Basil and Choi Sum with a Fried Egg)


What's not to love, crispy sticky deep fried pork, a crispy but runny fried egg, fragrant anise flavoured basil and some crunchy fresh greens over rice. It's a quick (mostly unhealthy, yes) but very satisfying one plate meal. Speaking one one plate dishes or ahaan jan diew (lit. one dish food) in Thai, they're some of my favourite things to cook and exactly what I want to eat when I don't want to cook anything elaborate or time consuming. They're the classic type of food you expect to find for lunch at a street food stall (usually served on the omnipresent plastic pastel- coloured plate. By the way if you know of anywhere in the UK that sells those thick melamine plates used in South East Asia, do let me know, I've been after them for years!!

This recipe is in essence a combination of three of my earlier recipes- 

Pad Grapao Gai (Chicken fried with holy basil), Pad Horapha Bhet Yang (Roasted duck fried with sweet basil) and Moo Grob Pad Pak Got Shangai (deep fried pork fried with pak choi). It combines the best of everything in one dish.

For two portions use:

  • 300g of pork shoulder, rind and excess fat trimmed off, cut into 1 inch cubes
  • 2 eggs
  • a large double handful of choi sum (or pak choi/gai lan etc,) cut into 2 inch pieces
  • a handful of Thai sweet basil leaves
  • 3/4 small red chillies, roughly chopped
  • 4 cloves garlic, peeled
  • a big splash of oyster sauce
  • a big splash of light soy sauce
  • a small pinch of sugar
  • vegetable oil for deep frying and for stir frying
  • Freshly cooked rice
Boil water and get the rice cooking before starting.

Heat the deep frying oil and when hot, carefully drop in the pork. Deep fry until dark golden brown and crispy (roughly 6-7 minutes) before draining onto kitchen paper.

In a pestle a mortar, lightly pound the chopped chillies and garlic into to rough paste, leave for a moment.

Heat a splash of oil in a wok and when hot, throw in the garlic chilli paste, stir for a few seconds before adding in the crispy pork, stir frying for 20//30 seconds. Tip in the vegetables and stir fry for about 1 minute, no more as you want some crunch to be retained.

Pour in the sauces and pinch of sugar, coating everything well before turning off the heat and lightly toss through the sweet basil leaves.

Heat a separate frying pan/wok (or decant your stir fry into a dish) and keep warm somewhere while you quickly do the fried eggs. Heat a large splash of oil in a clean wok/ frying pan and when very hot crack in an egg, let the bottom get crispy and spoon hot oil over the yolk until it's reached your desired crispy/runniness. Briefly blot on kitchen paper.

Drain the rice, plate up with the stir fry and place the fried egg over the top. 

Jobs a good'un!


Monday, 21 March 2016

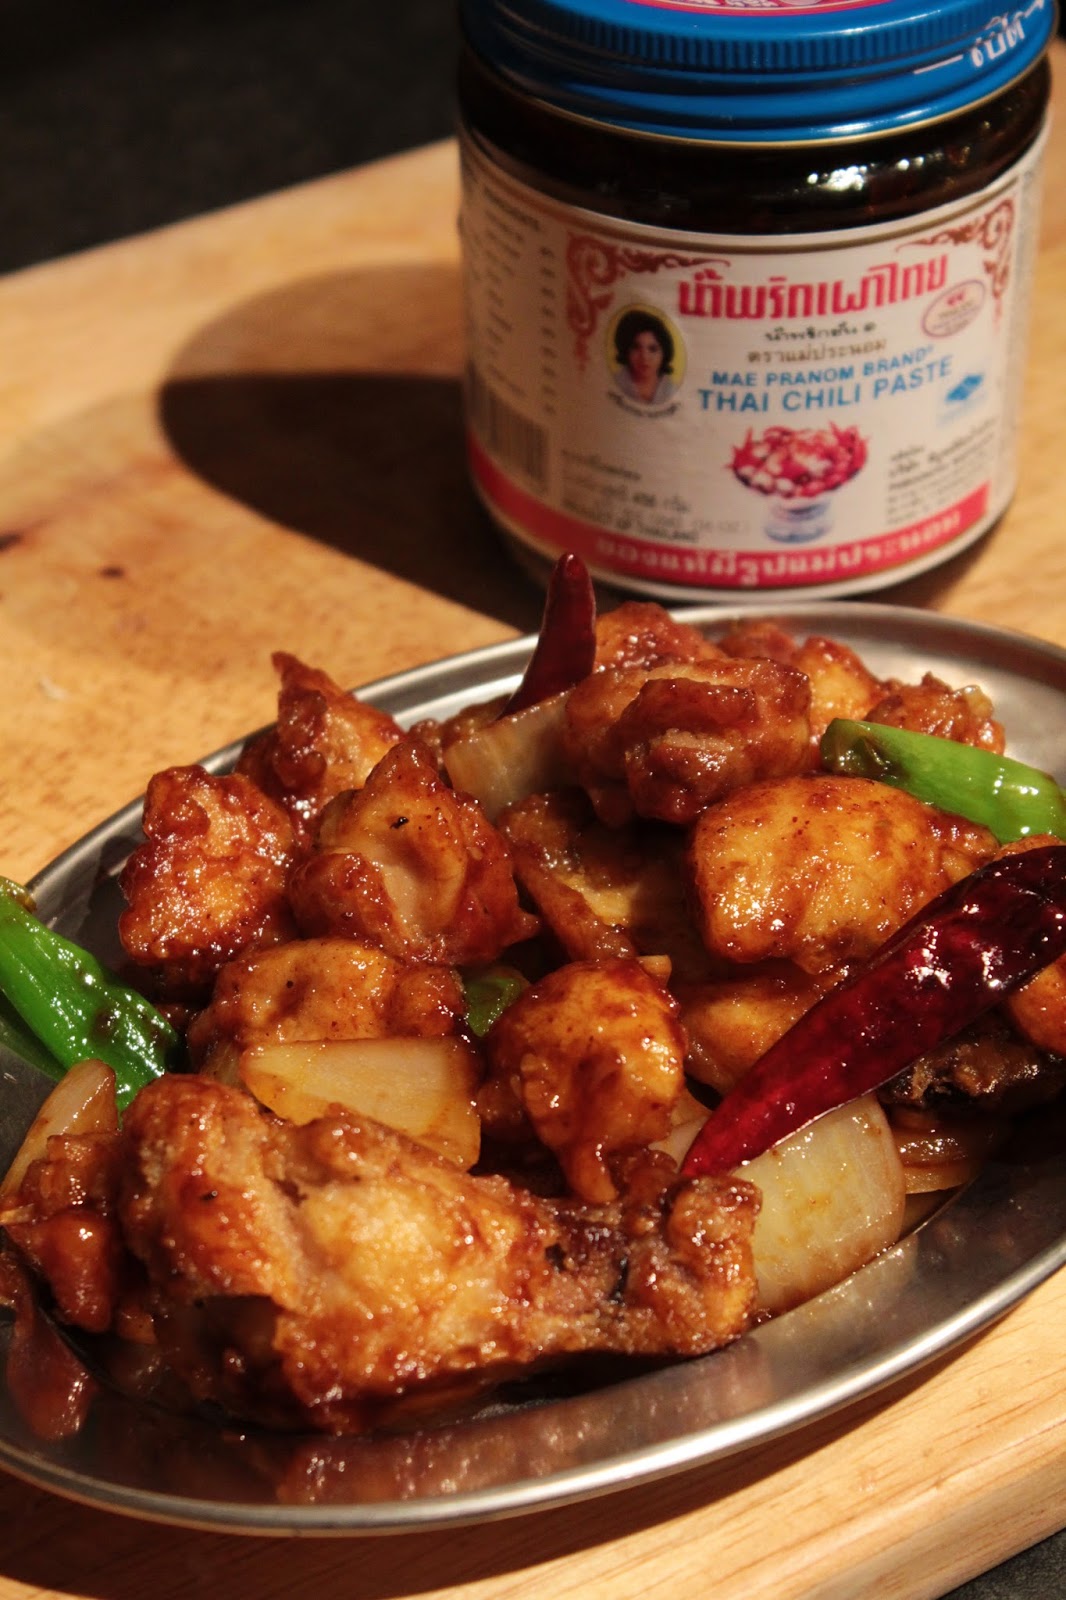
Gai Tod Pad Nam Prik Pao (Fried Chicken Stir Fried with Roasted Chilli Paste)


It's very rare these days that we would ever buy a takeaway, I've just had way too many identical oil drenched, msg ridden, jam-like, tummy ache laden meals to ever optionally order one then pay through the nose for the privileged. however that's not to say I eat healthy all the time. Like most, I occasionally like deep fried food, I just like my salt, sugar and fat in reasonable amounts and I think takeaway places (by and large) rely on pre made cheap fixes.

Ranting over, when I do want something takeaway like, I'd much rather make it myself, lets face it, as long as you have the ingredients in, you can be eating this quicker than it would take for a takeaway to be delivered. I guarantee this crunchy, spicy, sticky stir fry will satisfy all your takeaway urges!! It differs quite substantially from all the other English written versions of gai tod nam prik pao, this is taken directly from a Thai recipe and is the real thing!

As an added bonus, it's a 2 in 1 dish. If you just want the chicken as a starter/snack, use wings and forgo the vegetables. If it's a whole meal, keep the veggies in and serve with rice.

For the stir fry version for two people use all the ingredients:
For the chicken wing snack version use just the ingredients with a * next to them
  • 4 large chicken thigh fillets, skinned and cut into large cubes or 10 wings, jointed*
  • 1 large onion, peeled and cut into large chunks
  • 2 spring onions, kept in large chunks
  • 4 cloves garlic, peeled and finely chopped
  • a small handful of dried red chillies
  • a heaped dessert spoon of roasted chilli paste (nam prik pao)*
  • a big splash of light soy sauce*
  • a big splash of oyster sauce*
  • a big pinch of brown or palm sugar*
  • rice flour for dredging the chicken (plain flour is ok too, just not as light and crispy as rice)*
  • salt and pepper*
  • oil for deep frying and splash for stir frying*

Season the chicken with salt and pepper, then dredge it through the rice flour, shake off the excess.
Heat a deep fat fryer to 190 degree Celsius or use a heavy pan and watch it carefully.
Pop in the chicken pieces and cook until deep golden and crispy (3-5 mins). Drain on kitchen paper.

Heat a small splash of oil in a wok until hot then throw in the onions and stir fry on a high heat to get some colour. Throw in the dried chillies and garlic and stir fry for a few minutes. Throw in the spring onions and the drained fried chicken.

Add in the roasted chilli paste, coating the chicken well, then the remaining sauces and sugar. Everything should be nice and sticky.

* If you make the wings snack version make the sauce in a wok- heat a small splash of oil before adding the roasted chilli paste, sugar oyster sauce and soy sauce, blend well and put the fried chicken wings in, stirring well so everything is coated.


Tuesday, 1 March 2016

Pla Tod Khamin (Turmeric Fried Fish)


Ahh, poor bonito; fish never look quite so pretty when they've been deep fried whole- I'm not one for removing heads though, I'd much rather keep them whole- plus you'd miss out on the cheeks!

Saturday just gone I did one of my favourite things to do in my free time, wandering round food markets, picking up random things to take home and make things with. I went to Bolton market; I've been there once before and remembered it was a great place to pick up every kind of fish, cut of meat, exotic vegetables and great for local northern produce. It also has a great fresh Thai fruit and vegetable stall, easily on par with any of my usual favourites in Leeds, Manchester and Birkenhead- very reasonable prices too. 

Along with my bonito fish (£5 for a huge fish), some acacia (cha om), fresh green peppercorns (just because I struggle to get them) I also picked up some bitter gourds for a recipe which will follow soon.

There is nothing fancy about the fish- I wanted to cook it in a way that would do it justice, quickly and simply and served it with nam prik seafood (seafood sauce) and some rice. We ate it as you see it here, sharing it between us.

For two people use:

  • a large meaty fish, gutted, scaled and deep slashed cut into both sides
  • several knobbly pieces of fresh turmeric, chopped
  • half a bulb of garlic, peeled and chopped
  • a lot of vegetable oil for deep frying
and if you fancy making the 'sauce seafood' to go with it- here's the link within another of my earlier recipes... 

Heat a large, deep wok full of vegetable oil until hot. Very, VERY carefully slowly slide the fish in and allow it to develop a deep golden crispiness- it will need to be carefully turned over half way through the cooking. It will depend on size but mine took about 10 minutes.

Gently lift out, use two spatulas (an extra pair of hands helps) and drain on kitchen paper.

Still in the hot oil, drop in all the chopped turmeric and garlic and deep fry for around 2 minutes- stirring regularly until you can see the garlic is a light golden brown and everything is slightly crispy. Scoop out with a sifter and sprinkle over the fish.


Wednesday, 13 January 2016

Choo Chee Pla (Fish in Thick Red Curry Sauce)


Wow, I've been away for a long time again and for that I can only apologise. Those of you who saw my last post will know I'd been rather ill, had lost my appetite and wasn't really cooking, hence putting up a post from before I got the lurgy. You'll hopefully be pleased to know that the 2nd round of antibiotics have done their job and I'm now hungry and have most definitely taken over the running of the kitchen again!!

Choo Chee Pla is a dish that has been on my to do list for quite a long time now, there are certainly some similarities with Penang curry - they're both thick, creamy coconut based dishes, predominantly sweet and mild in heat. The main difference is choo chee uses a red curry paste rather than massaman and is always a fish/seafood based one. For convenience and presentation, I've chosen to use fish fillets but whole fish can also be used. For texture (and mostly indulgence) I've chosen to lightly batter and deep fry the fish; not an essential for choo chee; but very nice!

I like to eat this with lots of fresh sweet basil leaves, white rice and something tangy like a som tam salad to cut through the richness.

For two people use:

  • 2 large fish fillets cut in half (I've used basa/river cobbler- yes I know it has poor credentials but it's robust and holds up well when deep frying)
  • a large handful of plain flour
  • 400ml of good coconut milk eg Chakoh or Aroy-D
  • a level tablespoon of red curry paste (Mae Ploy is what I always use)
  • a large splash of fish sauce
  • a large pinch of palm or light brown sugar
  • 5 or 6 kaffir lime leaves, rolled and shredded finely
  • optionals to serve- sliced large red chilli & Thai sweet basil leaves 
  • vegetable oil for deep frying
Heat the oil for deep frying to around 180 degrees celcius. Pat the fish pieces dry with kitchen paper and dust in the plain flour before placing gently in the oil, fry until a light golden brown and crisp (around 5-8 minutes depending on the size). I did mine in two batches so as not to overcrowd the fryer.

While the fish fries, make the sauce. Heat a dry wok and when hot, add in the coconut milk. Allow the milk to bubble away, reduce and the oils to start making their way out- this should take about four to five minutes. Stir gently to help it along.

Next pop in the red curry paste and mix well for several minutes until fully blended and the red oils start to float to the top of the sauce. Add in the fish sauce and sugar, stir well.

Drain the fried fish on kitchen paper before putting on your serving plate, pour over the sauce, sprinkle over the lime leaves and serve up with chillies and sweet basil. Don't leave it hanging around too long so the fish stays crisp.


Saturday, 12 December 2015

Pad Pla Cha (Sizzling Fried Fish)


The last week has certainly been a chaotic one- in our corner of the world we've had horrendous amounts of rain which led to wide scale flooding in our city centre, followed by our substation getting flooded, blowing up and widespread blackouts. It really was strange to have 3 days without electric, internet or even phone signal; most people also use digital phones so even a basic phone call using a landline was out. Consequently, cooking in the dark at friends and family's houses (we don't have gas here, only electric so we had to borrow) using up whatever food we had that hadn't yet gone off did not make for a productive week to run a food blog- all the shops were shut due to flood damage and having no power and even the museum where I work (unfortunately next to the river) had suffered from the flood waters so the beginning of week there was much cleaning up to be done.

This recipe for pad pla cha was made last week before all of this even began and has been waiting to get uploaded for a bit. The 'cha' part of the name describes the sizzling noise made by stir frying at high temperature, there are many variations on pad cha recipes, this is just one! I find deep frying the fish holds it together and helps absorb the flavours of the sauce. It has a couple of specific ingredients- the green peppercorns and the krachai root which give it a unique flavour.

For two people use:

  • 2 small fillets of fish (I've use basa- a type of catfish)
  • a big handful of flour
  • 1 long Asian aubergine/ 3 Thai, sliced
  • a handful of green pea aubergine
  • a tablespoon of green peppercorns
  • a heaped teaspoon of red curry paste (I use Mae Ploy brand)
  • 2 small red chillies
  • 4 cloves garlic, peeled
  • 1 large red chillies, sliced
  • 2 fingers of krachai (fingerroot), peeled and finely chopped
  • a large handful of sweet Thai basil (bai horapha)
  • a large splash of oyster sauce
  • a large splash of light soy sauce
  • a small splash of fish sauce
  • vegetable oil for deep frying and a splash for the stir fry

Make a rough paste in a pestle and mortar with the small chillies and garlic, set aside. Cut the fish into thin slices and coat them in the flour, dusting off the excess. Heat a pan of oil to a depth of at least 3 inches and when hot, deep fry the fish until crisp and light golden in colour, scooping out and draining onto a paper towel. Set aside briefly.

In a wok, heat a splash of oil over a high heat and briefly fry off the chill/garlic paste and the red curry paste for around 30 seconds until fragrant. Next pop in the sliced aubergine and fry for a few minutes until slightly softened. Next in go the pea aubergines, green peppercorns, krachai and sliced red chilli and fry for just a minute. Now pop in the breaded fish and be much more gentle now, stir through and add in the remaining sauces (soy, fish and oyster), coat everything well. Finally, turn off the heat and throw in the basil leaves, briefly stirring through. 

Serve with freshly cooked rice. 

Wednesday, 25 November 2015

Khao Moo Tod Gratiem ( Rice with Crispy Pork & Garlic)


So along with the Yam Makeua Yang (grilled aubergine salad), I served this little beauty- khao moo tod gratiem- marinated pork, fried until crisp, along with freshly cooked rice, a runny fried egg and crispy fried garlic. This dish makes no pretense- it's totally unhealthy but as a treat, it's a cracker. You can find these classic one plate dishes served up at food carts up and down Thailand- they're popular for a reason!

For two people you'll need:


  • Two bowls of freshly cooked white rice
  • Two fried eggs (fry lightly and leave on kitchen paper in a warm oven)
  • Around 300g of lean pork shoulder, cubed
  • 3 cloves garlic
  • teaspoon of white peppercorn
  • small splash of fish sauce
  • big splash of soy sauce
  • big splash of oyster sauce
  • 1/2 bulb of peeled and chopped garlic
  • a big splash of vegetable oil for frying
  • token gesture sprig of coriander!
Use a mortar to pound up the peppercorns and the 3 cloves garlic into a rough paste. Put this with the cubed pork into a bowl and add in the three sauces. Leave to marinade for about an hour. 
In the meantime, fry the garlic. Heat the vegetable oil in a wok on a low-medium heat and gently fry the garlic until a light golden brown (takes 6-10 minutes). Then scoop out and drain onto kitchen paper, retaining the oil.

Next cook the rice and keep covered until ready to serve.

Finally, heat the flavoured garlic oil and when hot, carefully spoon in the pork. Fry on a medium heat until the pork is crisp and dark golden brown.

Plate up over the rice, pop on the fried egg and sprinkle over the crispy garlic. Serve with some green stuff!

Saturday, 4 April 2015

Tod Man Khao Pod (Sweetcorn Fritters)


Snack time! I’ll admit, this was a pretty lazy option; they’re probably more popular in western Thai restaurants than in Thailand itself but they are very moreish, have great texture and are easy to make. They can easily be adapted to be vegetarian or vegan friendly, just use salt instead of fish sauce and add more corn instead of the prawns.

This recipe makes around 10 fritters:
  • A cereal bowl packed with sweetcorn kernels (defrosted)
  • a heaped dessert spoon of red curry paste (I use Mae Ploy Brand)
  • a handful of small prawns
  • 5 or 6 kaffir lime leaves (rolled and finely shredded)
  • 1 egg
  • small splash of fish sauce (nam pla)
  • ½ cup of rice flour
  • heaped teaspoon of baking powder
  • vegetable oil for deep frying

In a food processor, whizz up half of the sweetcorn, the curry paste, egg, fish sauce, flour and baking powder into a smooth batter. Remove the blade and stir in the remaining ingredients (other half of kernels, lime leaves and prawns) giving it a good mix together.
Heat the oil in a wok or deep frying pan until hot but not smoking. Drop a tablespoon of the batter into the hot oil- gravity will spread it out into a fritter shape. Don’t overcrowd the pan; three is probably the right amount. After a couple of minutes the fritter should gently be turned over and cooked for a further minute or two until deep golden brown. Drain on kitchen paper then serve them with some sweet chilli sauce or sriracha.

Friday, 20 March 2015

Khao Pad Moo Grob (Deep Fried Pork Fried Rice)


This is definitely an indulgence dish- any dish with ‘fried’ in it’s title twice has got to be. That said, there’s only a few pieces of crispy pork belly per portion and there’s lightly cooked fresh veggies, so don’t feel too guilty.
I loved fried rice dishes, they great for using up leftover cooked rice or assorted vegetables. Click the link for the chicken fried rice I made last summer- http://iwishiwasinthailand.tumblr.com/post/91472102264/pad-khao-gai-chicken-fried-rice 
For 3-4 portions use:
  • A 300-400g slab of pork belly
  • a cereal bowl of cold, pre cooked rice (yesterday’s is ideal)
  • a few stalks of choi sum or or pak choy (or other leafy/crunchy veg)
  • half a white onion, thinly sliced
  • 4 spring onions, sliced
  • a large red chilli, sliced
  • 4 cloves of garlic, minced
  • 1 egg
  • juice of 1 lime
  • a big splash of fish sauce (nam pla)
  • a big splash of light soy sauce
  • a big pinch of ground black pepper
  • half a bottle of vegetable oil for deep frying and a splash for the fried rice
Cook the pork belly (click link to open recipe) following the boiling, cutting, soaking and deep frying stages (please be careful- cover the pork during cooking and watch out for spitting oil- I ended up with a few nasty burns on my hands) then once cooked,cut into cubes.
With the meat cooked, we’re ready to start. heat a small splash of oil in a wok and when it’s nice and hot, add in the garlic and sliced onions; stir frying for a few seconds before shoving everything to one side of the wok. Crack the egg into the empty half and leave it to set for a bit, then scramble, then set, then scramble. When it’s fully cooked through, mix everything back together. Throw in the choi sum, chillies and spring onions, stir frying for a minute over a high heat. Now tip in the rice and mix gently, but thoroughly. Add in the sauces and black pepper next, then mix through most of the crispy pork belly. Cook for a final couple of minutes.
Serve with a few more pieces of pork on the top and squeeze over a wedge of lime per portion.

Tuesday, 17 February 2015

Hoi Jor (Shellfish Rolls)


Having never worked with fresh bean curd sheets, these were probably one of the trickier Thai foods I’ve made and it can take a bit of practise to get the amount of filing and the role shape correct but I’m pleased with the outcome. What we’re looking at here is a pork mince and crab filling, rolled up in a bean curd sheet, steamed, sliced and then deep fried. They make a great appetiser to a healthier Thai main meal or would be perfect served alongside some other Thai snacks such as Tod Mun Pla (Fishcakes) or Po Pia Tod (Spring rolls) for canapes/buffet food. If you don’t have access to an Asian supermarket and can’t get bean curd sheet, use filo pastry instead and skip the steaming stage, making closed parcels rather than open ended rolls with the pastry.

For around 15 rolls (not all will be equal in shape) use:
  • a packet of fresh bean curd sheet (roughly 2/3 A4 sized sheets)
  • 100g of fresh or tinned crab meat (shredded/ chunks/white/brown it’s all good)
  • 200g of pork mince
  • 1 egg, beaten
  • 3 tablespoons of rice flour
  • a small handful of coriander (stalks are ideal)
  • 4 cloves of garlic, peeled
  • a teaspoon of black peppercorns
  • 4 spring onions, very finely chopped
  • a big splash of light soy sauce
  • a small splash of Chinese rice wine (Xiaoxing/ Shaoshing or sherry)
  • vegetable oil for frying
  • Sriracha sauce for serving

Start by pounding the pepper, coriander and garlic into a paste in a mortar. Add the paste to a bowl along with the pork, crab, egg, flour, spring onions and liquids. Beat together well. The mixture should have the consistency of a loose meatloaf/ sausage meat before cooking.
Lay a sheet of bean curd in front of you (landscape). Divide the mixture equally between the amount of sheets of bean curd you have and place one portion of the mix in the middle/bottom part of the bean curd sheet. Spend a bit of time getting it into a roughly even sausage shape, leaving about 2 inches free from either edge. Fold the sides in first, then roll the whole thing up, leaving the seam underneath the roll. Repeat to use up the rest of the bean curd/ mixture.
At this point you’re supposed to start tying the roll into sections, like a Christmas cracker- for me it didn’t work. Even using wide thread slowly cut through the soft bean curd like a cheese wire before the roll got anywhere near tight enough.
Instead, for this next step, I recommend just keeping the rolls seam side down. Heat a steamer/ colander over a boiling pan of water. Gently place the filled rolls into the steamer and allow to slowly cook in the steam for 15 minutes. Check the water levels in the pan periodically to make sure it hasn’t boiled dry.
When the time’s up, remove the steam cooked rolls, leave them to cool for a while and then use a very sharp knife to cut them into 1 inch long slices- be careful to keep those loose ends tucked under for now.
Heat a frying pan with oil to a depth of ½ inch. It needs to be hot but not smoking. Carefully lower in the rolls, cooking in smaller batches if needed. The bean curd bubbles up and goes brown and crispy fairly quickly. Cook for about 3-4 minutes, gently turning the rolls over on all sides until all the bean curd,and the filling is golden brown and crisp. Drain on kitchen paper before serving.
Feeling lazy after all this effort, I served my hoi jor with a dipping bowl of Sriracha but by all means, make/use a chilli sauce of your choice.

Wednesday, 21 January 2015

Mee Grob (Crispy Noodles)


Mee Grob or Mi Krob, depending on what spelling variation is used is somewhat unknown here in the UK though it’s fairly common in the US as a take-out/ restaurant dish and may be recognisable from being mentioned in The Big Bang Theory and South Park (with varying degrees of popularity).

It does take a bit of prep time and you need to have everything ready to do the bit at the end or you can end up with soggy noodles if you wait too long but I’m sure you’ll do just fine.

Mee grob is predominantly sweet and sour, with this version nudging slightly more towards sour, which is my preference; feel free to adjust the sauce quantities to your taste.

For two people use:

  • two nest of or a small packet of vermicelli rice noodles

  • 5 spring onion, trimmed and shredded lengthways

  • a handful of very fresh bean sprouts

  • half a packet of firm tofu, cut in cubes

  • 5 shallots, thinly sliced in rings

  • a small handful of coriander leaves

  • a big handful of prawns/shrimp (raw or cooked)

  • vegetable oil for frying/deep frying

  • 3 small red chillies, cut into thin strips

  • 2 tablespoons of tamarind puree

  • a big splash of yellow bean sauce

  • a big splash of fish sauce

  • juice of 1 lime

  • 3 cloves garlic,chopped

  • a heaped tablespoon of sugar

  • a big pinch of pepper

Start by making the sauce, which can then be left until the very end. Gently heat together the tamarind, yellow bean sauce, fish sauce,lime juice, sugar, pepper and chopped garlic and let it reduce until its quite thick and syrupy.

In a wok, heat a small splash of oil. When hot, fry the prawns/shrimp until pink (if raw) and for about a minute (if they were pre cooked). Leave these on the side.

Fill up the wok with oil for deep frying. When the oil’s hot, add in the tofu and deep fry until the tofu is golden and crispy. Fish it out and leave to drain on kitchen paper. Now deep fry the shallot rings, for around 2-3 minutes, again until they’re golden and crisp and leave them to blot on kitchen paper as well.

Now the fun bit (have more kitchen paper out ready on a plate).Heat the sauce up again and keep it nearby. Get the deep frying oil very hot again and when ready, put the whole nest/slab of dried vermicelli noodles in the hot oil. It should immediately puff up about 3 times in size. Lift out after a few seconds and straight onto the kitchen paper. Repeat if you have more noodles to do.

Work quickly, pour the sauce and the fried noodles into another clean, dry wok or large pan and use a chopping/stirring action to break up and mix the noodles and sauce together. Add the cooked prawns back in and stir well.

Serve on a plate with the coriander, crispy tofu, fried shallots, spring onions, bean sprouts and sprinkle over the chilli strips.

Monday, 12 January 2015

Gai Tod Gratiem (Garlic Fried Chicken)


Sometimes you just need deep fried food and Thai food has plenty of it to spare. These wings are WAY better than fast food fried chicken and they don’t need many ingredients or take too long to do. All the crispy garlic bits were particularly good. This is the kind of street food dish you can find up and down Thailand. Serve it alongside a healthy salad like Som Tam or a vegetable stir fry like Pad Pak Grachet. I served these wings with the same sweet chilli dipping sauce that I made to go with last week’s Po Pia Tod (click and scroll down for sauce recipe).


For two people use:

  • a pack of chicken wings (about 10)

  • half a bulb of garlic (or more if you like), peeled

  • a dessert spoon of black peppercorns

  • a big splash of Thai fish sauce (nam pla)

  • a small splash of light soy sauce

  • vegetable oil for deep frying


Prepare the chicken wings by using a heavy knife to trim off and discard the tip. Then find the joint between the upper and lower part of the wing and cut them into two. Place in a large bowl. In a pestle and mortar, bash up the peppercorns- it can be slightly coarser than a powder but don’t leave big bits- pour over the chicken. Lightly bash up the garlic, just to break it into pieces, not paste and add into the bowl. Pour the sauces over the chicken and give everything a good mix,leave to marinate for up to an hour.


Heat the oil in a heavy pan or wok. The oil needs to to be hot but not smoking otherwise the chicken and garlic may burn but the chicken inside could still be raw. Gently lower the chicken pieces in, including the garlicky bits (but discard any left over sauce). I had to do mine in two batches so the pan wasn’t crowded. Fry for around ten minutes, turning over half way. The chicken should be a dark golden brown and crispy. Drain onto kitchen paper,making sure you scoop out and sprinkle the crispy garlic bits over the top when serving. Serve with sweet chilli sauce.

Tuesday, 6 January 2015

Po Pia Tod (Fried Spring Rolls)


They can be found at every restaurant serving Asian food across the world and must be one of the most popular snacks they sell but each country has their own variation on the roll. The Thai version varies from the typical Chinese one with the addition of a coriander/white pepper paste and different fillings. This recipe is vegan friendly too and would be a perfect complement to the pad see ew noodles I made a few months back.


For loads of rolls (like 20) use:

  • a pack of square spring roll wrappers (freeze what you don’t use)

  • half a block of tofu, cut into very small cubes

  • half a bag ( two handfuls) of beansprouts

  • about 15 dried wood ear (Chinese) mushrooms- re-hydrated in boiling water and then sliced fine (use shitake mushrooms chopped if you can’t get wood ears)

  • a small handful of coriander leaves/stalks/roots, roughly torn

  • 3 cloves of garlic, peeled

  • a teaspoon of white peppercorns

  • cup of water (for sealing edges)

  • vegetable oil for deep frying

Make a paste of the coriander, garlic and white peppercorns in a pestle and mortar, you should end up with about a tablespoon. Mix this with the tofu cubes and set all the other filling ingredients around you for easy access.

Take a single spring roll sheet and lay it in front of you with a corner pointing towards you (i.e. so it’s a diamond not a square). Lay a thin line of beansprouts across the widest point from left to right, leaving a gap at both points. On top of this put a small sprinkling of mushroom and on top of that a spoonful of tofu cubes. Fold up the bottom point over the filling, fold in the left then right points, roll the whole thing towards the top point and use a drop of water to get the top point to stick. If it’s too full you won’t be able to roll it up and if it’s under-filled it’ll be saggy- it takes a bit of practise to get the right amount of filling!

To cook, heat the oil until medium hot and gently lower the rolls in (don’t do too many at a time). The odd one may burst but don’t worry. Cook until golden, about 2 minutes. Drain on kitchen roll and serve with sweet chilli sauce.


If you want to make your own sweet chilli sauce that tastes way better than the bottled variety here’s the recipe…


(enough for 20 rolls or) use:

  • 3 red Thai chillies for a hot version/ 1 red jalapeno for a mild version

  • 1 garlic clove, peeled

  • a small splash of white wine vinegar

  • a big splash of water x2

  • a tablespoon of sugar

  • a teaspoon of cornflour


In a herb chopper/ small blender, mix the chillies, garlic, vinegar and 1 big splash of water. Heat this mixture (gentle heat) in a small pan for a minute or so until the sugar is all dissolved. In a small bowl mix up the other big splash of water into the cornflour-make sure there’s no lumps. Pour this into the pan and mix gently, it will thicken straight away into chilli sauce.


Friday, 28 November 2014

Moo Grob Pad Pak Got Shanghai (Deep fried pork stir fried with pak choi)


MMMMmmm, very satisfying and with all the greenery you can even convince yourself this is healthy- just don’t think too much about the deep fried pork belly. The textures are pretty wonderful, really crunchy.

It didn’t take long to do and to me is perfect Thai street food.


For two use:


  • a slab of pork belly (roughly A5 in size), rind off but fat left on, cuts into chunks

  • 2 pak choi, cleaned, trimmed and cut into large chunks

  • half a bulb of garlic, peeled

  • 3 small red chillies, chopped

  • a big splash of oyster sauce

  • a big splash of light soy sauce

  • a small splash of fish sauce

  • a small splash of water

  • vegetable oil for deep frying

set up a deep pan or wok and fill it half way with the vegetable oil. Heat until hot (but not smoking) and drop in a piece of pork to gauge if it the right temperature; if it is, add in the pork, cooking in small batches. Once it is crispy and a light brown colour, roughly about 6-8 minutes, strain out and drain on kitchen paper. Leave to one side for now.


In a pestle and mortar, mash the garlic and chillies roughly. Heat a further small amount of fresh oil in a clean wok and when hot, very briefly stir fry the garlic and chilli- only for about ten seconds before adding in the white parts of the pak choi and pork. Stir fry for about a minute before adding in the leafy green bits and then add the three sauces and if needed, a small splash of water. Cook for just a minute or so more.

Serve with fluffy rice :)


Tuesday, 4 November 2014

Khao Soi (Curried Noodles)


This is another new favourite- my husband has requested this as a regular in our house.


In other news (and I’ll come back to the noodles very soon) I’m soon to be relocating back to my home city in Lancashire :) which means I’ll no longer be stuck in a small town in North Yorkshire! Sadly this will mean an end to my Thai food stock up trips to Nong Fern in Leeds but does mean I have two Asian supermarkets on my doorstep! The very good news is, the recipes will all be continuing!


Back to the Khao Soi- for once I wasn’t lazy and did make the simple curry paste from scratch- you could use a yellow or red Thai curry paste but it’s worth giving this one a go as it’s a bit different due to the roasting process. Khao soi is a northern Thai dish and is said to take a lot of it’s influence from nearby Burma. It’s a creamy, rich satisfying noodles dish, not too hot at all.


For two people use:


  • 2 skinless small chicken breasts/ 4 thighs, chopped into small pieces

  • 400ml coconut milk

  • 100ml water

  • a big splash of fish sauce (nam pla)

  • a big pinch of sugar

  • 2 sachets of egg (yellow) noodles

  • vegetable oil for deep frying

  • a lime, halved

For the curry paste, use:


  • 4 cloves of garlic

  • 2 stalks of lemongrass (ends trimmed and outer layer peeled off)

  • 6 lime leaves

  • a finger sized piece of fresh tumeric

  • a finger sized piece of ginger

  • 3 red chillies

  • a small handful of coriander roots or stalks
  • 4 red shallots/ half a red onion cut into a few bits

  • 4 brown/ 10 white cardamom pods

  • a small handful of coriander seeds


Start out by placing all the curry paste ingredients into a packet made from tin foil. Place this foil packet over a low-medium heat hob- I did this on electric, gas works best. Don’t let the foil packet sit for too long, keep it moving to stop the contents from burning. After 5 to ten minutes, take a look inside; there should be some charring and everything should have softened up. This provides a really nice smoky flavour to the paste. Pop everything into a pestle and mortar and pound, pound, pound away until you have a course paste. I cheated a bit after a while and transferred the pounded paste to a mini herb chopper, just to get it really fine. 


Once the paste is done, heat a wok and pour in the coconut milk. Let it sit for quite a while, until reduced by half and the oils are visible on the surface. Add in all the paste and stir fry for a few minutes until cooked down. Add in the water, fish sauce, sugar and chicken and let it cook for at least ten minutes, more if you like a thicker sauce.


While the curry is cooking, boil water for the noodles, cooking for as long as needed. In another small pan, heat the oil until hot. Take a few strands of cooked and well drained noodles at a time and gently drop them into the hot oil. They will fizzle and puff up instantly. Scoop them out, and drain on kitchen paper. 


Assembly time- place the drained noodles in the bottom of a serving bowl. Spoon over a ladle of the curry. Place some of the crispy deep fried noodles on top and finally squeeze over the lime juice.

Sunday, 21 September 2014

Moo Pad Gratiem Prik Thai (Pork Fried with Garlic and Pepper)


Right, I promise no more pork for a while after this, but this one is a little different this time- This dish is a common one you’ll find in Thai restaurants over here and in Thailand but using chopped pork ribs is much more common in Thailand and, to be honest, much more satisfying as you have to get a bit messy and get hands on with your food.


You’ll need for two:


  • about 6 meaty pork ribs, use a cleaver to cut them into inch long pieces (please use a good solid wooden chopping board- I did this on my plastic meat board and chopped it into two!)

  • a whole bulb of garlic, finely chopped

  • a very large pinch of ground pepper

  • a small pinch of sugar

  • a big splash of light soy sauce

  • a big splash of oyster sauce

  • lots of vegetable oil for frying


Heat a deep pan or wok with the vegetable oil. When it’s medium hot, add in the rib pieces. You want them to cook fairly slowly, that way they’ll get really crispy. If the oils too hot, they will cook too fast on the outside and not all the way through. They will probably need 10-15 minutes deep frying. When they’re brown and crispy, drain onto paper towels.


Empty out the wok and add a small splash of cooking oil. Heat the wok onto high, throw in all the garlic for just a few seconds before tossing the ribs back in with the two sauces and the sugar and pepper, stir fry for just another minute or so and turn out onto your serving plate. Sprinkle a bit more pepper over the ribs and serve with a salad- it’ll balance out the deep fried pork and you’ll think you’re being at least vaguely healthy!


Saturday, 13 September 2014

Pla Rad Prik (Fish in Chilli Sauce)


There’s been a lot of pork on the menu recently and head’s up- there’s more to come. I can’t help it- pork is the commonest meat in Thailand and it tastes sooo good! For today though, still not exactly healthy- a deep fried fish in a sweet and sour chilli sauce. Very satisfying and pretty quick to make too.


For two people use:


  • two whole white fish- the sea bass looked good today so I got those

  • 5 cloves of garlic, finely chopped

  • ½ onion, finely chopped

  • 5 or 6 red chillies, finely chopped

  • 2 tablespoons sugar

  • a big splash fish sauce (nam pla)

  • a big splash of tamarind liquid (use juice 1 lime if you can’t get it)

  • Some coriander leaves, roughly ripped up

  • lots of vegetable/ sunflower oil for deep frying


Take a minute to make sure your fish have been scaled first otherwise this dish will be godawful. Then use a sharp knife to cut deep slits along both sides of the fish. Heat a wok half full of oil on a low- medium heat and when it’s reasonably hot, slide the fish in. They want to cook fairly slowly, don’t touch them AT ALL. Once the fish are in, start the sauce..,


Heat a small amount of oil in another pan, gently fry the onion, chilli and garlic until soft for about 3 minutes before adding in the sauces and sugar and a splash of water too. Let in reduce down while the fish continue to cook. 


After the fish has been cooking for 10 minutes on one side, use ladles/ spatulas, plates, whatever, to very gently turn in over. Continue to cook for another 5 minutes- it should end up being very crispy.


When the fish is done, gently lift it out onto a plate, pour over the chilli sauce which should be syrupy and scatter the coriander leaves around.